Archive for the ‘recipes’ Category
I know I’ve been going on and on about my new toaster oven, and by now you’re probably thinking, “toast is great and all, but how much toasted bread can one girl eat?”
Well, I’m here to tell you the very, very best reason to pull your toaster oven out of storage.
Fresh.
Baked.
Cookies.
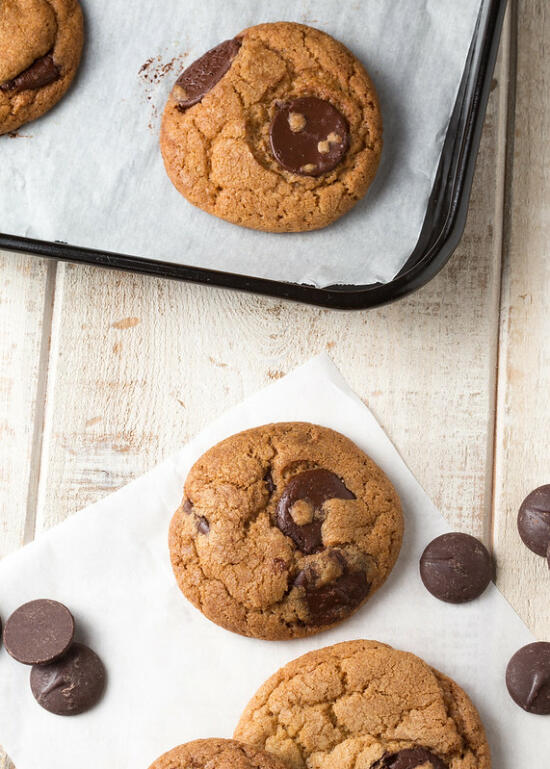
Make the cookie dough over the weekend, and if you have the time, roll the dough into balls, then stick them in the fridge. Then, during the week, any time you want a warm, gooey, fresh-baked cookie? Just place a ball of dough or two on a little parchment-lined baking sheet, stick it in your toaster oven, and 15-20 minutes later, fresh-baked cookies! The best.
Chocolate Chip Cookies
Recipe from my Aunt Lydia
Ingredients
- 2 cups + 2 tbsp all-purpose flour
- 1/2 tsp salt
- 1/2 tsp baking soda
- 1 1/2 sticks (3/4 cup) good European unsalted butter (I used Plugra), melted and slightly cooled
- 1 cup brown sugar
- 1/2 cup granulated sugar
- 1 egg + 1 egg yolk
- 2 tsp vanilla extract
- 1 1/2 cups semi-sweet chocolate chips (we prefer TCHO dark chocolate baking drops
Cooking Directions
- Heat oven to 325°F. Adjust oven racks to upper- and lower-middle positions. Line two large baking sheets with parchment paper.
- Mix flour, salt, and baking soda together in medium bowl; set aside.
- Mix butter and sugars until thoroughly blended. Mix in egg, yolk, and vanilla. Add dry ingredients, mix until just combined. Stir in chocolate chips.
- Refrigerate the dough for at least an hour, or up to two days.
- Form 1/4 cup-sized balls of dough, and place on prepared baking sheets, leaving plenty of space between cookies.
- Bake, switching the positions of the cookie sheets halfway through, until cookies are light golden brown and the outer edges start to harden but centers are still soft and puffy, about 15 to 22 minutes (every oven is different – my aunt bakes hers for 22 minutes, but mine, baked using the convection setting on my toaster oven, were done in about 15 minutes, so keep an eye on them).
- Cool cookies on cookie sheets. Serve warm, or store in airtight container.
- Enjoy!
The word “resolution” seems so big and intimidating, and I feel like most people who made New Year’s Resolutions have probably already fallen off the boat by now, three weeks into the year.
Personally, I find things stick much better when I make a list of smaller, way more attainable goals. (Am I gonna lose twenty pounds this year? HAH! Not likely. But can I run a 10k? Okay, that’s totally doable.)
(Of course, I’m the kind of dork who puts together a spreadsheet of my goals, and checks them off daily. It works for me, but I understand if most of you aren’t nearly so nerdy.)
This year, I’ve decided I want to become a better cook. As glamorously delicious as my life may seem from my food blogs and Instagram (*snort*), most meals around here consist of roasted veggies, rice, and whatever meat we happen to have on hand. Or cereal. I eat an embarrassing amount of cereal for dinner.
So I made a list of goals for 2015:
- improve knife skills
- learn how to use pressure cooker
- cook something new every week
- cook a larger variety of flavors and techniques
- find a go-to chili recipe
- make proper bolognese lasagna
- use waffle maker
- make gumbo
- learn to cook more spontaneously, whatever’s good
- make more dumplings
- make it a habit to clean as I go
- learn how to brown butter
- clean out freezer and pantry
- make ramen from scratch
- cook soft shell crabs when they’re in season
- cook a larger variety of seafood
- cook more limited-availability ingredients when they’re in season (like meyer lemons)
I don’t expect to complete them all (I’ve already failed on #3), but when I’m trying to plan out my week, or at a loss as to what to make for dinner, the list has definitely helped nudge me in one way or another.
This butternut squash recipe, from the January 2015 issue of Bon Appetit, was my first attempt at satisfying goal #4 – make more exotic foods. And a very delicious attempt it was! I’ve already made it three or four times, and I have more butternut squash cut up in the fridge, waiting for the gochujang treatment.
If you’re sensitive to spice, you may want to halve the sauce recipe, as it can be quite spicy. That’s also why I prefer to cube my butternut squash, rather than slicing it as directed by the original recipe – more squash per bite results in a slightly less spicy dish. Regardless, it’s delicious, and I highly recommend it! Would go great with any sort of grilled meats, especially galbi or steak.
Gochujang is a spicy Korean fermented soy bean paste, and can be found at many Asian supermarkets. If you can’t find it near you, this is the Gochujang that I use. (Affiliate link)
By the way… anyone have a good chili recipe? 😀
Butternut Squash with Gochujang and Sesame, from Bon Appetit
Ingredients
- 2 tbsp sesame seeds
- 2 tbsp vegetable oil
- 1 tbsp gochujang (Korean hot pepper paste)
- 2 tsp shoyu (soy sauce)
- 1 medium butternut squash, peeled, seeded, and cubed
- green onions, thinly sliced
- flaky sea salt
Cooking Directions
- Preheat to 425°F.
- Whisk sesame seeds, oil, gochujang, and shoyu in a large bowl until combined. Add butternut squash and toss to coat.
- Transfer the butternut squash to a rimmed baking sheet, and arrange it in a single layer.
- Roast for about 25–30 minutes, rotating the baking sheet halfway through, until tender and browned on some edges.
- Serve topped with green onions and salt.
- Enjoy!
When remembering my grandmother, everyone talks about the food she made. Especially her wontons. Always her wontons.
She would make huge batches of wontons for family gatherings, for her coworkers, even to sell at fundraising events when my mom and her siblings were in high school. (Four wontons for 25¢ – what a deal!) When she passed away a couple of months ago, several people, from different parts of her life, stood up to share their memories of her. Every single one of them mentioned her delicious wontons.
I’ll always remember her wontons, which still make an appearance at family gatherings.
I’ll remember the white chocolate peanut butter ritz cookies she kept in a bag in her freezer, that she would stealthily send home with my brother because he loved them so much.
I’ll remember her yam pie, which is way more delicious than any pumpkin pie I’ve ever tried.
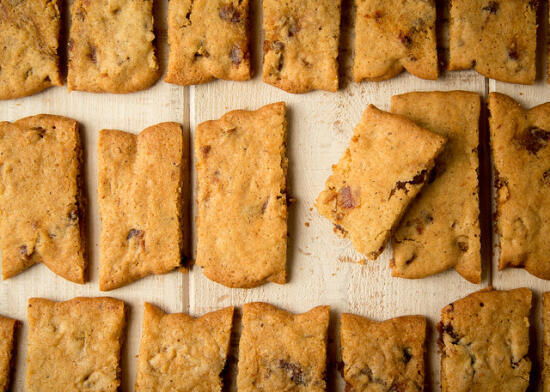
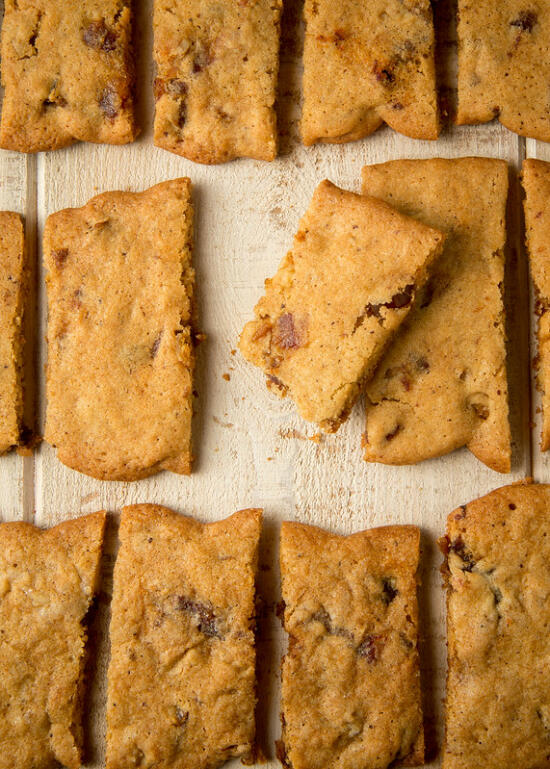
But most of all, I’ll remember her date nut bars. As a child, they were my absolute favorite thing that she made. (Which says a lot, because there’s a good reason why she’s so fondly remembered for those amazing wontons of hers!) Even though they sound healthy, they were always a huge treat when she made them. And now, even though it’s been years since she’s made them, all it takes is one bite to know that yes, this tastes exactly right.
(And it seems that I’m not the only one – it’s a good thing I made extra, because my brother, who’s usually a health freak, has gone through at least four dozen of them. And when I brought them to our Thanksgiving celebration, the whole family demolished them!)
Although they seem simple, and maybe a little boring, these are easily the favorite of the four cookies I made for The Great Food Blogger Cookie Swap – even more so than those scrumptious Gooey Chocolate Peanut Butter Cup Cookies!
Date Nut Bars
Ingredients
- 3 cups all-purpose flour
- 1 tsp ground cinnamon
- 1 tsp ground nutmeg
- 1/4 tsp ground cloves
- dash of salt
- 2 cups sugar
- 1 cup unsalted butter, softened
- 3 large eggs
- 1 cup chopped pitted dates
- 1 tsp baking soda dissolved in 2 tsp water
- 1 cup chopped walnuts
Cooking Directions
- Mix flour, cinnamon, nutmeg, cloves, and salt. Beat sugar and butter in a large bowl with electric mixer until light and fluffy. Beat in eggs, one at a time. Add dates and dissolved baking soda. On low speed, gradually beat in flour mixture. By hand, stir in nuts. Chill several hours until firm.
- Heat oven to 300°F. Line baking sheets with parchment paper.
- Form dough into rolls, about the thickness of your index finger and about ten inches long, on a lightly floured surface. Place two rolls five inches apart on each prepared baking sheet. Flatten rolls so they are about two inches wide – they will be very thin.
- Bake for no longer than 15 minutes. While hot, cut into one-inch slices. Cool on baking sheets for about five minutes, then remove to cooling racks and let cool completely. Makes about five dozen.
Who doesn’t love the combo of peanut butter and chocolate?
(If you don’t, don’t tell me – I don’t know if we can still be friends.)
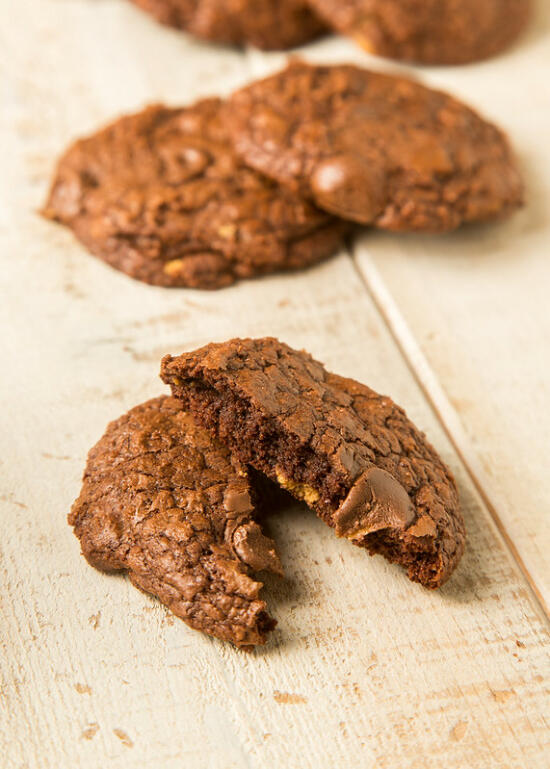
These oooey, gooey, rich chocolate peanut butter cup cookies are the perfect way to get your chocolate peanut butter fix. I love them so much, I’ve made them twice already!
(And nobody needs to know how often I sneak one of these cookies when no one’s looking, with a nice big glass of cold milk. Such a guilty pleasure!)
I highly recommend eating them warmed, with a scoop of ice cream on the side. I’m a bad influence like that. 😉
Gooey Chocolate Peanut Butter Cup Cookies, from SugarHero!
Ingredients
- 3/4 cup all-purpose flour
- 1 tsp baking powder
- 1/4 tsp salt
- 1 lb semi-sweet chocolate, coarsely chopped
- 1/3 cup (3 oz) creamy peanut butter
- 2 oz unsalted butter
- 1 3/4 cup packed brown sugar
- 4 large eggs, at room temperature
- 1 tbsp vanilla extract
- 2 cups mini peanut butter cups
Cooking Directions
- In a small bowl, whisk together the flour, baking powder, and salt, and set aside.
- Combine the chopped chocolate, peanut butter, and butter in a microwave-safe bowl, and microwave in 30-second increments until completely melted and smooth. Stir every 30 seconds to prevent overheating. Let the mixture cool to lukewarm.
- Place the sugar and eggs in the bowl of a large stand mixer, and beat with a whisk attachment until thick and foamy, about 5 minutes. Add the chocolate mixture and the vanilla, and mix them in until they’re incorporated. Scrape down the bottom and sides of the bowl, as the chocolate has a tendency to sink to the bottom.
- Stir in the flour mixture, and when that’s incorporated, add the miniature peanut butter cups, reserving about 1/4 cup of them. Press a layer of cling wrap on top of the batter and refrigerate it until it’s firm enough to scoop, at least 1 hour. (The batter can be refrigerated for several days, but it will need to sit at room temperature to become workable if it has been chilled for an extended period.)
- Preheat the oven to 350°F and line baking sheets with parchment paper. Use a large 1/4-cup scoop to scoop large portions onto the baking sheets. Cut the remaining peanut butter cups in half, and press a few of them on top of each cookie. Bake the cookies until they look dry and crackly on the top, but the center is still very jiggly and soft when pressed, about 9-12 minutes. Cool the cookies on the baking sheet—if you try to move them too soon, they’ll fall apart. Once cool, store the cookies in an airtight container at room temperature for 3-4 days For the best taste and texture, microwave them for a few seconds before serving, so the centers get warm and gooey.
I’m not sure where this recipe originally came from, nor do I know who this “Susan” is, however this recipe has been in my family for years, showing up at gatherings every now and then.
The cookies are very delicious on their own. But we all know that chocolate makes everything better, and this is absolutely true for these cookies!
However, chocolate or no chocolate, these cookies are crazy easy to make. Even better, being “refrigerator” cookies, they’re super easy to make the dough ahead, and then you can easily bake a few whenever you need a cookie fix!
(P.S. Don’t be lazy like me. If you actually sift your powdered sugar before mixing it into the ganache, your cookies will turn out looking a lot better than mine did! 😉 )
Susan’s Vanilla Refrigerator Cookies
Ingredients
- 1 1/2 cups sifted all-purpose flour
- 1/2 tsp baking soda
- 3/4 tsp salt
- 1/2 cup soft shortening
- 1 cup granulated sugar
- 1 egg, unbeaten
- 2 to 3 tsp. vanilla extract
- 1/2 cup nuts (optional)
- 1 batch chocolate ganache (optional)
Cooking Directions
- Sift flour, soda, salt. Mix shortening with sugar, egg, and vanilla until very light and fluffy. Gradually mix in flour mixture and nuts.
- Turn dough onto large piece of waxed paper. Shape into roll 1 1/2″ diameter, then wrap. Refrigerate several hours, overnight, or several weeks if desired.
- Start heating oven to 375°F. With sharp thin knife dipped into hot water, then wiped dry, slice roll 1/8″ to 1/4″ thick (slice off only what you need, return rest of roll to refrigerator to bake later).
- Place on ungreased cookie sheet. Bake 10 min or until done. Cool completely.
- If desired, make a batch of chocolate ganache and, using a butter knife or spatula, spread each cookie with ganache. Let cool completely, until ganache has hardened.
- Store in a tightly covered container. Makes 5 dozen.
- Enjoy!
