Chocolate Banana Strudel
The May Daring Bakers’ challenge was hosted by Linda of make life sweeter! and Courtney of Coco Cooks. They chose Apple Strudel from the recipe book Kaffeehaus: Exquisite Desserts from the Classic Cafés of Vienna, Budapest and Prague by Rick Rodgers.
… with marshmallows!
Well. I complained mentioned last month that I wanted a real challenge for Daring Bakers, and that I didn’t find cheesecake to be enough of a challenge. Heh. I got that challenge this month.
The challenge was apple strudel, though were were allowed to choose whatever fillings we wanted as long as we made the strudel dough. Oh man. It looked scary. And as you can probably tell, I ended up procrastinating until the last minute on it (I made it yesterday!) But, aside from a momentary scare when the dough looked more like a batter (I had forgotten the 1/3 cup of flour), it was actually doable.
Oooey gooey yumminess.
Now, I am not much of a fan of apple desserts. I don’t like apple pie (though I can always go for an apple fritter!) So I was very glad to read that we could pick whatever fillings we wanted. Problem was… I’ve never had strudel before. So… I really, really didn’t know what sort of fillings would work with it. Lucky for me, I work well under pressure. Yesterday, in my last minute baking, I came up with not one, but two ideas!
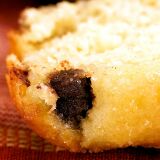
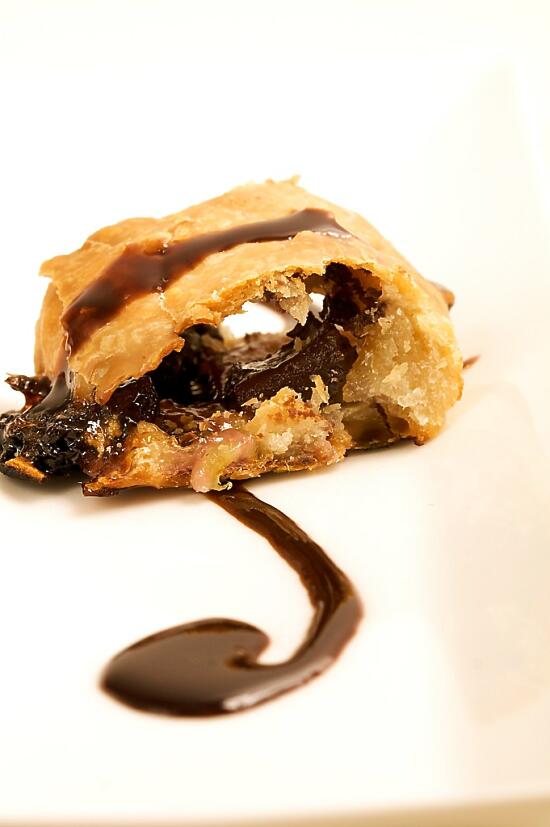
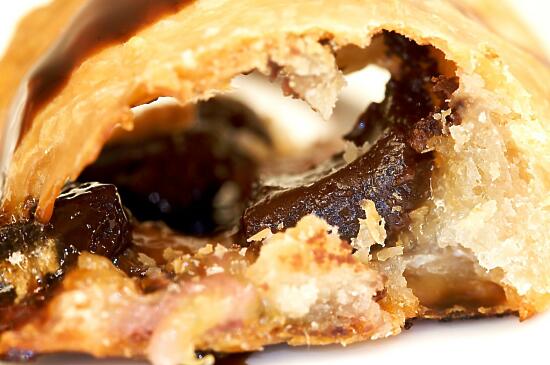
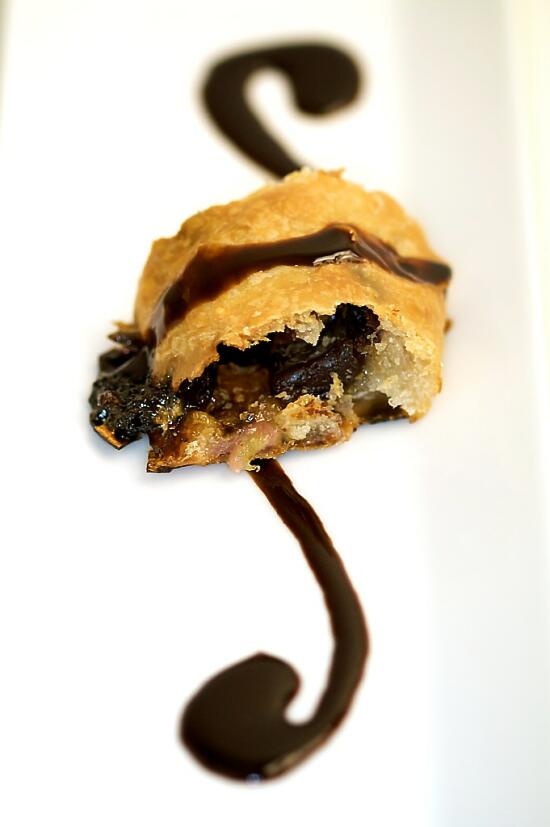
For my first idea, a chocolate-banana strudel. About a year ago, I was at a friend’s house for a barbeque, and we made barbequed bananas stuffed with marshmallows and chocolate. Both Son and I loved them, and I’ve been meaning to make them ever since. Since I had all the ingredients, I figured heck, why not? These were pretty decent.
But they were nothing compared to the barbeque chicken strudel. We had some barbeque chicken from Son’s parents, and I modeled these after a well-known barbeque chicken pizza. With the chicken, bacon, mozzarella cheese, and red onion… these were a definite success. I would go through all the work of making strudel again, just to have these. They were so good.
Since I have a teeny tiny kitchen and very little counter space, there was no way I could make a full-sized strudel. There was just nowhere to stretch out the dough like that. So instead, I made an entire batch of dough, then split it into three different pieces and made three little baby strudels. And (oops) I forgot the butter for all three strudels. But they still turned out well (thank goodness!)
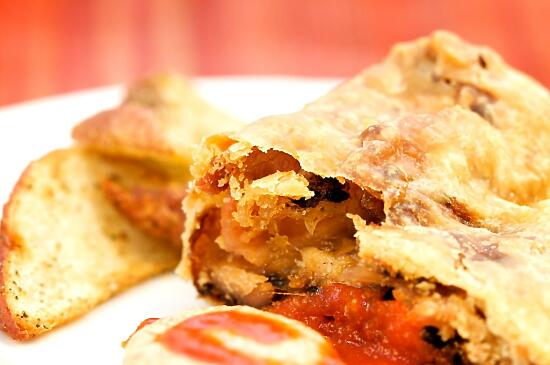
Barbeque Chicken Strudel
Ingredients
- 1 1/3 c unbleached flour (I used all-purpose flour)
- 1/8 tsp salt
- 7 tbsp water, plus more if needed
- 2 tbsp vegetable oil, plus additional for coating the dough
- 1/2 tsp cider vinegar
- 5 tbsp melted butter
For the chocolate-banana strudel:
- 1 banana, sliced
- 6 marshmallows, cut into quarters
- chocolate, broken into pieces
For the barbeque chicken strudel:
- 2 cups barbeque chicken, shredded
- 1 cup grated mozzarella cheese
- several slices of red onion
- 6 strips of bacon, cooked, crumbled
Cooking Directions
- Combine the flour and salt in a stand-mixer fitted with the paddle attachment. Mix the water, oil and vinegar in a measuring cup. Add the water/oil mixture to the flour with the mixer on low speed. You will get a soft dough. Make sure it is not too dry, add a little more water if necessary.
- Take the dough out of the mixer. Change to the dough hook. Put the dough ball back in the mixer. Let the dough knead on medium until you get a soft dough ball with a somewhat rough surface.
- Take the dough out of the mixer and continue kneading by hand on an unfloured work surface. Knead for about 2 minutes. Pick up the dough and throw it down hard onto your working surface occasionally.
- Shape the dough into a ball and transfer it to a plate. Oil the top of the dough ball lightly. Cover the ball tightly with plastic wrap. Allow to stand for 30-90 minutes (longer is better).
- It would be best if you have a work area that you can walk around on all sides like a 36 inch (90 cm) round table or a work surface of 23 x 38 inches (60 x 100 cm). Cover your working area with table cloth, dust it with flour and rub it into the fabric. Put your dough ball in the middle and roll it out as much as you can.
- Pick the dough up by holding it by an edge. This way the weight of the dough and gravity can help stretching it as it hangs. Using the back of your hands to gently stretch and pull the dough. You can use your forearms to support it.
- The dough will become too large to hold. Put it on your work surface. Leave the thicker edge of the dough to hang over the edge of the table. Place your hands underneath the dough and stretch and pull the dough thinner using the backs of your hands. Stretch and pull the dough until it’s about 2 feet (60 cm) wide and 3 feet (90 cm) long, it will be tissue-thin by this time. Cut away the thick dough around the edges with scissors. The dough is now ready to be filled.
- Put the rack in the upper third of the oven and preheat the oven to 400°F (200°C). Line a large baking sheet with baking paper (parchment paper).
- Spread about 3 tbsp of the melted butter over the dough using your hands (a bristle brush could tear the dough, you could use a special feather pastry brush instead of your hands). Spread the fillings about 3 inches from the short edge of the dough in a 6-inch-wide strip.
- Fold the short end of the dough onto the filling. Lift the tablecloth at the short end of the dough so that the strudel rolls onto itself. Transfer the strudel to the prepared baking sheet by lifting it. Curve it into a horseshoe to fit. Tuck the ends under the strudel. Brush the top with the remaining melted butter.
- Bake the strudel for about 30 minutes or until it is deep golden brown. Cool for at least 30 minutes before slicing. Use a serrated knife and serve either warm or at room temperature. It is best on the day it is baked.
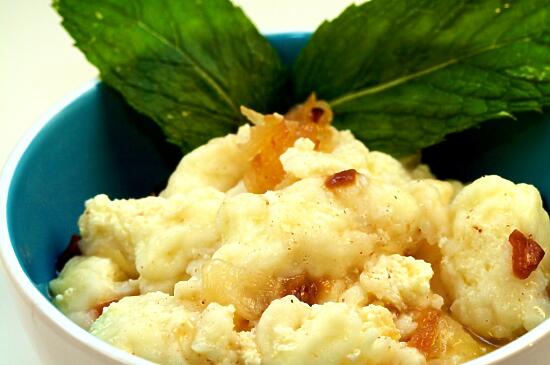
Ricotta Gnocchi
I’ve been busy lately. Really darned busy. I’m loving all this work and these rehearsals (the show’s this weekend… eeek!) But… this means I got the very first Daring Cooks challenge done half an hour before midnight. On the reveal date. Oops.
I’ve wanted to try gnocchi for a while, but… I’m easily intimidated by foods. Especially if I’ve never made them and they seem even the least bit challenging. And this one certainly did seem so. But ignoring my complete fail at making homemade ricotta for the gnocchi, it actually wasn’t that difficult. All you have to do is mix everything together, form the little blobs of gnocchi, roll them in flour, then boil them, mix with the sauce, and serve. Easy as pie. (Ignore, of course, my past difficulties with making pie.)
And how did I like them? Well. Plain, the gnocchi seemed very, very bland. With just butter, it was a little better, but still needed some sort of oomph. But as some beautifully browned sauteed onions to the sauce, and OH… that hits the spot.
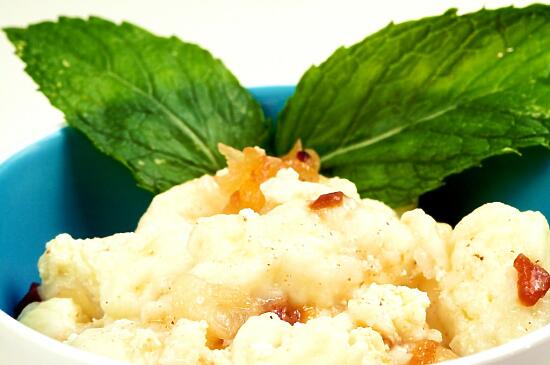
Definitely comfort food.
Ingredients
- 1 pound fresh ricotta
- 2 large cold eggs, lightly beaten
- 1 tablespoon unsalted butter, melted
- 1/4 cup Parmigiano-Reggiano, grated
- about 1/4 teaspoon salt
- all-purpose flour for forming the gnocchi
- 8 tablespoons butter, sliced
- 2 teaspoons water
- 2 large sweet onions
Cooking Directions
- Line a sieve with cheesecloth or paper towels and place the ricotta in a sieve. Cover it and let it drain for at least 8 hours and up to 24 hours in the refrigerator.
- Place the drained ricotta in a large bowl and mash it with a rubber spatula or a large spoon.
- Add the lightly beaten eggs to the mashed ricotta.
- Melt the tablespoon of butter and add it to the ricotta mixture.
- Add the Parmigiano-Reggiano and the salt.
- Beat all the ingredients together very well. You should end up with a soft and fluffy batter with no streaks (everything should be mixed in very well).
- Fill a small pot with water and bring to a boil. When it boils, salt the water generously and keep it at a simmer.
- In a large, shallow baking dish or on a sheet pan, make a bed of all-purpose flour that’s 1/2 an inch deep.
- With a spatula, scrape the ricotta mixture away from the sides of the bowl and form a large mass in the center of your bowl.
- Using a tablespoon, scoop up about 2 to 3 teaspoons of batter and then holding the spoon at an angle, use your finger tip to gently push the ball of dough from the spoon into the bed of flour.
- At this point you can either shake the dish or pan gently to ensure that the flour covers the gnocchi or use your fingers to very gently dust the gnocchi with flour. Gently pick up the gnocchi and cradle it in your hand rolling it to form it in an oval as best as you can, at no point should you squeeze it. What you’re looking for is an oval lump of sorts that’s dusted in flour and plump.
- Gently place your gnocchi in the simmering water. It will sink and then bob to the top. From the time that it bobs to the surface, you want to cook the gnocchi until it’s just firm. This could take 3 to 5 minutes.
- If your gnocchi begins to fall apart, this means that the ricotta cheese was probably still too wet. You can remedy this by beating a teaspoon of egg white into your gnocchi batter. If your gnocchi batter was fluffy but the sample comes out heavy, add a teaspoon of beaten egg to the batter and beat that in. Test a second gnocchi to ensure success.
- Form the rest of your gnocchi. You can put 4 to 6 gnocchi in the bed of flour at a time. But don’t overcrowd your bed of flour or you may damage your gnocchi as you coat them.
- Have a sheet pan ready to rest the formed gnocchi on. Line the sheet pan with wax or parchment paper and dust it with flour.
- Store the gnocchi in the refrigerator for an hour prior to cooking to allow them to firm up.
- Have a large skillet ready to go. Place the butter and water for the sauce in the skillet and set aside.
- In the largest pan or pot that you have (make sure it’s wide), bring at least 2 quarts of water to a boil (you can use as much as 3 quarts of water if your pot permits). You need a wide pot or pan so that your gnocchi won’t bump into each other and damage each other.
- Once the water is boiling, salt it generously.
- Drop the gnocchi into the water one by one. Once they float to the top, cook them for 3 to 5 minutes (as in the case with the test gnocchi).
- While the gnocchi cook, place the skillet over medium heat and melt the butter. Swirl it gently a few times as it melts. As soon as it melts and is incorporated with the water, turn off the heat. Your gnocchi should be cooked by now.
- With a slotted spoon, remove the gnocchi from the boiling water and gently drop into the butter sauce. Carefully roll in the sauce until coated. Serve immediately.
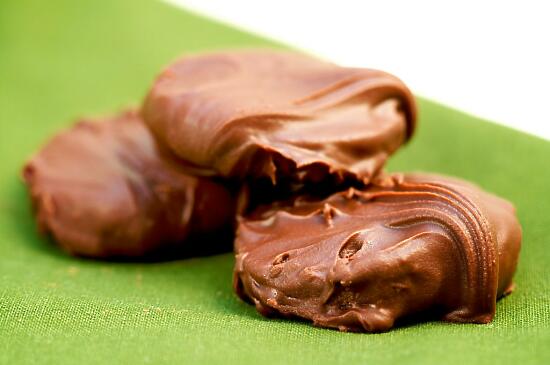
Homemade Thin Mints
I’m a bit of an odd one. I have no problem using store-bought foods for myself – I have a favorite salsa that I always buy, and cans of chili, soup, and roast beef hash sitting in my pantry. But if a friend tells me he or she likes a certain store-bought product, you’d better believe I’m going find a way to make it from scratch. It doesn’t always work (I tried making homemade ricotta cheese the other day… big fat FAIL.) And sometimes it works so well that we’re converts (Son has been forever banned from buying pico de gallo from the store. Seriously, when it’s so easy for me to make it at home? Not happening, dude.)
So when my good friend Nicole told me that her favorite type of cookies are Thin Mints… well, I couldn’t let her birthday go by without at least attempting them.
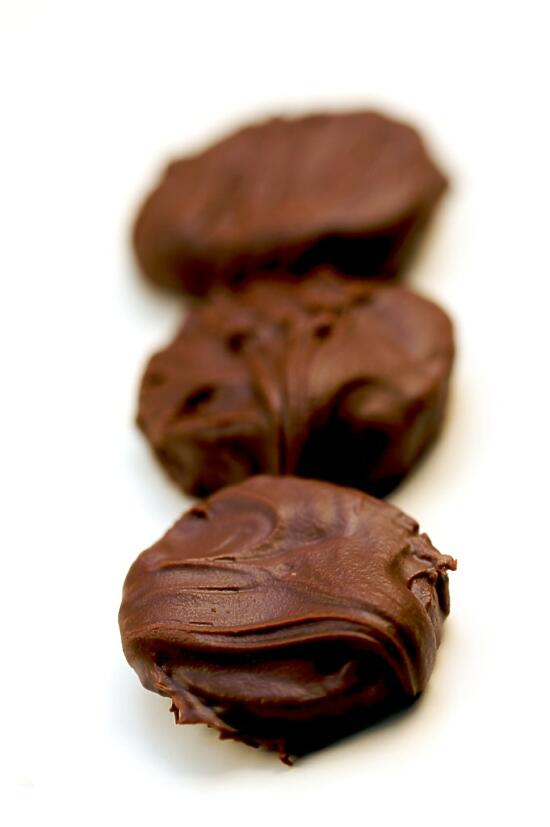
Chocolatey, minty…
So how’d they turn out? Well, you’d have to ask Nicole to see how she liked them. But they were a hit with my family, even though I may have over-baked them a little. They were more bricks than crispy cookies… oops.
I adapted the recipe from one I found on Baking Bites. The only changes I made were to decrease the baking time, and to add peppermint extract to the chocolate coating so it has even more of a peppermint flavor – I found it to be a little too subtle with the small amount used in the cookie.

…an American classic.
Ingredients
- 2 1/4 c all purpose flour
- 1/4 c cornstarch
- 6 tbsp unsweetened cocoa powder
- 1/2 tsp salt
- 1 c granulated sugar
- 1/2 c butter, room temperature
- 1/3 c milk
- 1/2 tsp vanilla extract
- 3/4 tsp peppermint extract
- 10 oz dark or semisweet chocolate
- 1/2 c butter, room temperature
- 1 tsp peppermint extract
Cooking Directions
- In a small bowl, whisk together flour, cornstarch, cocoa powder and salt.
- In a large bowl, cream together butter and sugar. With the mixer on low speed, add in the milk, the vanilla extract, and the 3/4 tsp peppermint extract. Mixture will look curdled. Gradually, add in the flour mixture until fully incorporated.
- Shape dough into two logs, about 1 1/2 inches (or about 4 cm) in diameter, wrap in plastic wrap and freeze for at least 1-2 hours, until dough is very firm.
- Preheat oven to 375F°.
- Slice dough into rounds not more than 1/4 inch thick – if they are too thick, they will not be as crisp – and place on a parchment lined baking sheet. Cookies will not spread very much, so you can put them quite close together.
- Bake for 10-12 minutes, until cookies are firm at the edges. Cool cookies completely on a wire rack before dipping in chocolate. Don’t over-bake them, or they’ll be hard as a rock.
- In a microwave safe bowl, combine chocolate and butter. Melt on High in the microwave, stirring every 45-60 seconds, until chocolate is smooth. Chocolate should have a consistency somewhere between chocolate syrup and fudge for a thin coating.
- Mix the remaining peppermint extract into the chocolate.
- Dip each cookie in melted chocolate, turn with a fork to coat, then transfer to a piece of parchment paper or wax paper to set up for at least 30 minutes, or until chocolate is cool and firm.
- Reheat chocolate as needed to keep it smooth and easy to dip into.