Shumai, har gao, char siu, xiao long bao. It wasn’t always the case, but these days dim sum (and dumplings in general) are among my favorite comfort foods. (Seriously, is there anything better than a steamer full of xiao long bao – soup dumplings – on a cold rainy day, or the soft warmth of a char siu bao?)
Also among my list of foods that make me happy, pretty much anything that Jen Yu ever posts on her blog.
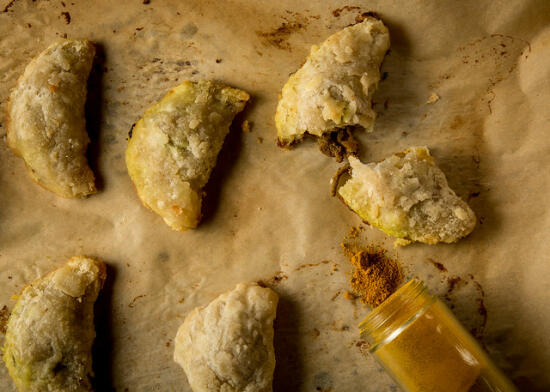
She posted these Chinese Beef Curry Pastries to Fridgg two years ago, and I knew I had to make them.
… which I did, a year later.
… and now I’m finally getting around to blogging about them, another year later.
I’m timely like that.
These do take a bit of time to make, what with the pastry dough and wrapping the dumplings, so this recipe would make a great weekend project.
Even better, get the ingredients for several batches (or different types of dumplings), invite a bunch of friends over, and have a dumpling party! (Also known as the best, and tastiest, way to get all your friends to do all the work.) Woohoo!
But whatever you do, don’t be like me and take forever to get around to making these. They’re wonderful, and delicious, and totally worth the time it takes to make them!
Chinese Beef Curry Pastries, from Use Real Butter
Ingredients
- 1 batch pastry dough
- 1-2 tbsp vegetable oil
- 1 onion, diced
- 4 tbsp curry powder
- 1 lb ground beef
- 4 tbsp shoyu (soy sauce)
- 2 tsp salt (to taste)
- 1 egg yolk
Pastry Dough
- 3 cups (15 oz) all-purpose flour
- 3/4 tsp salt
- 9 oz butter, chilled and cut into cubes
- 8-10 tbsp water
Cooking Directions
- To make the pastry dough, mix the flour and salt together in a large bowl and cut the chilled cubes of butter into the flour until it resembles pea-shaped pebbles. Add water to the dough, one tablespoon at a time, tossing it with a fork to incorporate until it just begins to stick together when you pinch the dough between your fingers. Form the dough into a ball, wrap in plastic, and chill it for an hour in the refrigerator.
- Heat the vegetable oil in a large frying pan and saut├® the onions and a tablespoon of the curry powder in the oil until the onions begin to sweat. Add the beef, shoyu, and remaining curry powder. Cook until the beef browns. Stir in salt, to taste.
- Preheat the oven to 450°F. Line a couple of baking sheets with parchment paper.
- When the dough is fully chilled, set it on a floured workspace and roll the dough out to 1/8-inch thickness. Cut out 3-inch circles with a biscuit or cookie cutter. Combine the scraps, roll it out, and cut more circles until you are out of dough.
- Place 1-2 tablespoons of beef filling on each circle of dough and fold the dough over (in half) to form a semi-circle. Pinch the edges together to seal the pastry (feel free to use fancy dumpling sealing techniques, if you know them). Set the pastries on the parchment-lined baking sheets. Beat the egg yolk and brush it over each pastry.
- Bake for 12-15 minutes until the pastry turns golden brown. Serve hot. Makes 2-3 dozen (depending on how many circles you got from the pastry dough).
- Enjoy!
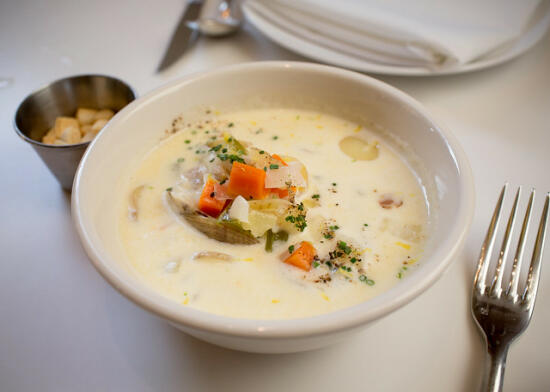
Fishing with Dynamite, in Manhattan Beach, CA.
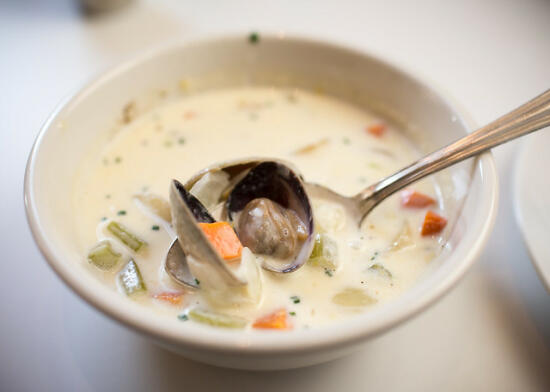
New England Clam Chowdah’, with Neuske’s bacon, Weiser Farm potatoes, and (super snackable) house made oyster crackers.
Overall delicious, and the clams were really sweet.
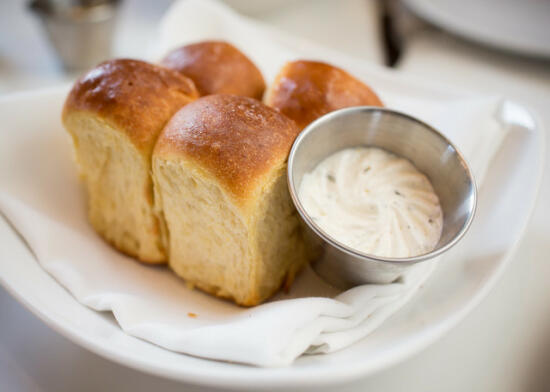
Squash rolls from the chef’s mom’s recipe, with rosemary butter.
The rolls were light and airy, and we loved the rosemary butter.
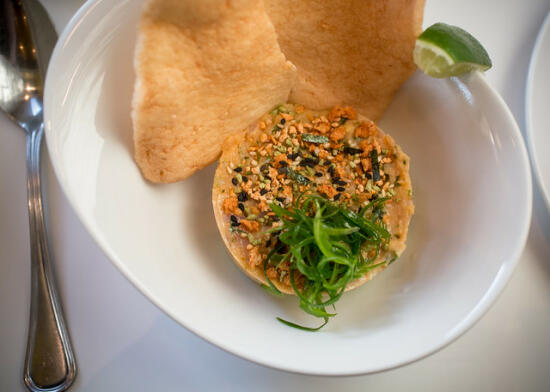
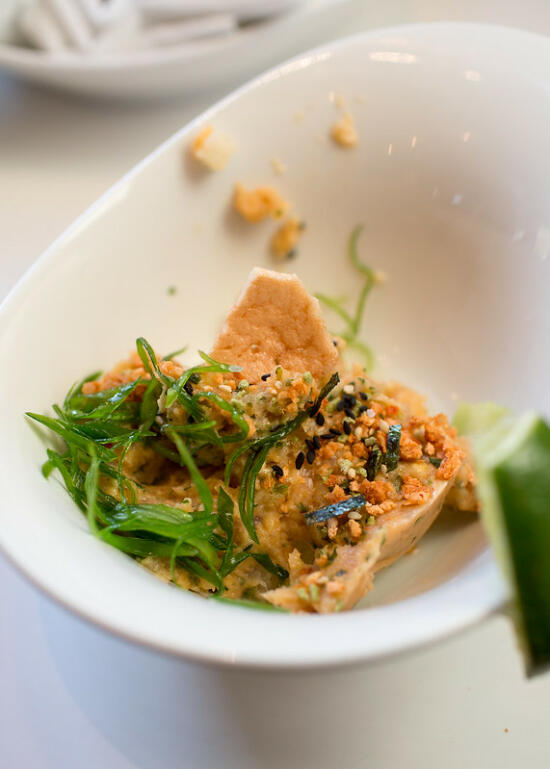
Albacore Tuna Tartare with shrimp chips, spicy aioli, Asian pear, and kimchi furikake.
Definitely on the spicy side, but delicious, super fragrant and flavorful, and we loved the idea of using shrimp chips with it.
Thai Shellfish and Coconut Soup, with shrimp, mussel, rice noodles, kaffir lime leaf, and coriander.
Really loved the flavor of the soup – the only problem is it makes me crave Keizo’s Green Curry Soba like crazy!
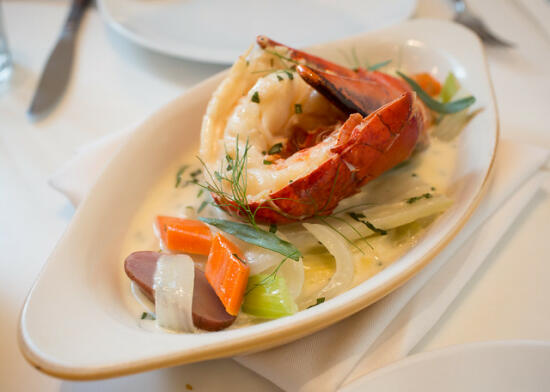
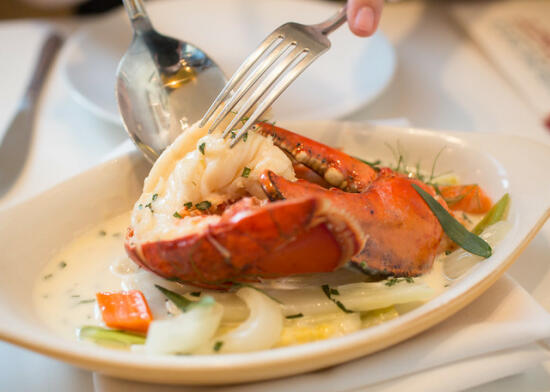
Poached Half Atlantic Lobster with aromatic vegetables, pee wee potatoes, and Pernod butter sauce.
There was nothing about the meal that we didn’t love, however this was by far our favorite dish of the meal. The lobster was sweet and tender, and the broth was wonderfully fragrant. Oddly enough, it smelled and tasted quite a bit like pho (perhaps from the Pernod?), which got us contemplating how delicious lobster poached in pho broth might be. I’ve been dreaming about this lobster ever since…
Key Lime Pie, with a graham cracker crust and kaffir lime meringue.
This was just tart enough, and not too sweet. We LOVED it. The contrast between the cold lime filling and warmer meringue topping was refreshing, and the roasted marshmallow flavor of the broiled meringue really took the dessert up a level. A fantastic ending to a fabulous meal.
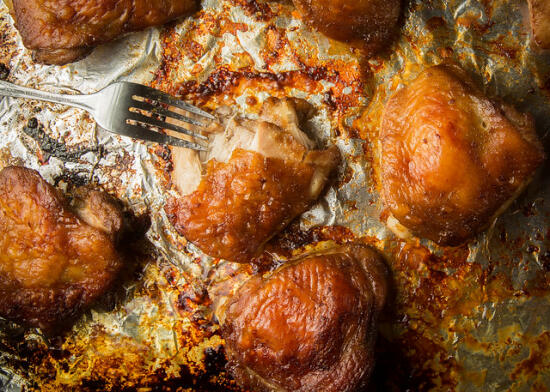
Garlicky Oven-Roasted Chicken
Is there anything better in this world than shatteringly crispy, crunchy chicken skin?
I think not.
Except, perhaps, when it comes attached to an incredibly moist, flavorful chicken thigh… and the entire package is insanely easy to make.
Son‘s been craving Vietnamese food lately, but we’ve been spending a ton of time working, so I haven’t had much time to cook lately. Luckily for me, Andrea Nguyen’s wonderful cookbook, Into the Vietnamese Kitchen: Treasured Foodways, Modern Flavors , came to the rescue. I needed a meal that would be quick, delicious, Asian enough to satisfy Son, and hopefully something that would make enough that I wouldn’t have to cook much the rest of the week. This recipe fit the bill perfectly – so well, in fact, that I’ll be making it again this weekend. ¤śĆ
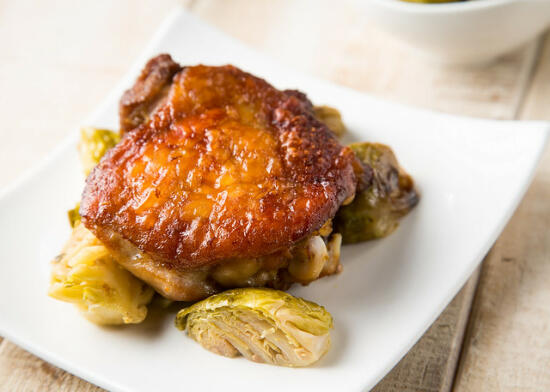
Just look at that crispy skin!
Ingredients
- 4 large cloves of garlic, finely minced
- 1 1/2 tsp sugar
- 1/4 tsp salt
- 3 1/2 tbsp Maggi sauce, or shoyu
- 2 1/2 tbsp canola oil
- 4 lbs chicken thighs, bone-in (about 10 thighs)
Cooking Directions
- In a bowl large enough to hold the chicken, mix all ingredients except the chicken well, then add the chicken pieces and massage the marinade into them. When possible, peel back the skin to get some marinade between the flesh and the skin as well. Cover and marinate in the refrigerator for at least 2 hrs, or up to 24 hours (recommended).
- Half an hour before cooking the chicken, remove the chicken from the refrigerator. Line a baking sheet with foil and put the chicken pieces on the sheet, skin-side down. Position a rack in the middle of the oven and preheat to 400°F.
- Put the chicken in the oven. After about 15 minutes, when you hear sizzling, use a pair of tongs to carefully flip each piece of chicken. Continue to roast for another 25-45 minutes, or until the skin is browned and crispy, and the juices run clear.
- Enjoy!

Fig Tarts
There are a lot of cool things that come from being a food blogger. One is the community – there are so many amazing people out there whom I now consider friends, that I never would have met if Son didn’t have the silly idea that I should start a sushi blog eight years ago.
Another cool thing, at least for me, is discovering a world of foods outside of what I grew up with. Don’t get me wrong – my parents are great parents, and did their best to feed us well (or as well as you could feed super picky kids who hated vegetables), but I think most families, like mine, have a list of foods that they do eat, and other foods that they don’t.
And in the last few years, my list of “do eat” foods has expanded to include quite a few foods that, for one reason or another, I never (or rarely) ate before my 20s.
fish.
dill.
tomatoes.
pickles.
brussels sprouts.
asparagus.
eggplant.
fish sauce.
anything Vietnamese.
figs.
Wait… figs?
Okay, I did have Fig Newtons, like, all the time when I was a kid. (Also, raise your hand if you always think of Ramona Quimby when you have Fig Newtons.) But until last summer, I had never, ever in my life eaten a fresh fig (that wasn’t Newtonized) before.
At the very, very end of summer last year, I got a basket of figs in my CSA box. Having never eaten a fresh fig before, I turned to my trusty list of “recipes I want to make someday” to figure out what to do with them. I came across this recipe from Sophisticated Gourmet, and a few sheets of puff pastry later, I was eating a super-simple but very delicious fig tart.
Since it was the end of fig season (and it takes me forever to get a blog post up anyways), I set aside the photos to post next year during fig season. And, well, we can all see how well that worked.
So, since I’ll likely never get this post written if I keep waiting for the next fig season, here’s a fantastic recipe for fig tarts!
You should totally make them next year.
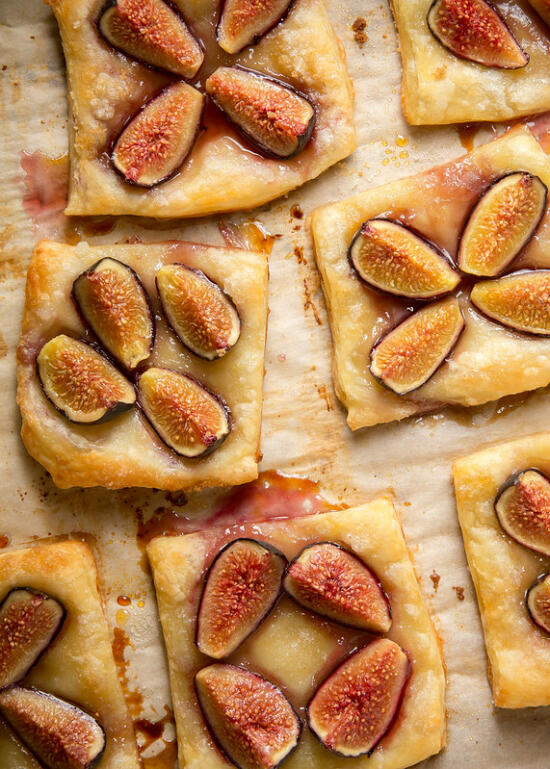
Fig Tarts
Recipe adapted from Sophisticated Gourmet
Ingredients
- 1 sheet puff pastry
- granulated sugar (or, if you have it, vanilla sugar)
- 4 ripe figs, quartered
- brown sugar
Cooking Directions
- Preheat oven to 400°F. Line a cookie sheet with parchment paper.
- Roll out the puff pastry. Cut the pastry into quarters, then place on the cookie sheet.
- Sprinkle each piece of puff pastry with the granulated sugar, then top with figs.
- Lightly sprinkle the brown sugar over the figs.
- Bake for 15 minutes, or until the puff pastry is puffed up around the edges and golden brown.
- Serve warm with vanilla ice cream, and enjoy!
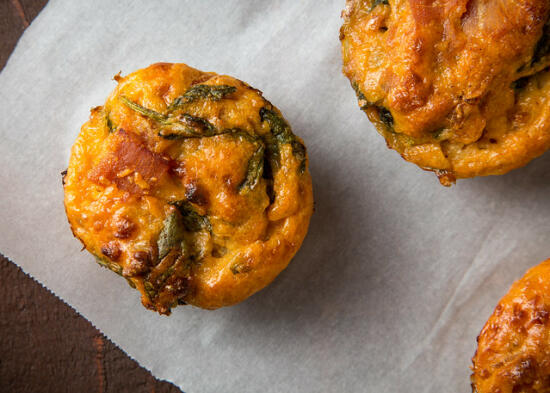
Ham and Spinach Muffins
Lately, work/life balance for me has been more like all work/no life, so I’m trying to get a little better about getting away from my computer for an hour or two every day. So Son and I have started running (*snort*) and taking yoga classes at a nearby studio. You’d think, as a former ballet dancer, yoga would totally be my kind of thing. Yeah… no. Unlike ballet, yoga actually requires upper-body strength. o_0
So I’m in a yoga class (because I know it’s good for me, and I know I should be working on my upper body strength, but seriously why do we have to stay in downward dog for so freaking long?!), and we’re doing the thing where you go into downward dog, and then into plank position, and you sloooooowly lower yourself to the floor (don’t ask me what the fancy yoga name is, I have absolutely no clue)… and I’m sweating, and my arms are shaking, and about a third of the way down my muscles are just like, NOPE. NOT GOING ANY FURTHER. And I crash to the ground.
Did I mention I have no upper body strength?
As I’m laying on the mat, face-down, trying not to burst out laughing, the entire class goes silent. It wasn’t exactly a quiet crash. I’m pretty sure the teacher was worried I’d hurt myself. So I reassure everyone, “I’m okay!” Except it came out as more of a strained squeak than a self-assured statement.
… which is why I go to the class called “gentle yoga”, and not the “serious yoga for people who actually know what they’re doing” class. I don’t try to be disruptive (honest!) but I’m really good at falling on my face. Also, downward dog is my nemesis.
Oh, and I hate kale.
I pretty much fail at being a Californian.
Anyways.
Another thing that is helping me keep my head on straight (more or less) is trying to be more efficient in places where it makes sense for me. Like buying pre-cut fruit at the grocery store (I KNOW, but let’s be honest, I am SO not going to be able to find the time to cut up a whole pineapple at home, and then it’s just going to go bad and be a waste and make me sad).
Or making breakfast ahead of time… which brings me to these muffins! Oh, these muffins. They’re so wonderfully delicious. I make a huge batch of them about once a month, freeze them, and then all I have to do is roll out of bed, pop a couple of them in the microwave, and voila! Breakfast! A hot, filling, fairly healthy breakfast!
Because I’m the kind of person who neeeeds breakfast (boy, do I get hangry if I don’t) but cooking first thing in the morning is so not a thing that happens here, especially on the mornings when I have to go directly from bed to computer for early morning conference calls. Morning person, I am not.
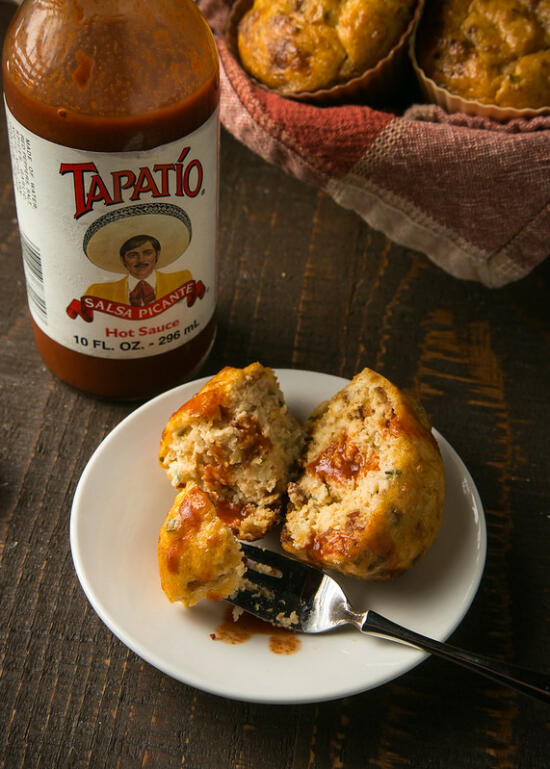
Bacon and chive muffins were made for Tapatio sauce
On a side note, I went to a food blogging conference! … almost four months ago. … and I didn’t take a single picture while I was there.
(If there were an award for worst food blogger, I’d definitely have won at least a few times in the last five years.)
Conferences usually aren’t my jam, mostly because I’m the worst networker ever (I’m that quiet chick hanging out in the corner, because she doesn’t know how to go up to people and introduce herself without being super awkward), SEO makes me grumpy, and I always feel kind of dumb being like, “Have you heard of Fridgg [the app, not the blog]? It’s super awesome and you should totally use it! (Please check it out?)”
So I’ve more or less sworn off conferences. Except for Big Traveling Potluck, which I’ve gone to the past two years, and is a lot more fun because it’s not a “learn about SEO and pass out business cards” conference, it’s more of a “let’s be awesome and eat good food and make great friends” conference.
In which I lost my voice on the bus in the middle of a conversation with Aran (*facepalm* way to be suuuuper awkward, Allison), didn’t get to talk to Fabiola nearly enough (why do we always do this?!), promised to hang out with Aimee (seriously, we live like five minutes from each other, why do we only ever see each other at a conference that’s two hours away?), and got to hang out with so many old and new friends. And I was only awkward, like, half the time!
Oh, and I won a thing! Which was cool, and unexpected, and holy cow what am I going to do with a year’s worth of coupons for free Earthbound Farms products? (Plus a salad bowl and three cookbooks… it was a pretty freaking awesome prize.)
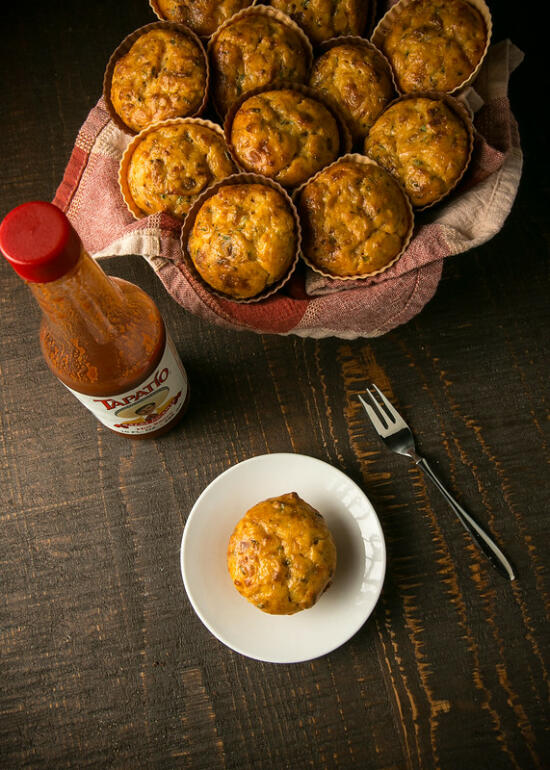
Bacon and chive muffins
So after the conference (and subsequent Europe trip, which will definitely be blogged about sooner or later!), I made another batch of these muffins. (That was the third time I’ve made them, and I think I’ve made them another two times since then.) Lo and behold – the spinach, THAT I WAS GOING TO BUY ANYWAYS, was Earthbound Farms brand! (Holy free spinach, Batman!) And the maple honey ham that I had also been buying for previous muffin batches was from Fork in the Road – another brand that had been at BTP2.
Synchronicity, people!
It’s the little things that make me smile.
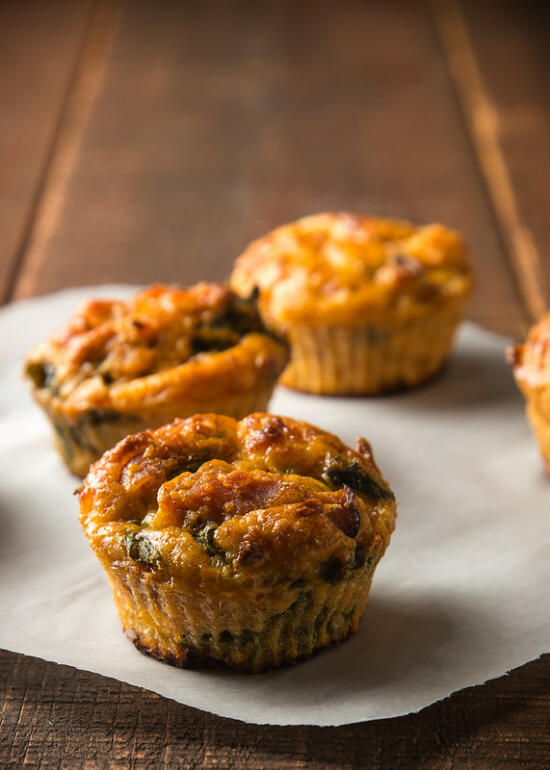
Ham and Spinach muffins
The original muffin recipe is from The Kitchn, and uses prosciutto and chives. Which I’m sure is delicious, but I subbed in bacon when I made it the first time, which is DEFINITELY delicious. (Best eaten with Tobasco sauce – you can thank me later.)
Since I feel like I should be maybe a little healthier with something I’m eating every morning for breakfast, all my subsequent batches have used ham and spinach. Also very delicious. (And reminds me of Easter every time I eat it.) I recommend both substitutions, or you can totally mix it up with whatever you want to add in.
For the original measurements, see the recipe at The Kitchn. I’m sharing the recipe I use, which makes ~48 muffins.
Also, I’ve found that these muffins stick REALLY badly to baking cups. I’ve tried both the foil ones and paper ones, and both times the bottom of the muffin was inedible (and I may have eaten a little paper in the process). I bought these silicone baking cups (I have them in both colors now) (yes, that’s an affiliate link), and they work really, really well. No more sticking! Although I find that the bottoms of the muffins still burn just a tiny bit, although that’s very probably just my stupid oven.
Ingredients
- 2 lbs (~3.5 cups) cottage cheese
- ~5 oz grated parmesan cheese
- 16 large eggs
- 1 cup water
- 1 cup whole wheat flour
- 1 lb (4 cups) almond meal
- 4 tsp baking powder
- 2 tsp smoked paprika
- 1 tsp salt
- 1 lb maple honey ham, chopped
- 1 lb spinach, wilted
Cooking Directions
- Preheat the oven to 400┬░F. If using silicone cups, lightly coat them with cooking oil if they’re not seasoned yet, and place them on a baking sheet. Otherwise, line a muffin pan with paper baking cups and spray them lightly with baking spray.
- Mix the cottage cheese, parmesan cheese, eggs, and water together in a (very) large bowl. Add the flour, almond meal, baking powder, smoked paprika, and salt, and whisk until there are no more lumps. Fold in the ham and spinach, making sure to mix them in as you go so you don’t get big clumps of spinach. (Trust me, an all-spinach muffin is no fun.)
- Fill the muffin cups with batter until they’re about 3/4 of the way full, and bake for 30-35 minutes, or until golden brown.
- The muffins refrigerate and freeze well. I wouldn’t keep them in the fridge any longer than a week, but I’ve frozen them for up to one month (they’ve never lasted longer than that, so I’m not sure how long they’d stay good in the freezer).
- Reheat them in the microwave for one minute on HIGH when refrigerated, or 90 seconds to two minutes on HIGH from the freezer.
- Enjoy!
