Archive for November, 2010

Pumpkin Parfaits
Every year, I make Dorie Greenspan’s Thanksgiving Twofer Pie for my family’s Thankgiving celebration.
Every year, I have leftover pumpkin filling and pecan topping.
And every year, I don’t know how to use it up. I’ve tried making extra little pies, but those never got eaten since I make two full pies and we always have leftovers.
So this year, I decided to do something a little different.
I poured the extra pumpkin filling into a baking dish, and baked it along with the pies. Then I scooped it out, and layered it with fresh whipped cream to make some beautiful (and delicious) parfaits. They were gone right away!
I no longer have to worry about what to do with that extra pie filling… and you’ll see in a day what I did to use up the pecan topping. ^_^
Pumpkin pie filling adapted from Baking from My Home To Yours by Dorie Greenspan. Whipped cream adapted from AllRecipes.com.
Ingredients
- 2 cups of pumpkin puree
- 1 1/3 cups heavy cream
- 1 cup brown sugar
- 2 eggs
- 2 egg yolks
- 1 tsp vanilla extract
- 1 tsp cinnamon
- 1/2 tsp ginger
- 1/2 tsp salt
- 4 tsp walnut liqueur (or rum)
- 2 cups heavy cream
- 2 tsp walnut liqueur (or vanilla extract)
- 2 tbsp powdered sugar
Cooking Directions
- Mix the pumpkin puree, 1 1/3 cups of heavy cream, brown sugar, eggs, egg yolks, vanilla, cinnamon, ginger, and salt. Pour into an 8×8″ baking dish.
- Bake at 300°F for 1 hour, or until no longer jiggly.
- Whip the 2 cups of cream until almost at stiff peaks. Add the liqueur and sugar, and mix until just blended in.
- Starting with the pumpkin, layer the pumpkin and whipped cream in a tall glass until full. Top with a little dollop of whipped cream, and a sprinkle of cinnamon.
- Enjoy!
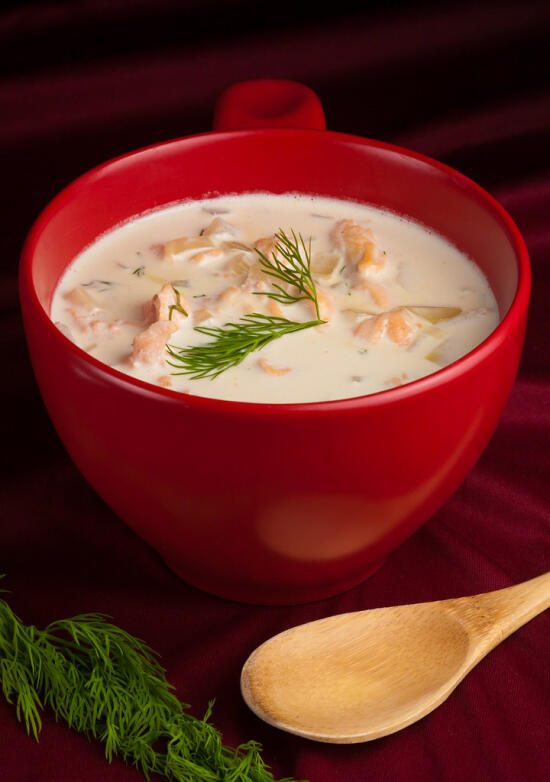
Arctic Char Chowder
When you order fish from I Love Blue Sea, you essentially have to order an entire fish. It makes sense – the fish has to be extremely fresh so that it will be sashimi-grade, and they can’t just have half-fishes sitting around waiting for the next order. That would be wasteful.
So after making a few different dishes for Sushi Day, I had a good bit of fish left over. Obviously I wasn’t going to throw it away… I spent good money on that arctic char! No… I had to find a good way to use it up.
When I need to use up an ingredient, I look to my kitchen to see what other leftover ingredients I have sitting around that also need to be used, and see if there’s a way I could put them together.
An onion.
Some garlic.
Heavy cream.
A sweet potato.
Hm…
SOUP!!!
So I turned to my bookmarked recipes, to see if I had any links for salmon chowders (since arctic char is in the same family as salmon, but it’s pretty rare that you’re going to find an arctic char recipe on most food blogs).
None. Dang.
However, I did have a recipe for garlic soup that I’d been wanting to make, which would use the onion, garlic, and heavy cream.
Garlic soup probably would go pretty well with some sweet potato and arctic char… right?
So I looked to AllRecipes.com for a salmon chowder recipe (for years AllRecipes.com has been my go-to site when I need a recipe for anything… at least, after I’ve looked through my list of bookmarked blog posts), and sort of fudged the two recipes together to come up with something that I hoped would work.
Let me just say, my apartment smelled like heaven while this was cooking.
Trust me… if you only ever make one thing from any of my sites, this is the one you want to make. On a cold, stormy, wintery day when the scent of it cooking will fill your home and make everything seem warm and comfy. And then cuddle up next to a fire with a bowl of soup and your loved ones, and… okay, I’m getting carried away. And overly romantic. Anyways.
You want to make this. Heck, I want to make another batch of this… right now. I think I’m going to have to order another couple of pounds of arctic char now…
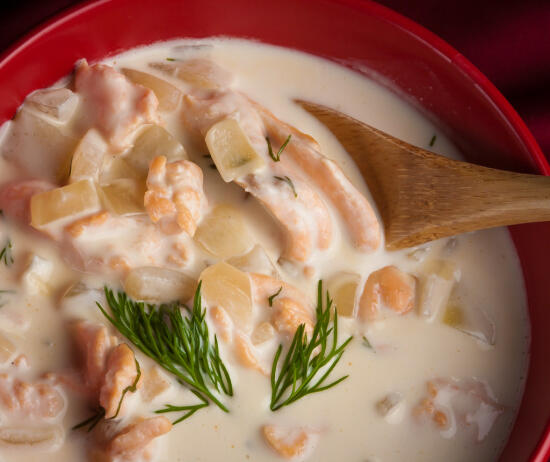
… with a yummy garlic soup base.
I adapted this recipe for garlic soup for the base of my chowder (because we LOVE garlic in this household), and then took inspiration from this salmon chowder recipe to figure out how to add the fish and potatoes into the soup.
Ingredients
- 1 tbsp rendered pork fat
- 1 onion, diced
- 12 cloves garlic, chopped
- 1 cup white wine
- 1 sweet potato, peeled and diced
- 1 quart chicken stock
- 1 1/2 cups heavy cream
- 1 fillet arctic char (about 1/3 lb), skinned, boned, and chopped
- 1 tsp dill, chopped
Cooking Directions
- Melt the fat in a hot pan.
- Add the onion and garlic, cook until caramelized.
- Add the white wine, simmer, covered, for 10 minutes.
- Add the stock and sweet potato. Bring to a boil, then simmer for half an hour.
- Add the heavy cream, arctic char, and dill. Cook just a couple of minutes longer, until warmed through and the arctic char has turned a opaque light pink.
- Enjoy with crusty bread or white rice.

Banana Drink
When I was a little girl, there were exactly two things that happened when bananas got very ripe in our household.
Quite often, my mother made banana bread using our trusty bread machine. Even now, that’s my very favorite banana bread.
But every once in a while, usually on a hot summer day after we had been running around outside for hours, my dad pulled out the blender and whipped up a batch of cold, refreshing, banana drink.
Dad tossed all the ingredients in our old, trusty blender – a few spotted, nearly black bananas; a handful of ice cubes from the tray in the freezer; a big scoop of carob powder that had to be scraped off the solidified block in the container; a dollop of vanilla extract. He filled the blender with milk almost up to the very top, and then covered it before turning the appliance on.
The loud, sharp sound of the blades cutting through the cubes of ice filled the air, and us three kids would watch the banana drink swirl in the blender as we eagerly waited for it to be ready.
“Taste test!”
The three of us would gather around, waiting for Dad to pour us each a mug full of cold banana drink. “Taste test, taste test!” When we were older we might not have always stood in the kitchen and watch him make the banana drink, but when we heard him call for taste testers, we would all make our way out to the kitchen to get a mug of the beloved smoothie.
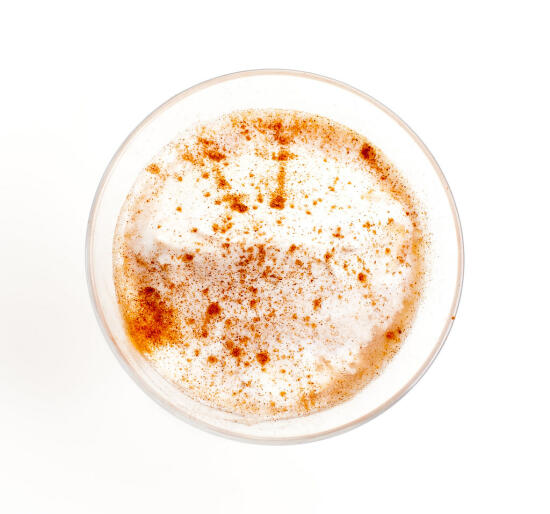
Topped with whipped cream & cinnamon
Ingredients
- 3-4 very ripe bananas
- 3-4 ice cubes
- 1 tbsp unsweetened cocoa powder
- 1 tsp vanilla extract
- milk
Cooking Directions
- Put the bananas, ice cubes, cocoa powder, and vanilla in a blender. Fill the remainder of the blender with milk, leaving a few inches of space at the top.
- Blend until smooth. If desired, top with whipped cream and/or ground cinnamon.
- Enjoy!
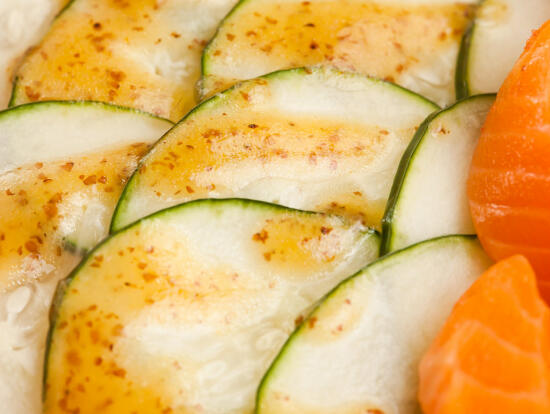
Marinated cucumber (with honey mustard vinaigrette)
I love simplicity. And I really love when simple dishes are fantastic.
These marinated cucumbers… I’ve been eating them as long as I can remember. My mom has always made them, and I believe she got the recipe from my grandmother (and I wouldn’t be surprised if she got the recipe form her mother, who grew up in Japan).
They’re so good with rice and fish. And so easy to make!
(In the picture, they were drizzled with a sweet mustard sauce, inspired by the one found on Steamy Kitchen. That recipe that I used can be found on Sushi Day.
Ingredients
- cucumber
- 1/8 cup rice vinegar
- 1/8 cup sugar
- 1/8 cup water
Cooking Directions
- Slice the cucumber very thinly (I use a mandoline).
- Mix the rice vinegar, sugar, and water. Marinate the cucumbers in this mixture for at least four hours.
- Discard the marinade, and enjoy the cucumbers!

Pork belly. AKA pure amazingness.
Pork belly.
I couldn’t tell you the first time I had it, because I don’t remember.
Son’s family eats it, boiled and with a shrimp fish sauce. I’ve learned to love it.

At the halfway point
But that pork belly is not this pork belly. No, this is more comparable to the type of pork belly that you get in a hot steaming bowl of green curry ramen, on a dark, cold, rainy night, in the part of Tokyo that tourists don’t often frequent.

Fin! Look at all that caramelized sugar and fat…
Or in the center of a fluffy steamed bun bought at a food stall in the basement of a department store, after spending a day photographing snow monkeys in snowy Nagano.
At least, that’s what I associate it with.

Slicing into it
The point is, I discovered in Japan that not only do I like pork belly… when done right, I LOVE it. (After all, it is the same cut of meat that bacon’s made from, so what’s not to love?)
Obviously, I had to learn how to make it someday.
When I saw the recipe in Momofuku (I really cannot rave enough about that book. But I won’t post every recipe from the book here, as much as I want to cook every recipe there… you’re going to have to go out and buy it yourself. ~_^), I knew I had to make it. We went out and got a nice, big, beautiful slab of pork belly just a few days later.
A note: two lbs of pork belly (or three, if you follow the recipe), can look like a lot. But, alas, it shrinks while cooking! So don’t worry that it will be too much. I promise there’s absolutely no way you’ll have any problem finishing it all up. Most definitely not. ^_^
Another note: As is, this is amazingly good. But next time, we’re planning on adding a tablespoon or so of five-spice or togarashi (we haven’t decided which yet) to the sugar/salt rub. We sprinkled some on after the fact, and it adds additional depth to the flavor of the pork belly.

And… eat!
Pork belly, from Momofuku.
(Edit: since posting this recipe, I’ve changed the ratios that I use, so I’ve updated the recipe to reflect that. The original recipe calls for 1/4 cup each of sugar and salt. These days I double the sugar, halve the salt (it was WAY too salty), and add the five spice at Son’s request.)
Ingredients
- 2 lbs pork belly, skin removed
- 1/2 cup sugar
- 1/8 cup salt
- 1 tbsp five spice
Cooking Directions
- Mix the salt and sugar; rub onto the pork belly. Refrigerate for 6-24 hours, discard any juices.
- Preheat oven to 450°F.
- Roast pork belly in a close-fitting roasting pan for 1 hour, basting with the rendered fat at 30 minutes.
- Turn the heat down to 250°F, cook for about 1 more hour.
- To get clean slices, it’s recommended to refrigerate the meat before slicing it. But if you’re impatient like me, just go for it.
- Enjoy! Best served with a salad or other fresh vegetables, and a starch like rice or bread.


