Archive for March, 2009

Candied Citrus Peels
Every now and then, my sister sends me a link to a recipe that she thinks I should try. A couple of months ago, she sent me a link to a candied citrus peel recipe. Her birthday was coming up, so I figured heck, why not make them for her? They seemed easy enough, and nearly everyone in my family loves sweet, citrusy foods.
It can be a little tedious slicing all the peels into nice, neat thin slices, and scraping the pith off of them, but it’s very much worth it when you get to try the final result. You really don’t have to roll the finished citrus peels in much sugar at all, otherwise they’ll become almost too sweet. Although I didn’t do so, these would be great dipped in some melted dark or semisweet chocolate.

Sweet, citrusy, yum…
Ingredients
- 2 grapefruits, 3 oranges, or 4 lemons
- 4 cups sugar, plus more for rolling
- 4 cups water
Cooking Directions
- Using a paring knife, make 6 slits along curve from top to bottom of each citrus fruit, cutting through peel but not into fruit.
- Using your fingers, gently remove peel. Reserve fruit for another use.
- Slice each piece of peel lengthwise into 1/4-inch-wide strips.
- Using a paring knife, remove excess pith from each strip and discard.
- Place strips in a large saucepan, and cover with cold water. Bring to a boil, then drain. Repeat at least twice.
- Bring sugar and water to a boil, stirring occasionally until sugar dissolves. Stop stirring. Wash sides of pan with a wet pastry brush to prevent sugar crystals from forming.
- Add strips to boiling syrup, reduce heat to medium-low, and simmer gently until strips are translucent, about 1 hour. Remove from heat, and let strips cool in syrup. (Strips in syrup will keep, covered and refrigerated, for up to 3 weeks.)
- Using a slotted spoon, transfer strips to a wire rack placed on a rimmed baking sheet.
- Wipe off excess syrup with paper towels, then roll strips in sugar.
- Arrange in a single layer on a wire rack, and let dry for at least 30 minutes.
- Sugared peels will keep, covered at room temperature, for up to 2 weeks.
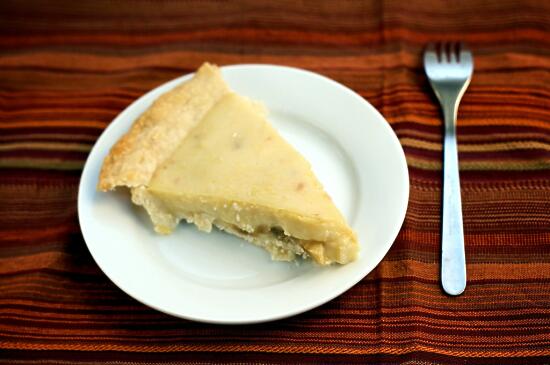
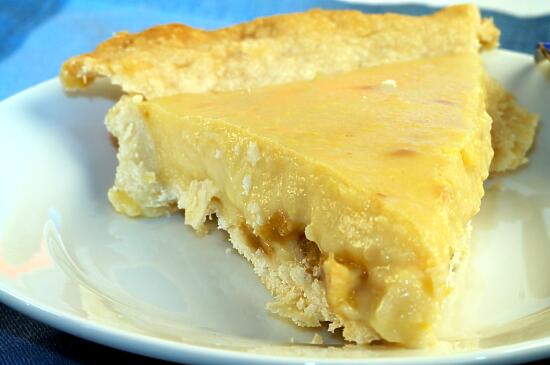
Banana Cream Pie
Pies used to be the bane of my existence. A year ago, I couldn’t make a proper pie to save my life. My apple pies looked like turkeys, and my lemon meringues never set. But suddenly, that has all changed.
The pie revolution started with this Thanksgiving pie, which was a hit with both Son’s family and mine. And now… well… I’ve gained so much pie-making confidence, that I have no problem baking up a pie on a whim!
… for Pi Day, of course!
That’s exactly what happened with this banana cream pie. I realized yesterday that today is Pi Day, and suddenly got a craving for banana cream pie. Never mind that I only had one banana (the recipe calls for four) and that it was already late in the day – I was going to have my pie.
And damn, was it good.
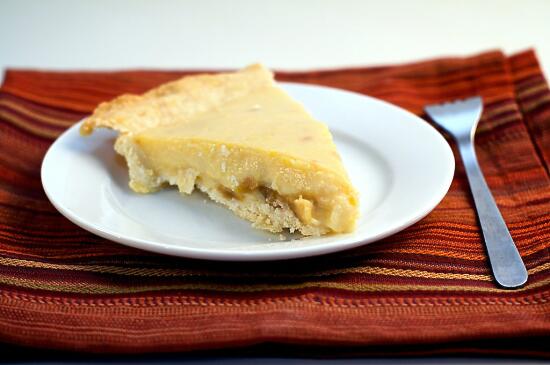
(We’ve already eaten half the pie. It’s that good.)
Banana Cream Pie adapted from allrecipes.com.
Ingredients
- 3/4 cup white sugar
- 1/3 cup all-purpose flour
- 1/4 teaspoon salt
- 2 cups milk
- 3 egg yolks, beaten
- 2 tablespoons butter
- 1 1/4 teaspoons vanilla extract
- 1 (9 inch) pie crust, baked
- 4 bananas, sliced
Cooking Directions
- Bake the pie crust.
- In a saucepan, combine the sugar, flour, and salt. Add milk in gradually while stirring gently.
- Cook over medium heat, stirring constantly, until the mixture is bubbly. Keep stirring and cook for about 2 more minutes, and then remove from the burner.
- Stir a small quantity of the hot mixture into the beaten egg yolks, and immediately add egg yolk mixture to the rest of the hot mixture.
- Cook for 2 more minutes; remember to keep stirring.
- Remove the mixture from the stove, and add butter and vanilla.
- Stir until the whole thing has a smooth consistency.
- Slice bananas into the cooled baked pastry shell. Top with pudding mixture.
- Chill the pie for at least three hours, or until the pudding has set.
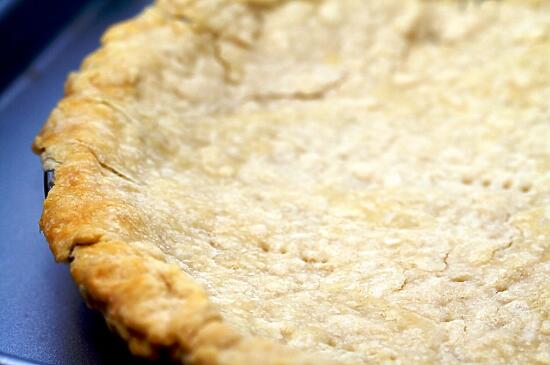
Yummy, flaky pie crust…
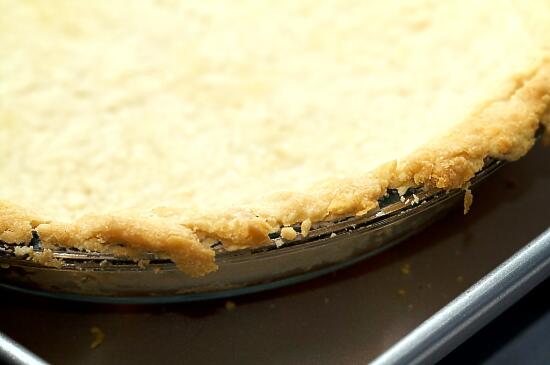
Late yesterday afternoon, I realized that today is Pi Day. Today’s 3/14… pi is 3.14… yeah. So, nerd that I am, of course I just had to make pie for today. Thankfully, the pie crust recipe I use is easy as can be – only three ingredients, super quick to make, and so yummy that I’ve often asked my mom to make an extra crust, just so I can eat it by itself.
Of course, this is my maternal grandmother’s recipe. Because obviously, Grandma’s recipes are always the best.
… and so easy to make!
Ingredients
- 1 1/3 cups all-purpose flour
- 1/2 cup shortening
- 1/4 tsp salt
- 2 tbsp water
Cooking Directions
- Preheat the oven to 400° F.
- Using a pastry cutter, food processor, or two knives, cut the flour, shortening, and salt together until you get a well-blended, crumbly mixture.
- Add the water.
- Knead into a ball of dough, adding a little more water if needed to hold the dough together.
- Turn out onto a sheet of waxed paper, then cover the dough with another sheet of waxed paper.
- Roll the dough out into a large, flat circle, a few inches wider than the circumference of your pie plate.
- Transfer the dough to your pie plate, making sure it’s snug against the bottom and sides of the pie plate.
- Crimp the dough around the edges of the pie plate.
- Using a fork, poke holes around the bottom of the pie crust, so it doesn’t poof up during baking.
- Bake for 15 minutes, or until it is slightly golden brown around the edges.
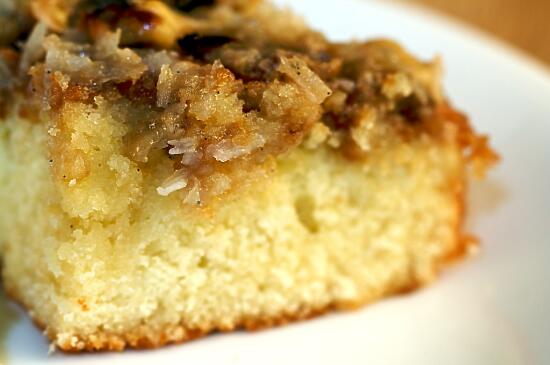
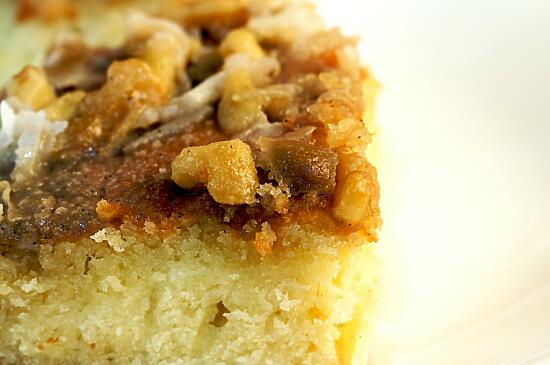
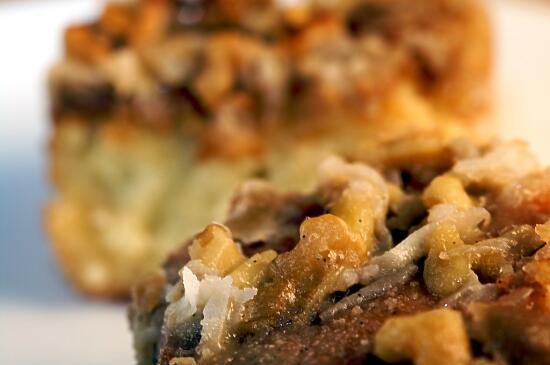
Hot Milk Cake
Recently, my dad celebrated his birthday. These days, since I’ve discovered a love for cooking and baking, it only makes sense for me to bake something every time a family member or close friend has a birthday.
As long as I can remember (and probably since before I was born), my dad’s favorite cake has been this Hot Milk Cake. Known as such because, you guessed it, it uses hot milk as one of the main ingredients. It’s a slightly dense, moist cake, with a delicious caramelized frosting. Although it is fantastic fresh out of the oven, it’s even better if you let it sit for a few hours and allow the cake to soak up some of the frosting.
Ingredients
- 2 eggs
- 1 c granulated sugar
- 1 c all-purpose flour
- 1/8 tsp salt
- 1 tsp baking powder
- 1/2 c milk
- 1 tbsp unsalted butter
- 6 tbsp unsalted butter, melted
- 2/3 c brown sugar
- 1/4 c heavy whipping cream
- 1/2 c unsweetened, shredded coconut
- 1/2 c walnuts, chopped
- 1/2 tsp vanilla extract
Cooking Directions
- Preheat the oven to 350° F.
- Line an 8″ square cake pan with parchment paper.
- Beat eggs until light and thick.
- Slowly add sugar.
- Beat with a spoon for 5 minutes, or 2 1/2 minutes with an electric mixer.
- Sift the flour, salt, and baking powder together, then fold into the egg and sugar mixture all at once.
- Heat the milk in a saucepan until it is hot but not boiling.
- Melt 1 tbsp of butter into the hot milk.
- Add all at once to mixture. The folding in of dry ingredients and adding milk should take only 1 minute.
- Pour the cake batter into the prepared pan.
- Bake for 30 minutes.
- To make the frosting, combine 6 tbsp of melted butter, brown sugar, cream, coconuts, walnuts, and vanilla extract.
- Spread the frosting over the warm cake.
- Brown the top of the frosted cake lightly in a broiler.
- Enjoy!
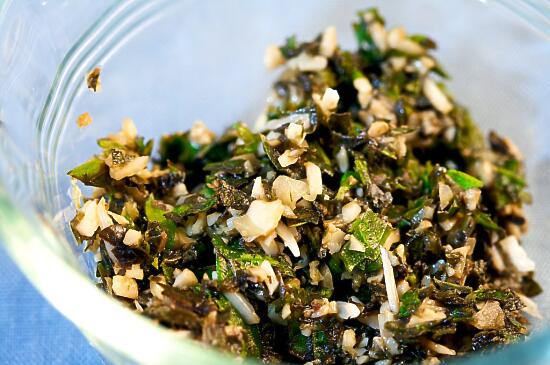
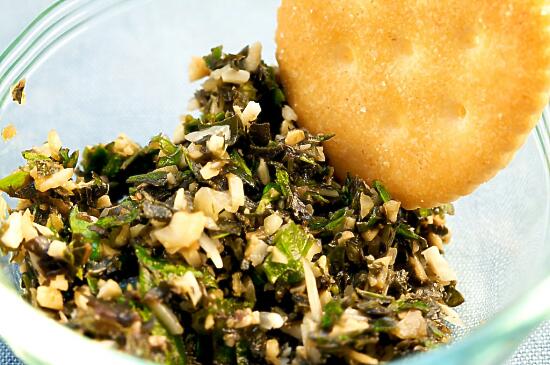
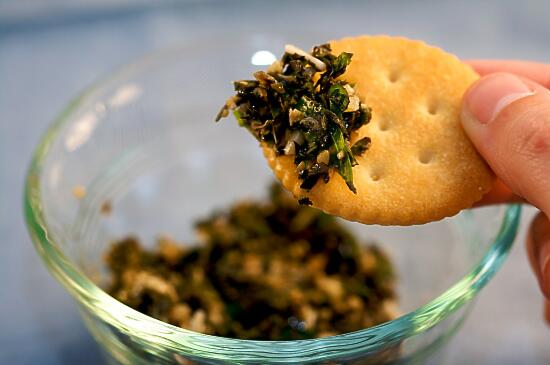
Basil Pesto
Every once in a while, I make a recipe that calls for basil. So of course, I go to the store and buy one of those big bunches of it. Problem is, I’m not a huge fan of basil… so after I’ve used the few leaves I needed for whatever recipe, the rest of the basil just sits and goes bad.
Obviously, I can’t let that happen, so I had to find a way to use up the basil. What better way than pesto? It’s super easy to make, and with Son around… it’s gone in a day. Thank goodness, because now that I’m actually growing basil… I’ll need a way to use it all up.
Dip…
I found this recipe on the food blog, Equal Opportunity Kitchen.
Ingredients
- 2 c fresh basil leaves, packed
- 1/2 c freshly grated Parmesan cheese
- 1/2 c extra virgin olive oil
- 1/3 c walnuts
- 3 medium sized garlic cloves, minced
- Salt and freshly ground black pepper, to taste
Cooking Directions
- Blend all the ingredients together in a blender or food processor.
- Enjoy!
… and eat!