Archive for July, 2009
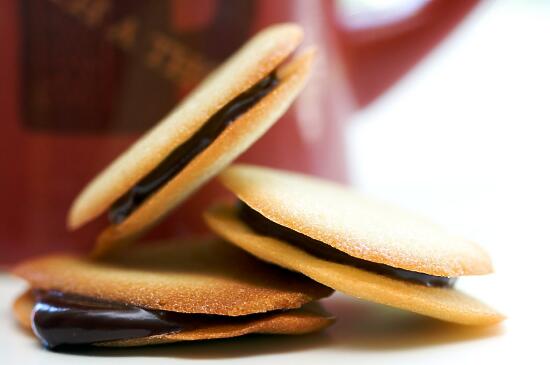
Milan Cookies
The July Daring Bakers’ challenge was hosted by Nicole at Sweet Tooth. She chose Chocolate Covered Marshmallow Cookies and Milan Cookies from pastry chef Gale Gand of the Food Network.
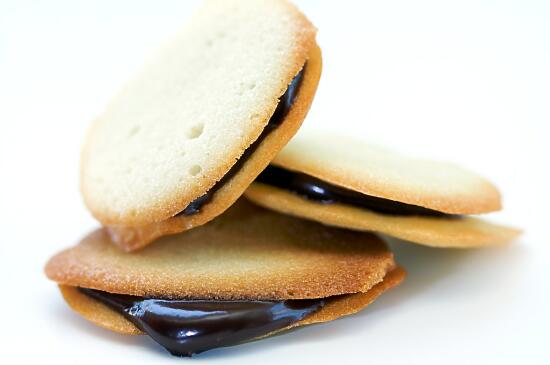
The cookies are terribly addictive
Milan(o) cookies have always been a staple at my house. Growing up, we always had one of those bags, with the five cookies in each paper cup, sitting in our pantry. Since I associate them with my family, it’s no wonder that the moment I saw this Daring Baker’s challenge I knew I had to make them for them. And since the 4th of July was coming up… well, that was a perfectly fine excuse for me.
These cookies… they’re addictive. Consider yourself forewarned. I must have eaten 20 of the cookies just by themselves, snitching one from the baking sheet every time I walked past – before I even made the filling. Oh man. They’re good. Thin, crispy, with a citrusy sweetness that won’t let you eat just one. These were definitely a success in my book.
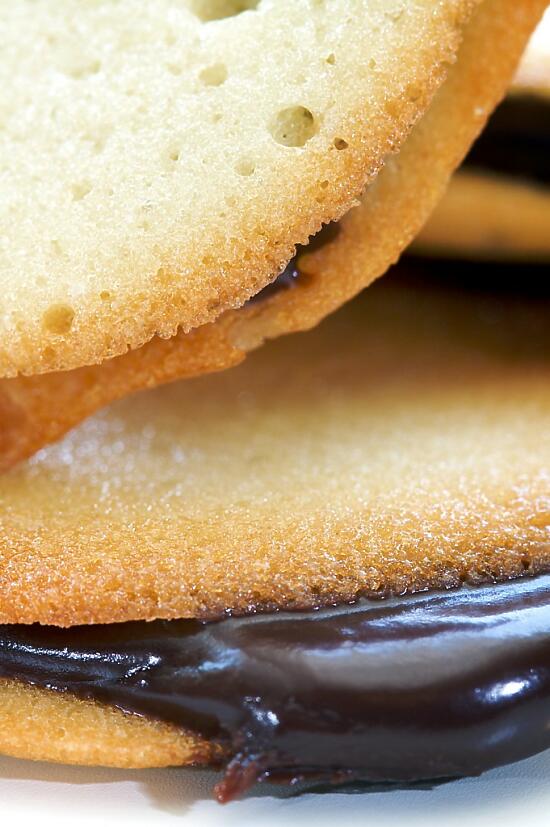
And who doesn’t like a filling of chocolate?
Ingredients
- 12 tbsp unsalted butter, softened
- 2 1/2 c powdered sugar
- 6 egg whites
- 2 tbsp vanilla extract
- 2 tbsp lemon extract
- 1 1/2 c all-purpose flour
- 1/2 c heavy cream
- 8 oz semisweet chocolate, chopped
- the zest of 1 orange
Cooking Directions
- Preheat the oven to 350°F.
- Cream the butter and the sugar.
- Add the egg whites gradually and then mix in the vanilla and lemon extracts.
- Add the flour and mix until just well mixed.
- With a small (1/4-inch) plain pastry tip, pipe 1-inch sections of batter onto a parchment-lined sheet pan, spacing them 2 inches apart as they spread. (And they WILL spread.)
- Bake for 10 minutes or until light golden brown around the edges. Let cool on the pan.
- While waiting for the cookies to cool, in a small saucepan over medium flame, scald the cream.
- Pour the hot cream over the chocolate in a bowl, whisk to melt chocolate, add zest and blend well.
- Set aside to cool (the mixture will thicken as it cools).
- Spread a thin amount of the filling onto the flat side of a cookie while the filling is still soft and press the flat side of a second cookie on top.
- Repeat with the remainder of the cookies.
Read More » 11 Comments
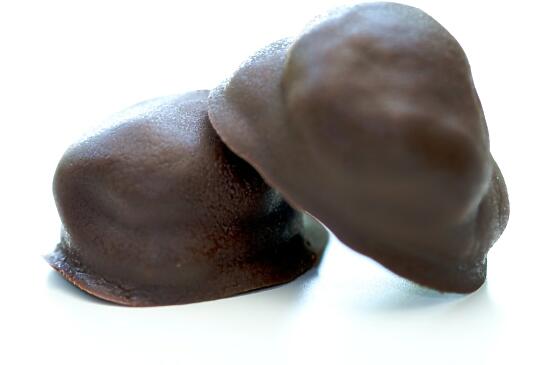
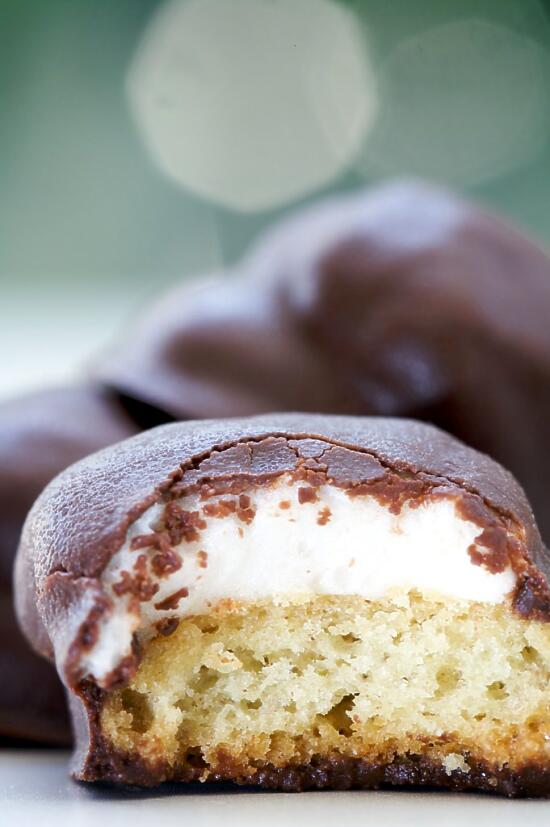
Mallow cookies
The July Daring Bakers’ challenge was hosted by Nicole at Sweet Tooth. She chose Chocolate Covered Marshmallow Cookies and Milan Cookies from pastry chef Gale Gand of the Food Network.
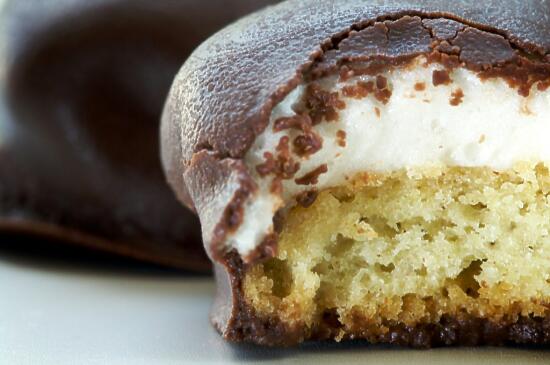
So maybe my marshmallows ended up a little lumpy…
There is no other cookie I associate with my mother more than mallow cookies. For Christmas, Mother’s Day, her birthday… she would always get at least one box of chocolates (usually See’s), and a package of Marshmallow Pinwheels (like these mallow cookies). So it was no wonder when I saw that these were one half of this month’s Daring Baker’s challenge, I instantly thought, “I have to make these for mom.”
Making these was… a bit of an adventure. Not in a bad way… or at least, not too much. Instead of the predicted 2 dozen cookies, I got… 200. Heh. And then my marshmallows refused to firm up, even when I used a different recipe… so I put them in the refrigerator and they firmed up a little too much. Oops. So instead of pretty little marshmallow cookies, my marshmallows ended up a bit lumpier than I would have preferred. And I had a whole extra batch of marshmallows to eat (woe is me!). To top it all off, the chocolate coating refused to set. So I had to keep them in the refrigerator, lest the coating melt and get all over everything.
Cookies 3, Allison 0.
So I brought the refrigerated, lumpy mallows to my family’s 4th of July celebration (along with the milan cookies that I’ll post later today). Within a minute of trying the first one, my mom had eaten… five. Yep, you heard me right. And then she stuck them back in the fridge so she wouldn’t finish the whole container of them in one sitting. I would certainly consider that a success, wouldn’t you agree?
My mom made us take some of the cookies back home, so she wouldn’t eat them all. Because somehow, I don’t think she would have had any problem finishing all two hundred cookies, if we had left them there. So we took about a third of them back home… and I made Son take them to his coworkers. Who very much enjoyed them.
I win.
… but they were still really, very good.
Ingredients
- 3 c all-purpose flour
- 1/2 c sugar
- 1/2 tsp salt
- 3/4 tsp baking powder
- 3/8 tsp baking soda
- 1/2 tsp ground cinnamon
- 12 tbsp unsalted butter
- 3 eggs, whisked together
- 1/4 c water
- 1/4 c light corn syrup
- 3/4 c sugar
- 1 tbsp powdered gelatin
- 2 tbsp cold water
- 2 egg whites, room temperature
- 1/4 tsp pure vanilla extract
- 12 oz semisweet chocolate
- 2 oz cocoa butter or vegetable oil
Cooking Directions
- In a mixer with the paddle attachment, blend the flour, 1/2 c sugar, salt, baking powder, baking soda, and cinnamon.
- On low speed, add the butter and mix until sandy.
- Add the eggs and mix until combined.
- Form the dough into a disk, wrap with clingfilm or parchment and refrigerate at least 1 hour or up to 3 days.
- When ready to bake, grease a cookie sheet or line it with parchment paper or a silicon mat.
- Preheat the oven to 375°F.
- Roll out the dough to 1/8-inch thickness, on a lightly floured surface. Use a 1 to 1 1/2 inche cookie cutter to cut out small rounds of dough.
- Transfer to the prepared pan and bake for 10 minutes or until light golden brown. Let cool to room temperature.
- In a saucepan, combine the water, corn syrup, and 3/4 c sugar, and bring to a boil until “soft-ball” stage or 235°F on a candy thermometer.
- Sprinkle the gelatin over the cold water and let dissolve.
- Remove the syrup from the heat, add the gelatin, and mix.
- Whip the whites until soft peaks form and pour the syrup into the whites.
- Add the vanilla and continue whipping until stiff.
- Transfer to a pastry bag.
- Pipe a “kiss” of marshmallow onto each cookie. Let set at room temperature for 2 hours.
- Melt the chocolate and cocoa butter together in the top of a double boiler or a bowl set over barely simmering water.
- Line a cookie sheet with parchment or silicon mat.
- One at a time, gently drop the marshmallow-topped cookies into the hot chocolate glaze.
- Lift out with a fork and let excess chocolate drip back into the bowl.
- Place on the prepared pan and let set at room temperature until the coating is firm, about 1 to 2 hours.
Note: if you don’t want to make your own marshmallows, you can cut a large marshmallow in half and place on the cookie base. Heat in a preheated 350°F oven to slump the marshmallow slightly, it will expand and brown a little. Let cool, then proceed with the chocolate dipping.

Pecan Pie Macarons
Every now and then, I come across a food that simply intrigues me. One that I’ve never had before, but that people often talk about and I think I would like to try it, even if people don’t always like said food. One such food was brussels sprouts (which I tried for the first time earlier this year and discovered I quite enjoy them.) Another was macarons. Not that you can blame me. After seeing them so often on
Helene’s blog and on other food blogs around the internet, I just had to know what this new, fascinating dessert that I had never seen before tasted like.
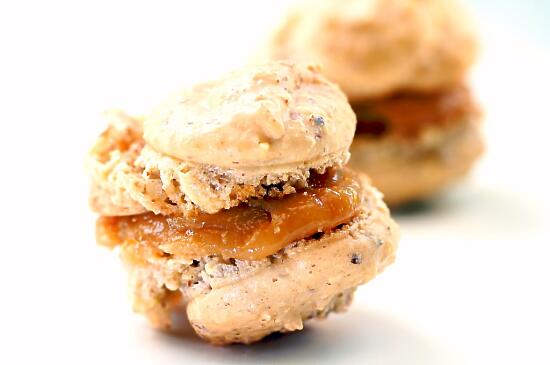
So they’re not the prettiest macarons…
So, on a whim, I baked up a batch. Well, not quite on a whim. I didn’t actually get around to baking them until a week after I decided I wanted to… at first I had no almonds, then I had no time, and then… well. Here they are.
These macarons… oh man. The first bite… heaven. The second… euphoria. Â Oh my goodness. Â By far the best cookies (or cookie-type baked goods) that I’ve ever had.
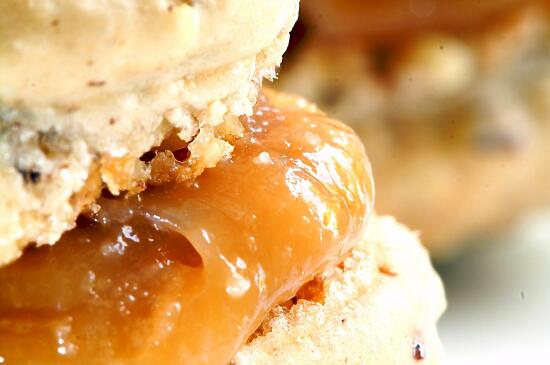
…but with that oooey gooey caramel…
Here’s the recipe, which I slightly adapted from
Tartelette’s Pecan Pie Macarons.
Mine didn’t turn out nearly as pretty as hers did. I have a feeling I might have piped the macarons too thickly on the parchment paper, so when baking they may have risen too much and then fallen over so they ended up lopsided. I also opted to leave out the pecan brittle. But they still tasted great, and I would make them again without hesitation.
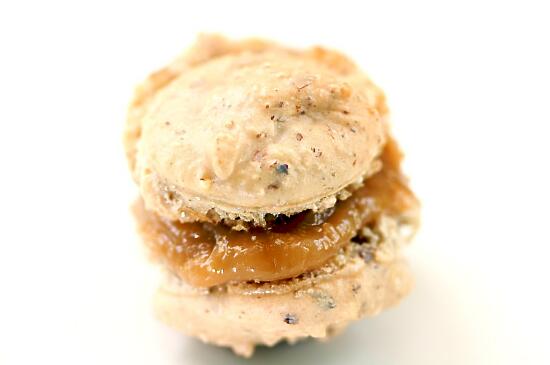
…they’re the best cookies I’ve ever had.
Ingredients
- 3 egg whites (about 90 g)
- 40 g granulated sugar
- 200 g powdered sugar
- 55 g almonds
- 55 g pecans
- 240 g sugar
- 80 ml water
- 115 g salted butter
- 150 ml heavy whipping cream
Cooking Directions
- The day before (24hrs), separate your eggs and store the whites at room temperature in a covered container. If you want to use 48hrs (or more) egg whites, you can store them in the fridge.
- In a stand mixer fitted with the whisk attachment, whip the egg whites to a foam. Gradually add the sugar until you obtain a glossy meringue. Do not overbeat your meringue or it will be too dry.
- Combine the almonds, pecans and powdered sugar in a food processor and give them a good pulse until the nuts are finely ground.
- Add them to the meringue, give it a quick fold to break some of the air and then fold the mass carefully until you obtain a batter that flows like magma or a thick ribbon. Give quick strokes at first to break the mass and slow down.The whole process should not take more than 50 strokes. Test a small amount on a plate: if the tops flattens on its own you are good to go. If there is a small beak, give the batter a couple of turns.
- Fill a pastry bag fitted with a plain tip (Ateco #807 or #809) or a ziplock bag with one tip cut off with the batter and pipe small rounds (1.5 inches in diameter) onto parchment paper lined baking sheets.
- Preheat the oven to 300°F.
- Let the macarons sit out for 30 minutes to an hour to harden their shells a bit and bake for 15-20 minutes, depending on their size. Let cool.
- If you have trouble removing the shells, pour a couple of drops of water under the parchment paper while the sheet is still a bit warm and the macarons will lift up more easily do to the moisture. Don’t let them sit there in it too long or they will become soggy. Once baked and if you are not using them right away, store them in an airtight container out of the fridge for a couple of days or in the freezer.
- In a heavy saucepan set over low heat, combine the sugar and water and heat just until the sugar is dissolved.
- Add the butter. Let it come to a boil and cook until it reaches a golden caramel color.
- Remove from the heat and add the cream (it will splatter, but that’s okay). Whisk to combine and put back on the stove. Let it come to a boil again over low heat and cook 10-15 minutes until you reach a nice creamy consistency.
- Refrigerate for a little while before spreading the caramel onto the shells, so it doesn’t ooze out when you press the shells together. (If it’s too hard when you take it out from the refrigerator, just let it sit at room temperature for a little while until it’s at the right consistency.)
- Place about a tablespoon of sauce on one shell, then top with a similarly-shaped shell. Repeat with all remaining shells. Makes about 20.
Coconut Ice Cream with Saffron
It’s summertime. It’s hot. It’s time for ice cream.
Actually, who am I kidding? It’s always time for ice cream. But now, even more so. Not only because it’s hot, but also because… *drumroll*… I got an ice cream machine!
We got this one, to be exact. From Costco. For $35. (In case you may have had any doubts about the price, Son took a picture of the price tag with his iPhone, because they accidentally overcharged us. We have proof!) It’s a steal, if you ask me. And totally worth it. In the week since we got it, we’ve made 6 batches of ice cream. And… erm… only gotten pictures of two. Not that we’ve been eating them too fast to remember to take pictures… no… of course not. *looks around innocently*
But never fear! There’s no doubt that we’ll be making them again… for pictures, of course. Not because I’m pigging out on ice cream. No, definitely not because of that. It’s the… um… duty of a food blogger, to perfect her recipes then take pictures of them for her adoring readers. (Because you all do adore me… right? … *crickets* …) Yes, such is the life of a food blogger. (Woe is me. ;))
However! I am pleased to tell you that there was one ice cream recipe that I didn’t consume too quickly to take pictures of. Well, actually… the first batch was gone pretty darn quickly. I blame that on Son. But then he suggested I make a second double-batch for his parents, because they would love it! So I did. Then stole some. For pictures, of course.

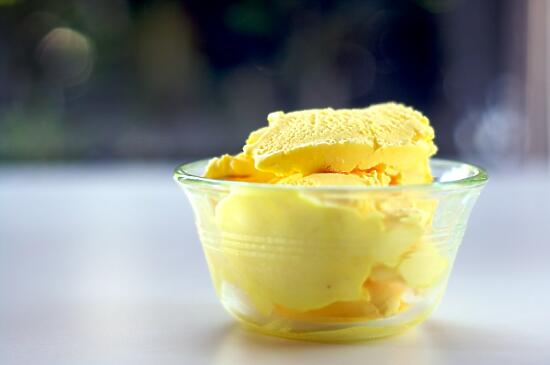
The saffron gives it that beautiful yellow color.
Actually, to be perfectly honest, I didn’t have more than a bite of this ice cream. Really. I’m (*sigh*) very ashamed to admit that… I don’t like coconut. Or at least not much, anyways. Not at all, compared to Son and his family. (Did I mention they’re Vietnamese? I think that might have something to do with it. Maybe. Or not.) Not that it was a problem. Son loved it, his family loved it… and I didn’t have to feel too bad about not so much liking it. But if you like coconut… you’re going to love it as well.
As for the recipe, I adapted it from David Lebovitz who adapted it from the Delicious Days cookbook, I believe. Not that I have the cookbook, so I couldn’t tell you for sure. *gives Son a gentle nudge, reminding him that I would love that cookbook* But it’s good. If you like coconut.
And that gorgeous yellow color of the ice cream? That’s from the saffron. (Yes, I was highly amused watching the pretty yellow swirls trailing from the saffron while the ice cream cooked. Both times. What? I’m easily amused.) It also adds a subtle flavor… very nice. (Quite a rich ice cream indeed, if you get the double entendre. Okay, I’m a dork.)
(One last thing… no making fun of my terrible ice cream styling. I don’t have an ice cream scoop. I’m planning a grand ice cream scoop heist from my parents’ house… soon. But until then, I must relegate myself to scooping ice cream from the container with a spoon. Which unfortunately doesn’t make for such pretty ice cream pictures.)
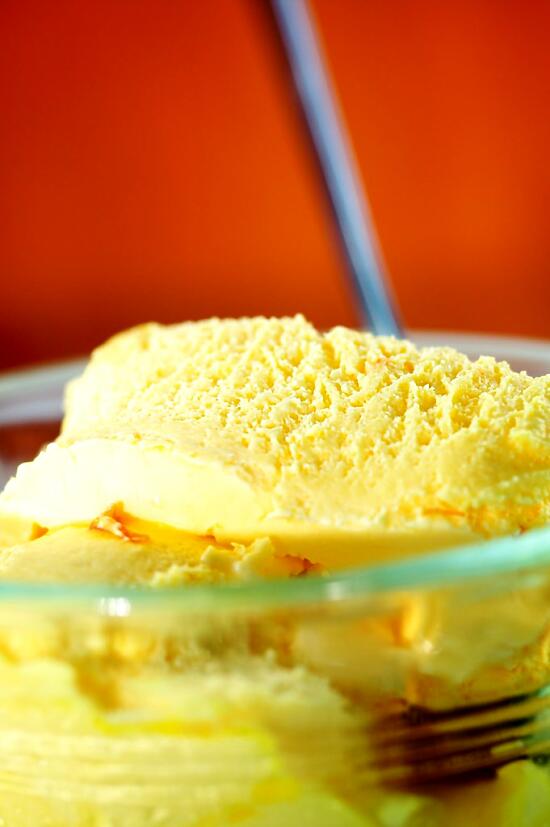
Very rich, very decadent
Ingredients
- 2/3 c heavy cream
- 1 c coconut milk
- 1/4 c white sugar
- scant 1/2 tsp saffron threads
Cooking Directions
- In a medium-sized saucepan, bring all the ingredients to a boil.
- Reduce the heat and simmer gently for ten minutes, stirring occasionally. Remove from heat, and chill the mixture thoroughly.
- Once chilled, freeze in your ice cream maker according to the manufacturer’s directions. Once churned, be sure to scrape any saffron threads clinging to the dasher back in to the ice cream.
Poached scallops, edamame, and various powders
When I make a dish, I want to like it. I really do. But it seems all too often these days, I end up making dishes that involve way too much effort for a final result that’s just… underwhelming.
Unfortunately, such was the case with this dish. Originally, the recipe called for skate wings, green beans, and different flavor powders. So I’m willing to accept that my dislike of the dish could be due to the changes I made to it. But given how often I talk about sustainable seafood over on Sushi Day, I couldn’t possibly use the incredibly unsustainable skate wings in my dish. So I opted for the more sustainable scallops.
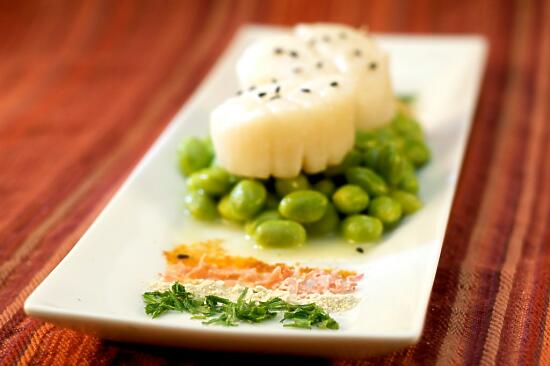
The best part of this dish, in my opinion, was the edamame – cooked in the beurre monte, it was actually quite good. But the scallops were bland (which makes me sad because I normally love scallops) and the powders weren’t that great… sadly, not worth the effort.
If you’d like to see the original recipe, it (and a lot of information about molecular gastronomy) can be found here. (I would link to the blogger who hosted this month’s Daring Cooks challenge, but I believe his blog is down at the moment. Besides, Audax Artifex always has some of the most creative dishes based around the challenge.)
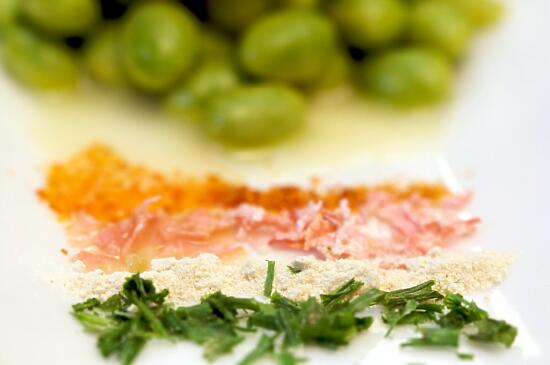
Green onion, wasabi, gari, and togarashi powders
Ingredients
- 8 scallops
- 300g shelled edamame
- sea salt
- 4 sticks butter, cubed and cold
- water
- 16 slices gari
- 8 stalks green onion
- 1 tbsp wasabi powder
- 1 tbsp togarashi
Cooking Directions
- Wash and thoroughly dry the green onion.
- Chop the green onion coarsely.
- On a paper towel, microwave the green onion for on HIGH for 2 minutes. Set aside any fully dried green onion pieces. Microwave the remaining green onion 2 more minutes on HIGH or until fully dried, stopping at 1 minute intervals to set aside dried pieces (so they don’t burn).
- Crumble the green onion finely between your fingers. (Or if you have a mortar and pestle, or a coffee grinder, you can use them to grind the green onion.)
- Dry the gari between two paper towels.
- Microwave on HIGH until fully dry, about 2-3 minutes.
- Crumble into a powder, like you did with the green onion.
- In a small saucepan, bring the water to a boil, remove from heat and whisk in the butter 1 cube at a time. This should from an emulsion – known as a beurre monte. Keep this heated, but under 195 degrees.
- Bring 100g water, 100g beurre monte, and edamame to a boil over high heat. Cook until the water has evaporated (about 3 minutes). When the pan is almost dry, remove it from heat and season with salt.
- Bring 300g water and 300g beurre monte to simmer over medium heat, add scallops and simmer for 2 minutes. Remove the pan from heat and flip the scallops over and let rest in pan for two more minutes. Transfer to warming tray lined with parchment and season with 5 grams of fine sea salt.
- To plate, top a scoop of edamame with the scallops. Garnish the plate with the green onion, gari, wasabi, and togarashi powders.


