Archive for the ‘recipes’ Category
Gloom.
I’m not a fan of gloom.
I love the rain, hate the gloom. This is why, as much as I absolutely adore Seattle, I’m pretty positive I’d never survive a winter there.
I’m sitting at my desk, staring out the window at a dull, grey sky, hoping that it will start to rain again soon, so I’ll hear the pitter patter of drops leaving streaks of water on the windowpane.
But if I leave my desk and wander to the other side of the apartment where the kitchen is, as I’m apt to do on days like this, things are looking much brighter. The blinds are closed to keep out the gloom, and the kitchen lights bathe the room with a warm glow. The heat of the oven chases away the chill in the air, and the smell of something delicious tickles my nose and brings a smile to my face.

Bacon and chive muffins
Gloomy days may be my least favorite of them all, but they’re also the very best days for spending hours baking comforting, delicious things.

Egg and mushroom dumplings
Today’s recipe isn’t for those bacon and chive muffins that I made today, as I made the mistake of using foil muffin cups but not greasing them, so the muffins stuck to the cups horribly. They were insanely delicious though, and I’ll definitely be making them again and sharing the recipe. One of these days.
I’ve already posted about the egg and mushroom dumplings about six months ago, and they’ve become a go-to comfort food recipe for me. I made them last night, while listening to the pouring rain, and shared some with my mom, who had the unfortunate timing to be making the long drive home from my grandmother’s house in the middle of all that rain. They’re perfect in wonton soup. They’re also wonderful comfort food when you’re a bit under the weather.
No, today’s recipe is actually for something entirely else, although just as perfect on a gloomy or rainy day. I bought The Back in the Day Bakery Cookbook sometime last year. Written by Cheryl and Griffith Day (whom I like to think I might be related to, even if only very, very distantly), it’s a delightful cookbook filled with recipes for all sorts of wonderful baked goods.
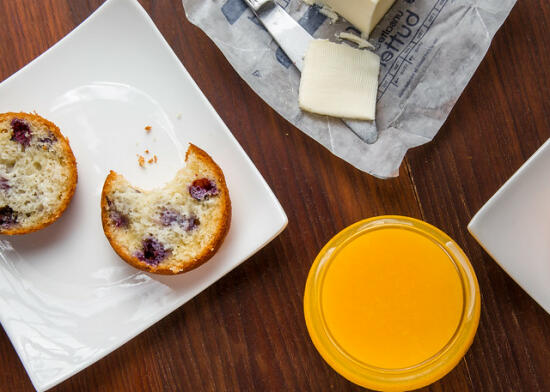
My mother promptly borrowed the cookbook, and a few days later was asking if I had any green cardamom pods (which I did), and could she borrow a few? This all worked out quite in my favor, as I became the happy recipient of several delicious blueberry muffins.
Mom makes the food, Son photographs it, and all I have to do is eat and blog about it? Hey, I could get used to this… π
Blueberry muffins, from The Back in the Day Bakery Cookbook
Ingredients
- 2 cups unbleached all-purpose flour
- 1 cup granulated sugar
- 1 tbsp baking powder
- 1/2 tsp fine sea salt
- 1/4 tsp ground cardamom
- 1/4 cup canola oil
- 4 tbsp unsalted butter, melted
- 1/2 tsp vanilla extract
- 2 large eggs
- 3/4 cup whole milk
- 1 cup fresh or frozen blueberries
- 1/4 cup cardamom sugar (to make the sugar: add 1/2 cup whole green cardamom pods to a 1-quart jar of granulated sugar; let sit at least a few days to infuse the flavor), or coarse sanding sugar for sprinkling
Cooking Directions
- Position a rack in the lower third of the oven and preheat the oven to 350°F. Lightly spray 12 large muffin cups with vegetable oil spray or line them with paper muffin cups.
- In a large mixing bowl, whisk together the flour, granulated sugar, baking powder, salt, and cardamom until thoroughly combined.
- In another bowl, whisk together the canola oil, butter, vanilla, eggs, and milk. Make a well in the center of the dry ingredients, pour in the liquid ingredients, and mix until just combined. Gently fold in the blueberries, using as few strokes as possible; be careful not to overmix.
- With a large ice cream scoop or spoon, scoop the batter into the prepared muffin cups, filling them approximately two-thirds full. Sprinkle the tops with the cardamom sugar or sanding sugar.
- Bake for 25 to 30 minutes, until the muffins are golden brown. The tops should be firm to the touch and a toothpick inserted in the center of a muffin should come out clean. Remove from the oven and let cool for 10 minutes.
- Turn the muffins out of the pan and enjoy warm or at room temperature. The muffins can be stored in an airtight container for up to 2 days.
Tres leches cake
As a food blogger, I’ve been lucky to be able to meet tons of other awesome food bloggers over the last seven (!) years, both over the internet and in person. (Also, cannot believe it’s been more than seven years since I first started blogging on Sushi Day! Now I feel ancient.)
One such awesome person that I got to meet in person a few years ago is Meagan Micozzi, of Scarletta Bakes.

Meagan giving her demo at Surfas
Meagan just released her first cookbook, The New Southwest: Classic Flavors with a Modern Twist . As part of her book tour, she did a demo at the Surfas in Culver City a few weeks ago.
As part of her demo, she made Sweet Potato and Bacon Sopes, her Sunday Salsa, and an Almond-Crusted Pear Tres Leches Cake. All of the recipes are in her cookbook.
We were big fans of everything. I’m not usually much of a salsa person, but I loved the flavors of her Sunday Salsa.

Sunday Salsa
Son, who’s not usually much of a dessert person, went crazy for her tres leches cake.
So much so, that not only did he ask me to make it for a potluck we were going to with his friends a couple of weeks later, but he instantly went and bought me a springform cake pan from Surfas so I could make it – which, from a guy who thinks I have way too much cookware/cookbooks as it is, is a pretty big deal.

Cake papparazi
Side story: When we were planning the potluck, Son’s friend Victor had requested I make pumpkin pie. But when Son tasted the tres leches cake, he said, “Forget the pumpkin pie, they’ll like the tres leches cake better!” I told him, “Fine, but you have to make sure it’s okay with Victor.” The response: “I’m Mexican, what do YOU think? Ooh, maybe I’ll ask my mom to make some sweet tamales for the potluck!”
Victor’s mom, you rock. Those sweet tamales were crazy delicious. Total win. π

Sweet pineapple tamale
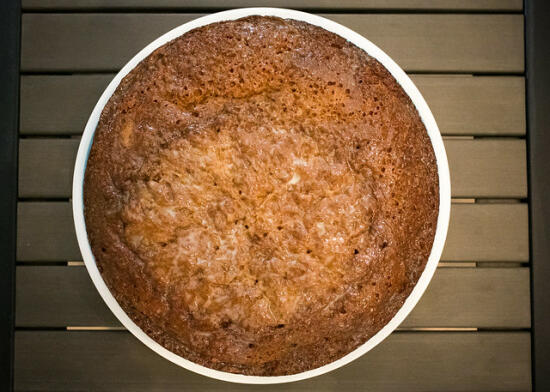
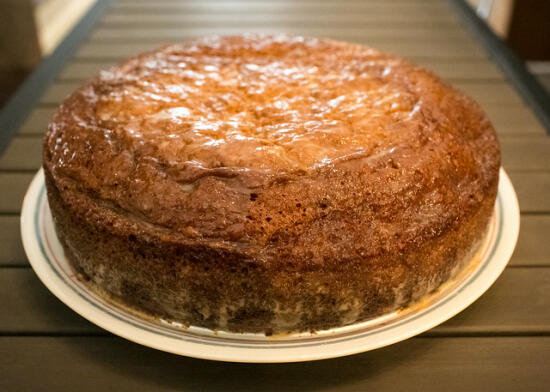
So back to the cake. I couldn’t believe how easy it is to make. Process, press, bake the crust; mix, pour, bake the cake. Honest to goodness, easiest cake I’ve ever baked.
Also, the most delicious thing I’ve baked in a long time. A flavorful, moist cake, with a crust that manages to stay crunchy thanks to the almonds, and a rich but refreshing soak.
I did make a few small changes. I used apple juice instead of pear juice (where does one find pear juice? I have no idea, and didn’t have the time to search for it.) I had to bake it a bit longer than the recipe called for, but I have a crappy old oven that doesn’t like to stay at the temperature you set it to (turn the dial to 350°F and I end up with a 325°F oven; set it to 400°F, and I’ve come back to smell something burning and my oven thermometer showing 500°F. Such an awesome oven. -_-). Lastly, I didn’t remove the springform ring before soaking the cake, since I knew it would be difficult to transport. So I just poured over the tres leches mixture a little bit at a time the night I baked it, and then put it in the refrigerator overnight to let it soak everything up.
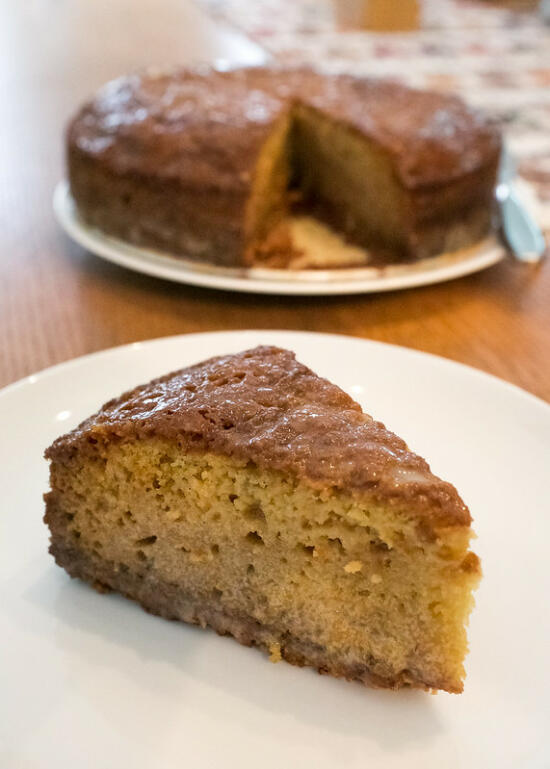
Best cake I have ever made!
Guys, you have to make this cake. I’m not kidding. We hadn’t even finished the first cake, and Son was already asking when I was going to make it again! And it was a total success at the potluck – everybody loved it, several people were asking for the recipe, and one of the guys said it was his favorite thing I had ever brought to a potluck.
Almond-Crusted Pear Tres Leches Cake
from The New Southwest: Classic Flavors with a Modern Twist , by Meagan Micozzi
Ingredients
For the crust:
- 9 whole graham crackers
- 1/2 cup almonds
- 1/2 cup almond meal
- 8 tbsp unsalted butter, melted
For the cake:
- 1 1/2 cups all-purpose flour
- 1 tbsp baking soda
- 4 large eggs
- 1 1/2 cups granulated white sugar
- 1/2 cup whole buttermilk
For the soak:
- 1/4 cup whole milk
- 1 (14oz) can sweetened condensed milk
- 1 (12 fl oz) can evaporated milk
- 1/4 cup pear juice (I used apple juice)
Cooking Directions
- Preheat the oven to 350°F.
- Line a 9-inch springform cake pan with a depth of at least 3 inches with parchment paper and set aside.
- To prepare the crust, break the graham crackers into large pieces and place with the whole almonds in the bowl of a food processor fitted with a steel blade. Process to a coarse meal. Remove to a large bowl and toss together with the almond meal and melted butter. Spread the very damp mixture into the bottom of the pan and bake for 10 minutes. Remove and set aside to cool.
- Meanwhile, to prepare the cake, whisk the flour and baking soda together in a large bowl, and set aside. In another large bowl, beat together the eggs and sugar. Slowly beat in the dry ingredients, alternating with the buttermilk and mixing just until you have a uniform batter. Pour the batter over the crust and bake for 45 to 50 minutes or until a cake tester inserted into the center of the cake comes out clean. Remove baked cake from oven and set aside to cool for at least 10 minutes before unmolding.
- Meanwhile, to prepare the soak, whisk the whole milk, condensed milk, evaporated milk, and pear juice together in a large bowl. Once the cake has cooled, release it from the pan, remove the parchment paper, and set the cake on a rimmed platter. Using a wooden skewer, poke a series of holes through the top of the cake and pour the soak over top. Set the cake aside to allow the soak to be absorbed. The cake can be served chilled from the refrigerator or at room temperature.
Disclaimer: This post does contain an affiliate link.
Cookie butter cookies
Some might say I’m an overachiever.
I say, this is my only good excuse to bake cookies all year, so I’m going to take full advantage of it, gosh darn it!
S’mores cookies
So, yes. I baked three different types of cookies to send to TiAn of Unruly Bliss, Diana of Life Tastes So Good, and Laurie of Food is Love for this year’s Great Food Blogger Cookie Swap.
We were technically only supposed to bake one type of cookie, and send a dozen to each of our three matches.
S’mores cookies
But considering Son and I both work from home (no coworkers to fatten up) and neither Son nor I really eat that many sweets (ignore the fact that Son was ready to totally demolish this tres leches cake that I’ll be posting about soon), there just aren’t that many opportunities in my life to bake cookies.
Sweetened condensed milk cookies
Binge baking. It’s totally a thing.

Milano Cookies
Plus, have I mentioned that I got some pretty awesome cookies in return? Brittany of Life of a Bama Girl sent me some delicious Milano Cookies (which my mom promptly stole – these are one of her favorite types of cookies!) (I made something similar a few years ago).

Almond Tartlettes
Janet of Simply So Good sent some fantastic Almond Tartlettes. Son LOVED these.

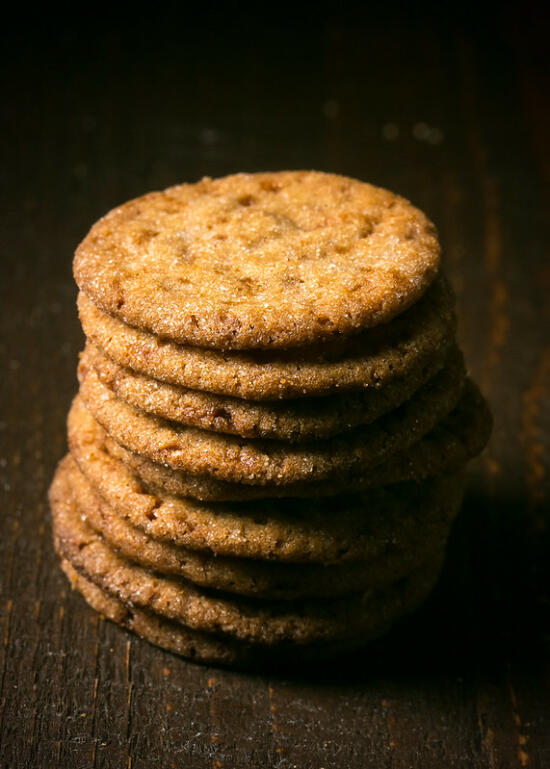
Cookie butter cookies
In addition to the Sweetened Condensed Milk Cookies and Gooey Stuffed S’mores Cookies that I made, I also made these Cookie Butter Cookies from Willow Bird Baking.
These were my favorite.
Super easy to make (they’re like peanut butter cookies, except with cookie butter! Genius.), they result in lots of thin, crispy, gingerbread-y cookies. LOVE. (Also, I accidentally realized that if you let them sit out for a day or two and get a little stale, they get nice and soft, which is also wonderful.)
P.S. If, like me, you haven’t tried cookie butter up until now, just do yourself a favor and go buy a jar. I always roll my eyes when people are like, “ohmygawd this is lifechanging!”, but there’s a possibility I may make an exception here.
Ingredients
- 1/4 cup shortening
- 1/4 cup butter, softened
- 1/2 cup sugar, plus extra for rolling
- 1/2 cup brown sugar
- 1/2 cup crunchy cookie butter (Trader Joeβs Speculoos Spread or Biscoff Spread)
- 1 egg
- 1 1/4 cup all-purpose flour
- 3/4 tsp baking soda
- 1/2 tsp baking powder
Cooking Directions
- Preheat the oven to 375°F and cover two baking sheets with parchment paper.
- In a large bowl, cream together the butter, shortening, and both sugars until light and fluffy (2-3 minutes). Add the cookie butter and egg and combine. Add in the flour, baking soda, and baking powder, and mix until combined, scraping down the sides of the bowl as needed.
- Roll the dough into 1-inch balls and roll in sugar. Place about 2 inches apart on a baking sheet and bake for 7 minutes. Remove from the oven and gently remove from the pan to a cooling rack so the bottoms donβt get too brown. Cool completely and enjoy

S’mores cookies
I love Fridgg.
(Obviously, I’m just a bit biased, but hear me out for a minute.)
The thing I love most about Fridgg is the awesome people we’ve gotten. We have such a freaking awesome community!
It’s so cool what a variety of people we’ve gotten from all around the world – from people who just take photos with their phones in Taiwan, to professional food photographers in Massachusetts, to food bloggers from London, India, Australia, Italy, and so many other places!
Fridgg has definitely become my biggest source for finding new food blogs, and tons of recipes I want to try. (I always know when Son is looking at Fridgg, because he will send me links to all the recipes he wants to try… which pretty much ends up being every recipe posted to Fridgg. π )
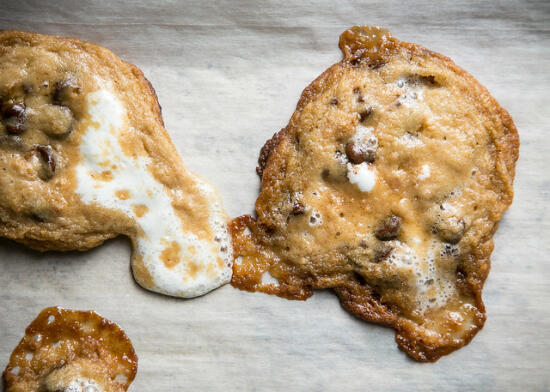
S’mores cookies
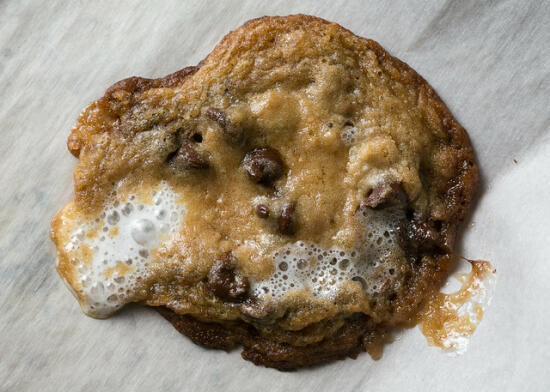
One of the awesome new blogs I’ve had the pleasure of discovering through Fridgg lately is Life Made Sweet. I like to think of Liz as our resident cookie blogger – seriously, her twitter name is @cookieliz! – so obviously in picking cookies to make for this year’s Great Food Blogger Cookie Swap (because this is one of the only excuses I have to make cookies all year, so I can’t just stop at one type!), I HAD to make sure I made one of her cookie recipes.
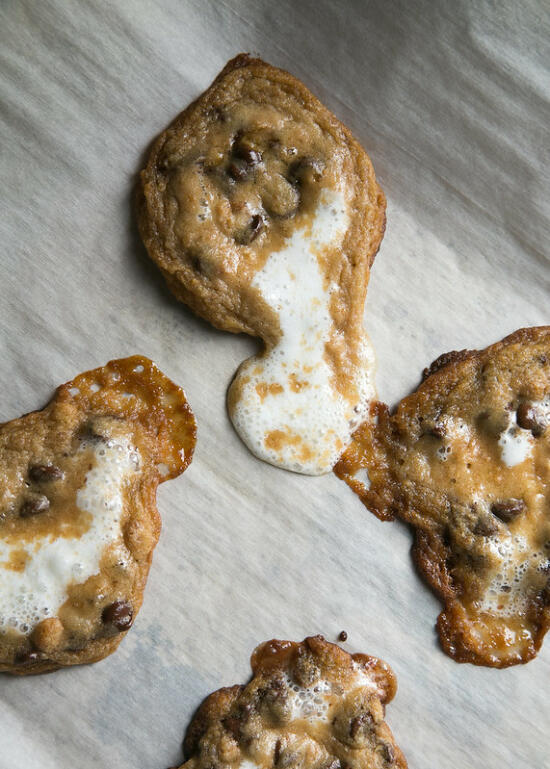
I’ve had my eye on Liz’s Gooey Stuffed S’mores Cookies for a while now (don’t they sound amazing?!), so they were a must-try.
Although mine didn’t turn out quite as pretty as hers, they were delicious! Seriously decadent. Also, sticky. As s’mores should be. π

Oooey gooey!
Ingredients
- 1 1/2 cup unsalted butter, softened
- 1 cup sugar
- 1 cup brown sugar
- 2 large eggs
- 2 teaspoons vanilla extract
- 2 1/4 cups all purpose flour
- 2 cups graham cracker crumbs
- 1 teaspoon salt
- 1 teaspoon baking soda
- 18oz chocolate chips
- 20-24 large marshmallows (If you only have mini marshmallows, take about 8-9 and roll into a ball to stuff inside the cookie)
Cooking Directions
- Cream the softened butter, sugar, and brown sugar in a stand mixer. Add the eggs in one at a time. Add the vanilla and mix.
- In a separate bowl, sift together the flour, baking soda, and salt. Add the graham cracker crumbs and mix together.
- Add the flour and graham cracker crumbs to the wet ingredients in about 3 increments, scraping the bowl down in between. Mix until combined. Add the chocolate chips and mix all together until combined.
- Refrigerate the dough for at least 30 minutes. While refrigerating the dough, preheat the oven to 375°F. Roll each of your large marshmallows into balls.
- Line cookie baking sheets with parchment paper. Using an ice cream scoop, scoop out a portion of cookie dough. Flatten the dough in your hand and wrap the rolled marshmallow in the dough. Wrap the cookie dough around the marshmallow and place about 2-3 inches apart on a parchment lined baking sheet.
- Bake in the preheated oven for 8-10 minutes, rotating the cookie sheet halfway through. Let cool 5-8 minutes.

Condensed Milk Cookies
Son loves sweetened condensed milk. LOVES it. For a guy who doesn’t have that much of a sweet tooth, it’s kind of nutty how much he likes it.
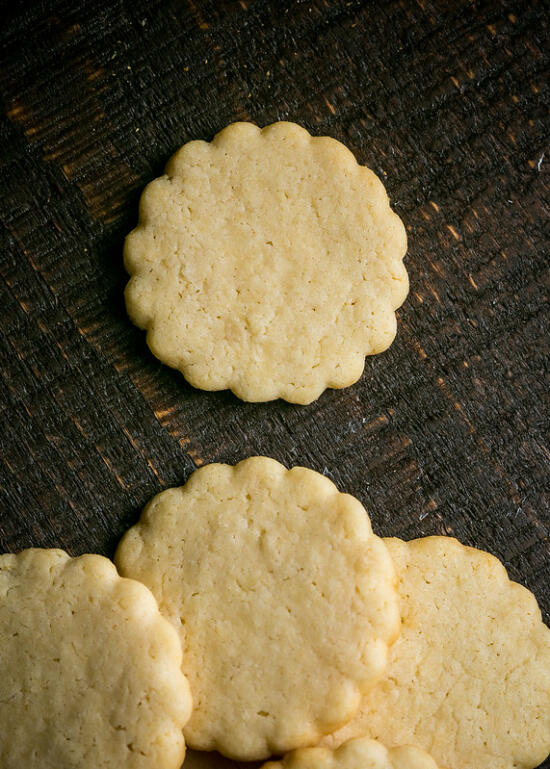
So when I had to figure out what sort of cookies to make for this year’s Great Food Blogger Cookie Swap, Son instantly went for these Condensed Milk Cookies from Jessica of JessKa’s Kitchen. They’re a tasty alternative to your traditional sugar cookies!
Ingredients
- 250g butter
- 3/4 cup sugar
- 1 14oz can sweetened condensed milk
- 3 cups flour
- 1 tsp vanilla extract
- 2 tsp baking powder
- a pinch of salt
Cooking Directions
- Preheat the oven to 325Β°F.
- Cream together the butter and sugar.
- Mix in the sweetened condensed milk.
- Add the remaining ingredients, and knead together to form a stiff dough.
- Roll out the dough to about 1/4″ thick (put your dough in the fridge for 30 minutes to harden a bit if this is difficult).
- Cut out shapes using cookie cutters.
- Place cookies on a baking tray lined with parchment paper and bake for 10 to 12 minutes, or until the bottom of the cookies is starting to brown.


sometime last year. Written by Cheryl and Griffith Day (whom I like to think I might be related to, even if only very, very distantly), it’s a delightful cookbook filled with recipes for all sorts of wonderful baked goods.

