Archive for the ‘recipes’ Category

Spicy Sausages with Red Lentil Mash
Son has never been one to spend a lot of time looking at food blogs. But ever since we launched Fridgg, he looks at the photos our users submit and the blog posts they link to every single day.
So it’s become a much more common occurrence in our household where he’ll send me a link to a Fridgg photo or blog post and say, “this sounds good, can you make it sometime soon?”
Such was the case when he saw Abbe’s photo of her Slow Cooker Spicy Sausages with Red Lentil Mash. Instant begging. 😉

Spicy Sausages with Red Lentil Mash
It turned out so very well. It’s a hearty, filling dish, definitely one I’ll be making again as the weather cools down. There’s something very crave-worthy about it – I made it over a month ago, and just writing about it is making me salivate!
Check out Abbe’s post for the original recipe.
I only made a few changes – I used Chicken and Apple sausages (the ones that Costco sells), and I’m not sure what hot chicken stock is so I just used normal chicken stock. Also, I don’t have a slow cooker, so I just cooked it in the oven at 325°F for 1 hour 15 minutes (I used these instructions to convert the slow cooker time to the amount of time in the oven.)
Next time I make it, I will probably double all the ingredients except for the sausage – it was so good, I wanted more!

Double peanut butter cookies
My mother is adorable.
So I’ll tell you a secret: for a couple of months now, the person writing all the tweets, Facebook posts, and Google Plus posts for Fridgg has been my mother. She gets to make a little extra pocket change, and I get an easy but time-consuming task taken off my hands, so I can spend my time doing other things – like developing new features for Fridgg! Woo!
(All together now: “Hi, Allison’s mom!”)
And let me tell you, she has gotten really into this whole Fridgg thing. “Such and such food holiday is coming up! Here, I found this recipe for you, you should totally make that and post it on Fridgg!” Or, “Hey, I made these cookies, here’s the recipe so Son can take pictures and you can post them on Fridgg.”
I love my mom. 😀

Newspaper clipping
So these cookies are something that she used to make a reeeeeeeaaaally long time ago, when I was a kid. It’s been ages since she made them, but my goodness, I certainly remembered them once I took a bite!
We’re not entirely sure where the recipe came from – my mom says it probably came from an LA-base newspaper (either the LA Times or the Daily Breeze), but we’re not sure who came up with the recipe.
(My mom was agonizing about not being able to properly attribute the recipe – I’m telling you, we’ll make a food blogger out of her yet!)
If you love peanut butter or ordinary peanut butter cookies as much as I do, you’ll love these cookies. They’ve got all the best part of a normal peanut butter cookie, with the addition of a creamy peanut butter filling!

Peanut butter cookies filled with peanut butter!
Ingredients
- 1 1/2 cups flour
- 1/2 cup sugar
- 1/2 tsp baking soda
- 1/4 tsp salt
- 1/2 cup shortening
- about 3/4 – 1 cup peanut butter, divided
- 1/4 cup corn syrup
- 1 tbsp milk
Cooking Directions
- Preheat oven to 350°F. Grease a cookie sheet or line with parchment paper.
- Combine flour, sugar, baking soda, salt, shortening, and 1/2 cup peanut butter. Mix together until it resembles coarse meal. Then add corn syrup and milk. Form into long roll about 2 inches in diameter and wrap in wax paper. Chill dough until firm.
- Cut dough into 1/4-inch thick slices. Place half of dough slices, about 2 inches apart, on ungreased baking sheet. Dab the center of each slice with 1/2 tsp peanut butter. Top with another slice of dough. Seal 2 slices with the prongs of a fork. Bake about 12 minutes or until done.
- Makes about 2 dozen cookies. Enjoy with a nice big glass of ice-cold milk!

Curry udon
As you may be able to tell from the fact that I happily ate curry udon on both of my two trips to Japan, I love curry udon.
It’s been half a year since our last trip (not that you would know it from the fact that I still haven’t finished posting about this year’s trip…), and of course I’m craving all the things that we ate there. Onigiri, ramen, takoyaki… and curry udon.
Shirley from Lovely Lanvin posted a recipe for curry udon on the day we got back from our trip to Japan. I think the woman’s psychic. I’ve been wanting to make it ever since then, so when we had an especially cold December and I wanted comfort food, I finally decided to make her recipe.
I made a couple of small changes, just based on what I happened to have in my kitchen at the time. No mushrooms (didn’t have time to run to the Japanese supermarket to buy them) and I used the vegetarian dashi from the Tsukimi udon recipe that we recently talked about and posted on my Miso Hungry Podcast.
The end result? Honest to goodness, this was the most delicious thing that has come out of my kitchen in a very long time. (And I’ve made some pretty delicious things, like the apple cheddar latkes and especially the scalloped potato gratin with three types of potatoes – and bacon!, so that’s saying something!)
This will definitely be happening again in my kitchen on a regular basis, and I highly recommend you try it out too!
Head over to Lovely Lanvin for the curry udon recipe!

Apple Cheddar Latkes
Before this year, I had never had a latke.
I mean, it’s not as if I’d be expected to have eaten latkes before, since I’m not Jewish. (Obviously, all my Jewish friends have been seriously slacking at bringing this sort of deliciousness into my life.)
But still. As someone who loves food, I feel as if it’s one of those things that should be in my life anyways.
Plus, it just plain looks delicious. (I mean, seriously. How can you go wrong with shredded, fried potatoes?)
(Of course, it’s not like I’ve never had potato pancakes before. But I see so many latke recipes all over the place around this time of year, and something just seems special about them.)
So… I’ve been bookmarking latke recipes pretty much forever. But lately I’ve gotten a little better about making particularly delicious-sounding recipes right away when I find them, especially if I just happen to have all the ingredients in my kitchen.
Which, in the case of these apple cheddar latkes from A Cozy Kitchen… I did! Woohoo! Delicious apple cheddar latkes, come to mama.
P.S. I know these aren’t what I, and probably most of you, perceive as the “traditional” latkes, made with potatoes. However, Wikipedia tells me that these are just fine, and everybody knows you can’t put things on the internet that aren’t true. So apple and cheddar it is!
Plus, the leftovers make a fantastic breakfast, especially topped with a poached or soft-boiled egg… mmmm. Dang it, now I’m craving them again.

A delicious combination
Recipe from A Cozy Kitchen.
Ingredients
- 3 large apples (I used 3 large honeycrisps), peeled, cored and grated
- the juice of 1 lemon
- 1/2 tsp sea salt
- 1/4 cup all-purpose flour
- 1/2 tsp baking powder
- 3/4 tsp freshly ground black pepper
- 1 1/4 cup extra sharp cheddar, grated
- 1 large egg
- vegetable oil
Cooking Directions
- In a medium bowl, toss the grated apples with the lemon juice and sprinkle with the salt. Let stand for five minutes.
- Whisk together the flour, baking powder and black pepper in a separate bowl. In another small bowl, lightly beat the egg and set aside.
- Drain the apples and squeeze out any extra juice. Place them back in the bowl and add the flour mixture and cheese; toss until the apples are evenly coated. Add the egg and mix until completely combined.
- Place a skillet over medium-high heat, and pour in vegetable oil until it is half an inch deep. Once the oil is hot, place heaping tablespoons of the apple mixture into the pan a couple of inches apart, slightly flattening each one with the back of a spoon. Cook the latkes on their for about a minute or two until golden brown, then carefully flip them and cook the other side for an additional minute. Drain on paper towels, then place them in a preheated 200°F oven to keep them warm.
- Repeat with the remaining apple mixture. Serve with a dollop of sour cream and a sprinkling of black pepper.

Lemon Crinkles
Everybody loves getting packages in the mail.
Especially packages of cookies.
And as certain people know, I really like baking and sending packages of cookies to people.

Zesting a lemon
The battle against childhood cancer is also something that’s near and dear to my heart, because my younger brother had leukemia twice, as a child and a teenager. (He’s been in remission for a few years now.)
So when I heard about the 2nd Annual Great Food Blogger Cookie Swap, benefiting Cookies for Kids’ Cancer, I signed up instantly.
We were all required to make a small donation to Cookies for Kids’ Cancer (if you’d like to donate, there’s a donate button at the bottom of the Great Food Blogger Cookie Swap page), and then they sent us each the addresses to three other bloggers who had signed up, and we were required to send a dozen cookies to each of them.

Juicing a lemon
Another requirement was that we had to send cookies that we had never blogged about. So I spent a good bit of time looking through all the cookie recipes I had bookmarked to make in the future. It was a hard decision, but after setting aside the ones that would be too fragile to ship, the ones that seemed overly complicated, and the ones that just seemed too ordinary, I settled on these lemon crinkles.
I had doubled the batch, knowing that I would eat some, and wanted to give some to my mom (who loves lemon sweets), but good gosh, the moment they came out of the oven I was afraid there wouldn’t be any left to ship! There wasn’t anything wrong with the recipe… no, quite the opposite. One bite led to another, and before I knew it I had eaten ten (yes, seriously, ten!) cookies right off the cooling rack.
I promise you I’m not normally this much of a glutton, but with these cookies, especially fresh out of the oven, you just can’t help yourself. They’re light and soft, so it feels like you’re hardly eating anything, and the lemon flavor is refreshing enough that you just want to keep eating more!
My cookies (and some almond toffee covered in chocolate) went off to Brynn, Melissa, and Bonnibella. Hopefully you all enjoyed the cookies and toffee!

Ready to give away for the holidays!
And if you’re wondering what fantastic, delicious cookies I received…
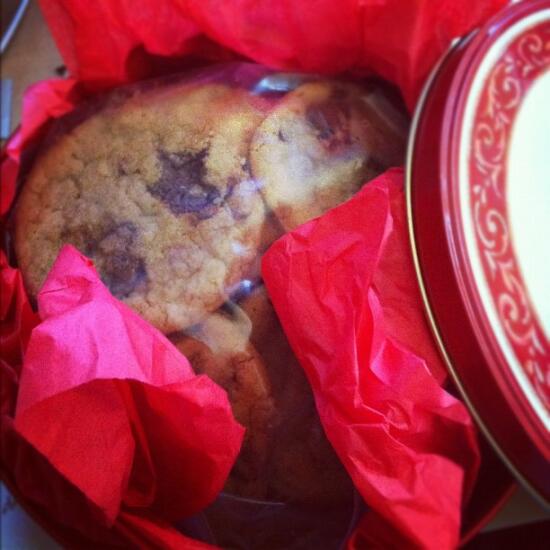
Kate from Fleur-De-Licious sent me Halloween Candy Cookies…
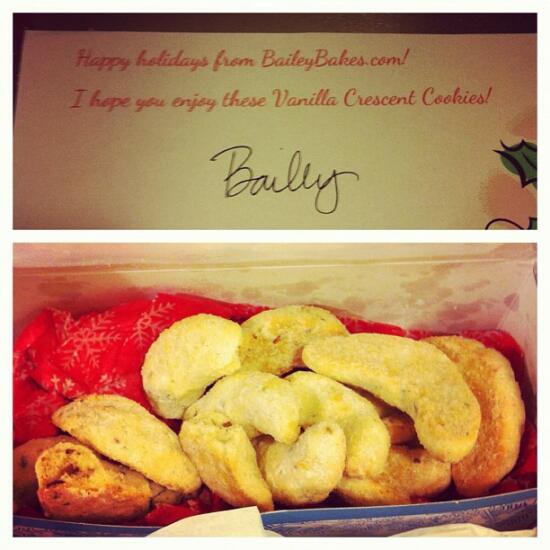
Bailey from Bailey Bakes sent me Vanilla Crescent Cookies…
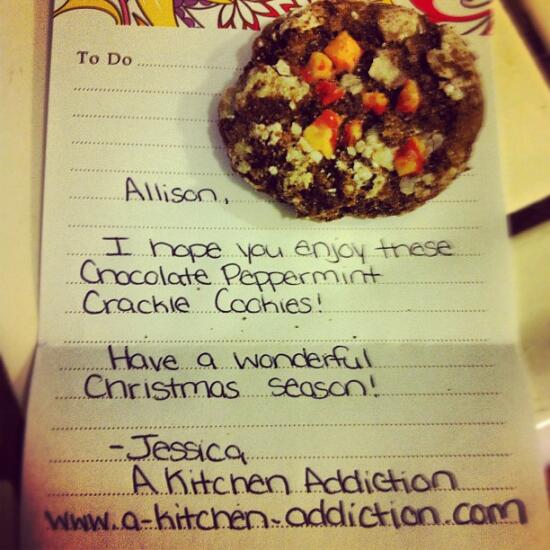
and Jessica from A Kitchen Addiction sent me Chocolate Peppermint Crinkles!
Lemon Crinkles
Recipe from Lauren Brennan
Ingredients
- 1/2 cup butter, softened
- 1 cup granulated sugar
- 1/2 tsp vanilla extract
- 1 egg
- 1 tsp lemon zest
- 1 tbsp fresh lemon juice
- 1/4 tsp salt
- 1/4 tsp baking powder
- 1/8 tsp baking soda
- 1 1/2 cup all-purpose flour
- 1/2 cup powdered sugar
Cooking Directions
- Preheat oven to 350°F. Line your baking sheets with parchment paper, set aside.
- In a large bowl, cream butter and sugar together until light and fluffy. Whip in vanilla, egg, lemon zest, and lemon juice. Scrape sides and mix again. Stir in the salt, baking powder, baking soda, and flour slowly until just combined. Scrape sides of bowl and mix again briefly.
- Pour the powdered sugar onto a large plate. Roll a heaping teaspoon of dough into a ball and roll in the powdered sugar, making sure the entire ball is coated, and shaking off the excess sugar. Place balls on the baking sheet about three inches apart.
- Bake for 9-11 minutes or until the bottoms begin to barely brown and cookies look matte (not melted or shiny). Remove from oven and cool cookies about 3 minutes before transferring to cooling rack. Once cool, store in an airtight container.
- Enjoy!


