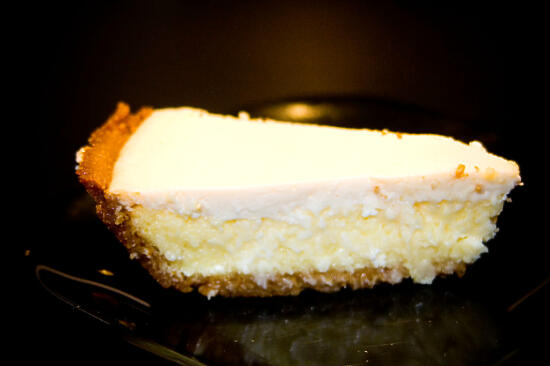
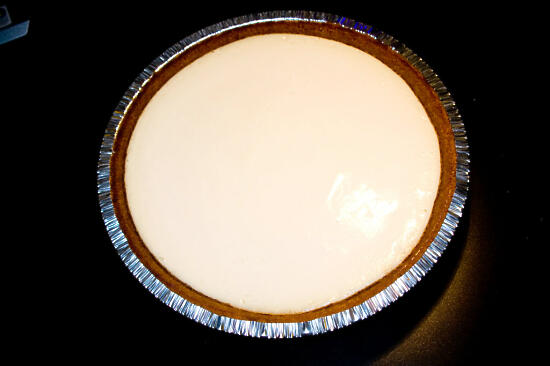
Grandma Day’s Cheesecake
I should not be left alone with a cheesecake. It’s dangerous – both for the well-being of the cheesecake and for my waistline. So when I discovered how incredibly easy the cheesecake that my aunt makes for all our family gatherings really is… well, I can kiss my girlish figure goodbye.
Cheesecake is easily one of my favorite desserts. The crumbly graham cracker crust, the rich, creamy filling… especially the tangy-sweet sour cream topping. Son and I have been known to consume an entire cheesecake in a weekend. An entire cheesecake… for just the two of us. It’s entirely possible we have a cheesecake problem. We might need help. The big problem is, this cheesecake is so ridiculously easy to make. Just mix, bake, mix, bake, refrigerate, eat! Perhaps not quite as easy as those no-bake cheesecakes, or those pre-made cheesecake fillings you can buy, but the tiny bit of added effort is entirely worth it.
Make this cheesecake once, and then try – just try – to not make it again when the first one is gone. It’s just. That. Good.
This is my paternal grandmother’s recipe – my aunt (on my mom’s side) got it from her at my mother’s wedding shower and has made it quite often since then.
Grandma Day’s Cheesecake
Ingredients
Crust:
- 1 ready-made graham cracker crust
Cheesecake:
- 2 eggs
- 1/2 cup sugar
- 1 tsp vanilla
- 8 oz cream cheese
Topping:
- 8 oz sour cream
- 4 tbsp sugar
- 1 tsp vanilla
Cooking Directions
- Preheat oven to 375°.
- Beat eggs until thick.
- Beat 1/2 cup sugar, 1 tsp vanilla, and cream cheese into the eggs, until smooth.
- Bake at 375° for 30 minutes or until firm.
- Cool about 15-20 minutes until top is firm.
- Preheat oven to 400°.
- Mix sour cream, 4 tbsp sugar, and 1 tsp vanilla until well combined.
- Pour on top of cream cheese layer and smooth out.
- Bake at 400° for 10 min or until firm.
- Chill 6 hours or overnight
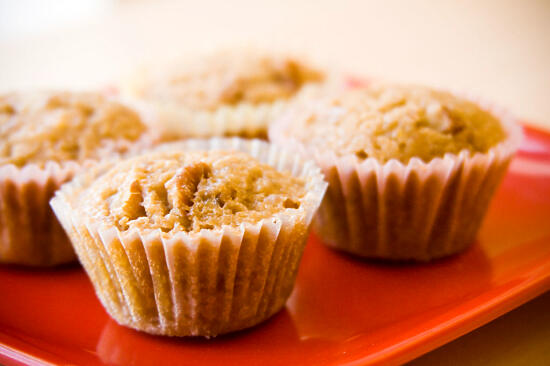
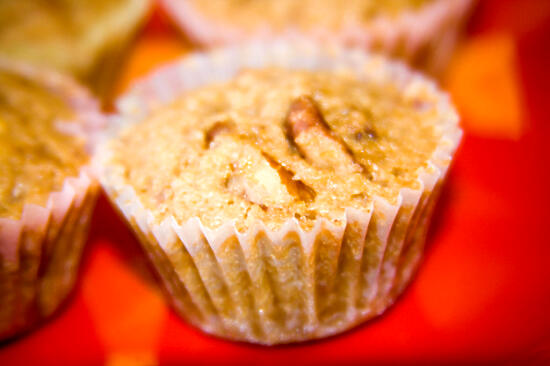
Pecan Pie Muffins
I love pecan pie. Son loves pecan pie even more than I do. Pecan pie is a regular at my family functions – Thanksgiving, Christmas, sometimes even Easter or the Fourth of July. Son first tried pecan pie around the first time he had spinach dip and deviled eggs – at my family’s Fourth of July barbecue in 2005. As much as he loves apple pie, which was the other offering, he couldn’t get enough of my mom’s pecan pie. (No, I will not show you her apple pie recipe… yet. Last time I tried making it, the apple pie ended up looking more like a turkey… epic FAIL.)
I have not yet tried making her pecan pie recipe. As you can see, I do not get along well with pie crusts… I swear they have something against me. However, if I can find something that tastes just like pecan pie but is infinitely easier to make? Heck yeah I’m making it!
That is what happened when I found these pecan pie muffins. They are unbelievably easy to make – only five ingredients, and at most they take half an hour to make. Half an hour! For a recipe – any recipe – that is incredibly fast. You might be thinking, “Sure, they’re quick and easy. But are they any good?” A resounding “Yes!” If I hadn’t stopped him, Son would have downed the entire batch in a day. The pecan pie lover gave these his seal of approval and is, as I type this, asking me to make more. I’d say that’s a good sign.
The original recipe says it makes 18 mini muffins, but I made 36 and could have easily gotten more out of the batch.
Pecan Pie Muffins
Ingredients
- 1 cup chopped pecans
- 1/2 cup all-purpose flour
- 1 cup packed brown sugar
- 2/3 cup butter, melted
- 2 eggs
Cooking Directions
- Preheat oven to 350 F.
- Combine everything in a bowl.
- Spray 2 mini muffin tins about 3/4 full.
- Bake 18 minutes.

Pecan Pie Muffins
Cheese Age
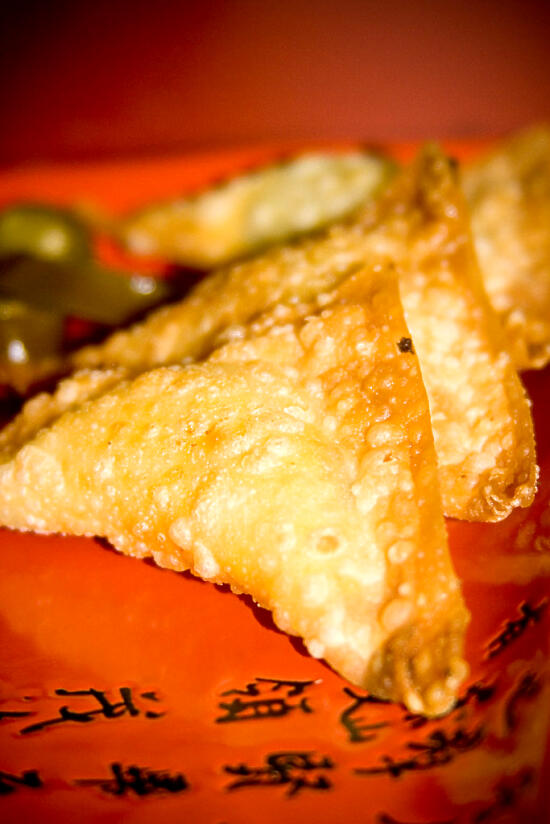
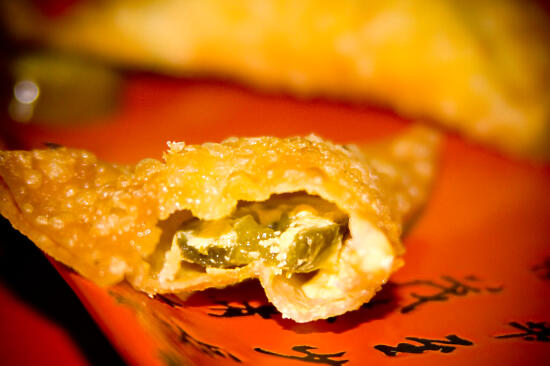
I was apprehensive at first. Although I am learning to love spicy foods, my sensitive little tongue can still only take so much. The first nibble got only fried won ton; the second a bit of melted cheese. The third bite… ohmygoodness spicy! Normally after one bite of overwhelming heat, I would have made Son eat the rest. But with these… more please?
I first tried Cheese Age (pronounced ah-gay) when I took Son to Honda-Ya for his birthday last year. These cheese and jalapeño filled won tons were one dish that we knew we would have to try to replicate at home. Although they were quite spicy (I was grabbing for a glass of water, while Son had no problem at all with them) they are one of the few spicy foods I can’t get enough of.
I’m not the only one who adores them. The first time I made them, I took them to a Christmas party with my mother’s side of the family. Everyone liked them, and my Great-Aunt loved them so much, she kept going back for more and even took the rest of them home with her.
They do take a bit of effort to make, but I promise you it’s worth it. (Great. Now I’ve got myself craving more cheese age. See how delicious they are?) Oh and I know it uses Velveeta, and I’m probably going to be banished from the foodie world because of this, but I really was just trying to replicate the original cheese age the best I could. Although I haven’t tried, you could probably make them with cheddar or some other type of *real* cheese, and they would be just as good.
Cheese Age
Ingredients
- 1 package of wonton skins
- 1 package of Velveeta individual cheese slices
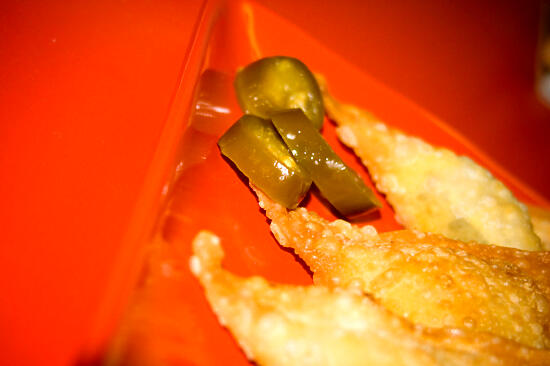
- 1 jar of sliced jalapeños
- vegetable oil
- water
Cooking Directions
- Lay down a wonton skin so one of the corners is pointing towards you.
- Place a jalapeño slice just below the halfway point of the wonton skin.
- Break the cheese slice into thirds.
- Break each third of the cheese slice into pieces, arrange on top of and around the jalapeño.
- Brush the bottom two edges of the wonton skin with water.
- Fold the top half of the wonton skin down over the fillings.
- Press the edges together to seal the wonton.
- Pour enough oil into a frying pan so it is at least an inch deep, heat it until it is hot (sorry, I have no exact temperature for you).
- Place one layer of the filled wontons into the pan.
- Fry wontons until they are golden brown. When we did this, we found that they expanded quite a bit and would start to leak cheese if one of the sides hit the bottom of the hot pan (which is why we want the oil to be deep enough so this doesnt happen.
- Let cool, and enjoy!
Cheese Age


