
Phở bò tái (beef noodle soup)
It’s been four years, five months to the day since Son and I went on our first date. In those four years, he has widened my perspective on a lot of things – especially food. The eighteen-year-old girl who met Son in a ballroom dance club at her university wouldn’t recognize the almost-twenty-three-year-old programmer and food blogger that I’ve become – back then, I wouldn’t go near curry, sashimi, spicy foods, exotic fruits… anything that didn’t look like the Japanese- and Swedish-American foods I grew up with.
Nowadays, as you can see from the things I post about both here and on Sushi Day, my tastes have widened significantly. But oddly enough, there is one ethnic cuisine that I rarely cook in my home – Vietnamese food. Son is Vietnamese – so you’d think I’d be leaping at the opportunity to cook the food he grew up with… right? Not so much… for two main reasons.
First of all, Son lived in Vietnam until his family came to California when he was eleven years old. And, of course, his parents still cook the food they grew up with on a regular basis. So obviously, Son knows Vietnamese food pretty darn well… thus I have a certain level of insecurity when it comes to the dishes he’s eaten all his life – what if I make them terribly? What if… *gasp*… I’m deemed an unsuitable girlfriend for him, because I’m unable to make decent phở?
Secondly, we visit his parents every other weekend. And from every visit, we return with food. Lots of food. Lots of home-cooked Vietnamese food. So unfortunately, while the demand for me to cook anything at all is fairly low, the demand for me to cook Vietnamese food is even lower.
Thus when I discovered this month’s Daring Cooks challenge was phở, chosen by Jaden of Steamy Kitchen, I was excited. Very excited. But also incredibly nervous – what if it wasn’t good enough for him? I would be heartbroken if it ended up being a failed phở. But I set my fears aside, and set to work making the phở bò tái (beef pho) (click the link for the recipe).
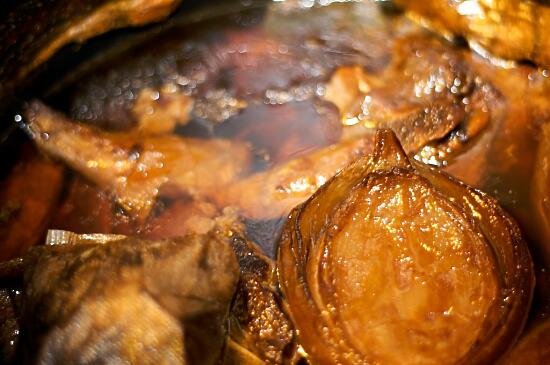
Liquid gold
I did make a few changes to the recipe. Since there isn’t a single decent Vietnamese restaurant near me (I’d likely have to drive all the way to the Little Saigon area of Southern California, which is easily an hour or more away), I couldn’t find the *real* bones used for the broth. You know, those really great ones filled with all the yummy marrow. So I had to make do with what I could find at the grocery store: two pounds of “soup bone” (a large-ish bone with meat attached), and about three pounds of neck bone (also with meat attached).
Because of my inefficiencies in the bone department, I decided to add some extra richness to the broth by using two quarts of beef broth in place of two of the six quarts of the water used in the broth. I also could not, for the life of me, find cardamom pods anywhere during the short amount of time I had to shop before I started the phở. So I used ground cardamom instead. Instead of regular cinnamon, I used a stick of Vietnamese cinnamon that I’ve been hoarding ever since I was lucky enough to be gifted some by Todd and Diane of White On Rice Couple.
Lastly, I upped the cooking time. By a lot. You see, Jaden’s recipe says three hours of cooking is plenty to get all the great flavor from the bones. And I would have believed her. But no. Son insisted that I cook the broth for at least twenty-four hours, because when his dad makes it, he cooks it for days and days and days. And even weeks. So instead I cooked the broth as instructed in the recipe up to the first hour and thirty minutes, then instead of cooking it for only another one and a half hours, I let it simmer for about six more hours that night. Then I refrigerated it over night, and then simmered it again all the next day – about eight more hours.
The verdict? As I mentioned (more than once) on Twitter, the broth is absolutely heavenly. I would have no problem just drinking it by itself, noodles, meat, and other accompaniments be darned. But then I tried the meat that had been attached to the bones, which had been cooking the entire time and was so wonderfully tender it just fell apart in my mouth… *swoon* As for Son, he approved greatly. Which just makes me so incredibly happy, I could burst.
Yep, I’d say this was definitely a huge success. Easily a recipe I’ll be keeping in my repertoire for many years to come.

A wonderful success

Pecan vols-au-vents

Brown sugar pecans
Sometimes time gets away from you. With work, and life, and everything else, sometimes an entire month can disappear before you realize it. Heck, it could even be Christmas before you know it! At least, that’s what it smelled like in my apartment when I was making these… a couple of days later than I was supposed to. (Remember what I said about time getting away from you? Yeah…)
So was all the work worth it? Oh goodness yes. I made some big ones with
macaroni and cheese in them, which were good. Then I made some mini ones and some twists out of the scraps of puff pastry with pecans in a brown sugar sauce (1 cup brown sugar, 1 stick butter, 1/4 cup honey melted together, mix in 1 1/2 cups pecans) – that was
good. It tasted… like the holidays.

Macaroni and cheese vols-au-vents
Ingredients
- 354 g unbleached all-purpose flour
- 142 g cake flour (or 121 g all-purpose flour and 21 g cornstarch)
- 1/2 tbsp salt
- 1 1/4 cups ice water
- 1 lb very cold unsalted butter
- egg wash (1 egg whisked with a little water)
- filling of your choice
Cooking Directions
- Mix the all-purpose flour, cake flour, and salt. Add the water all at once, mixing until the dough forms a ball. The dough will be very moist and pliable and will hold together when squeezed between your fingers.
- Form the dough into a ball, and with a small sharp knife, slash the top in a tic-tac-toe pattern. Wrap the dough in a damp towel and refrigerate for about 5 minutes.
- Meanwhile, place the butter between 2 sheets of plastic wrap and beat it with a rolling pin until it flattens into a square that’s about 1″ thick. Take care that the butter remains cool and firm: if it has softened or become oily, chill it before continuing.
- Unwrap the dough and place it on a work surface dusted with all-purpose flour (A cool piece of marble is the ideal surface for puff pastry) with your rolling pin (preferably a French rolling pin without handles), press on the dough to flatten it and then roll it into a 10″ square. Keep the top and bottom of the dough well floured to prevent sticking and lift the dough and move it around frequently. Starting from the center of the square, roll out over each corner to create a thick center pad with “ears,” or flaps.
- Place the cold butter in the middle of the dough and fold the ears over the butter, stretching them as needed so that they overlap slightly and encase the butter completely. (If you have to stretch the dough, stretch it from all over; don’t just pull the ends) you should now have a package that is 8″ square.
- To make great puff pastry, it is important to keep the dough cold at all times. There are specified times for chilling the dough, but if your room is warm, or you work slowly, or you find that for no particular reason the butter starts to ooze out of the pastry, cover the dough with plastic wrap and refrigerate it . You can stop at any point in the process and continue at your convenience or when the dough is properly chilled.
- Gently but firmly press the rolling pin against the top and bottom edges of the square (this will help keep it square). Then, keeping the work surface and the top of the dough well floured to prevent sticking, roll the dough into a rectangle that is three times as long as the square you started with, about 24″ (don’t worry about the width of the rectangle: if you get the 24″, everything else will work itself out.) With this first roll, it is particularly important that the butter be rolled evenly along the length and width of the rectangle; check when you start rolling that the butter is moving along well, and roll a bit harder or more evenly, if necessary, to get a smooth, even dough-butter sandwich (use your arm-strength!).
- With a pastry brush, brush off the excess flour from the top of the dough, and fold the rectangle up from the bottom and down from the top in thirds, like a business letter, brushing off the excess flour. You have completed one turn.
- Rotate the dough so that the closed fold is to your left, like the spine of a book. Repeat the rolling and folding process, rolling the dough to a length of 24″ and then folding it in thirds. This is the second turn.
- If the dough is still cool and no butter is oozing out, you can give the dough another two turns now. If the condition of the dough is iffy, wrap it in plastic wrap and refrigerate it for at least 30 minutes. Each time you refrigerate the dough, mark the number of turns you’ve completed by indenting the dough with your fingertips. It is best to refrigerate the dough for 30 to 60 minutes between each set of two turns.
- The total number of turns needed is six. If you prefer, you can give the dough just four turns now, chill it overnight, and do the last two turns the next day. Puff pastry is extremely flexible in this regard. However, no matter how you arrange your schedule, you should plan to chill the dough for at least an hour before cutting or shaping it.
- Line a baking sheet with parchment and set aside.
- Using a knife or metal bench scraper, divided your chilled puff pastry dough into three equal pieces. Work with one piece of the dough, and leave the rest wrapped and chilled.
- On a lightly floured surface, roll the piece of dough into a rectangle about 1/8 to 1/4-inch (3-6 mm) thick. Transfer it to the baking sheet and refrigerate for about 10 minutes before proceeding with the cutting.
- (This assumes you will be using round cutters, but if you do not have them, it is possible to cut square vols-au-vents using a sharp chef’s knife.) For smaller, hors d’oeuvre sized vols-au-vent, use a 1.5” round cutter to cut out 8-10 circles. For larger sized vols-au-vent, fit for a main course or dessert, use a 4” cutter to cut out about 4 circles. Make clean, sharp cuts and try not to twist your cutters back and forth or drag your knife through the dough. Half of these rounds will be for the bases, and the other half will be for the sides. (Save any scrap by stacking—not wadding up—the pieces…they can be re-rolled and used if you need extra dough. If you do need to re-roll scrap to get enough disks, be sure to use any rounds cut from it for the bases, not the ring-shaped sides.)
- Using a ¾-inch cutter for small vols-au-vent, or a 2- to 2.5-inch round cutter for large, cut centers from half of the rounds to make rings. These rings will become the sides of the vols-au-vent, while the solid disks will be the bottoms. You can either save the center cut-outs to bake off as little “caps” for you vols-au-vent, or put them in the scrap pile.
- Dock the solid bottom rounds with a fork (prick them lightly, making sure not to go all the way through the pastry) and lightly brush them with egg wash. Place the rings directly on top of the bottom rounds and very lightly press them to adhere. Brush the top rings lightly with egg wash, trying not to drip any down the sides (which may inhibit rise). If you are using the little “caps,” dock and egg wash them as well.
- Refrigerate the assembled vols-au-vent on the lined baking sheet while you pre-heat the oven to 400ÂşF (200ÂşC). (You could also cover and refrigerate them for a few hours at this point.)
- Once the oven is heated, remove the sheet from the refrigerator and place a silicon baking mat (preferred because of its weight) or another sheet of parchment over top of the shells. This will help them rise evenly. Bake the shells until they have risen and begin to brown, about 10-15 minutes depending on their size. Reduce the oven temperature to 350ºF (180ºC), and remove the silicon mat or parchment sheet from the top of the vols-au-vent. If the centers have risen up inside the vols-au-vent, you can gently press them down. Continue baking (with no sheet on top) until the layers are golden, about 15-20 minutes more. (If you are baking the center “caps” they will likely be finished well ahead of the shells, so keep an eye on them and remove them from the oven when browned.)
- Remove to a rack to cool. Cool to room temperature for cold fillings or to warm for hot fillings.
- Fill and serve.

Indian Dosas
Oh my goodness me. These dosas… wow. Just wow.
I wasn’t too sure about these when I saw that Debyi of Healthy Vegan Kitchen had picked them for this month’s Daring Cooks challenge. I was positive that Son would love them, but I wasn’t so sure whether I would like them or not. Oh boy. Did I have nothing at all to worry about. Not only are these delicious… they’re just plain addictive.
How spicy they are probably depends on the type of curry powder you use, and the kind of chilies you have. Ours were spicy. I’m eating one as I write this, and my mouth is on fire. But oh man, is it so good.
Dosa Pancakes
- 1 c spelt flour (or all-purpose, gluten free flour)
- 1/2 tsp salt
- 1/2 tsp baking powder
- 1/2 tsp curry powder
- 1/2 c almond milk
- 3/4 c water
- cooking spray, if needed
- 1/4 c grated coconut
- 1/4 cucumber, sliced
Dosa Pancakes – Cooking Directions
- Combine the dry ingredients in a bowl, slowly adding the almond milk and water, whisking until smooth.
- Heat a nonstick skillet over medium heat. Spray your pan with a thin layer of cooking spray, if needed.
- Ladle 2 tablespoons of batter into the center of your pan in a circular motion until it is a thin, round pancake. When bubbles appear on the surface and it no longer looks wet, flip it over and cook for a few seconds. Remove from heat and repeat with remaining batter. Makes 8 pancakes.
Curried Garbanzo Filling
- 5 cloves garlic
- 1 onion, peeled and finely diced
- 1 carrot, peeled and finely diced
- 1 green pepper, finely diced
- 2 medium hot banana chilies, minced
- 2 tbsp cumin, ground
- 1 tbsp oregano
- 1 tbsp sea salt (coarse)
- 1 tbsp turmeric
- 4 c cooked or canned chick peas (about 2 cans)
- 1/2 c tomato paste
Curried Garbanzo Filling – Cooking Directions
- Heat a large saucepan over medium to low heat. Add the garlic, veggies, and spices, cooking until soft, stirring occasionally.
- Mash the chickpeas by hand, or in a food processor. Add the chickpeas and tomato paste to the saucepan, stirring until heated through.
Coconut Curry Sauce
- 1 onion, peeled and chopped
- 2 cloves garlic
- 1/2 tsp cumin, ground
- 3/4 tsp sea salt (coarse)
- 3 tbsp curry powder
- 3 tbsp spelt flour (or all-purpose GF flour)
- 3 c vegetable broth
- 2 c coconut milk
- 3 large tomatoes, diced
Coconut Curry Sauce – Cooking Directions
- Heat a saucepan over medium heat, add the onion and garlic, cooking for 5 minutes, or until soft.
- Add the spices, cooking for 1 minutes more. Add the flour and cook for 1 additional minute.
- Gradually stir in the vegetable broth to prevent lumps. Once the flour has been incorporated, add the coconut milk and tomatoes, stirring occasionally.
- Let it simmer for half an hour.
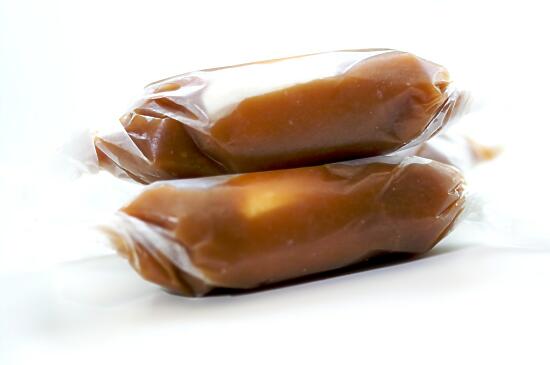
Scotch Kisses
Throughout my life, See’s Candy has always shown up at special occasions. Birthdays, Christmas, Easter… certain holidays just wouldn’t be complete without something from the little white and black colored store. There were many favorites – polar bear claws, scotchmallows, bordeaux, raspberry truffles (my mom’s all-time favorite) – but for us three kids, there was one candy that stood above all the rest. Scotch Kisses.
Something about the See’s caramel just makes me melt. I’ve never found the same sort of soft, buttery, perfect caramels anywhere else. And then the marshmallow, well, how can you go wrong with that? To me, it’s a perfect combination.
So when I made this caramel recipe and discovered that it tasted almost exactly like the See’s caramels, well. I was ecstatic. And I knew exactly how I was going to use it. I already had some marshmallow made (left over from these), so it was easy as can be to make some quick scotch kisses! With the leftover caramel, I just wrapped pieces in wax paper in a similar way… delicious. Irresistible.
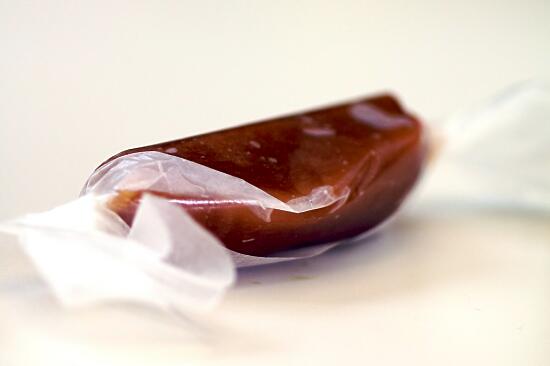
Plain Caramel
Ingredients
Cooking Directions
- Cut wax paper into 4×4″ squares.
- Using a pair of clean scissors, cut the marshmallows into 1/2″-1″ squares.
- Using a spoon, scoop about a tablespoon of caramel. Place in the top-center of the wax paper.
- Spread the caramel on the wax paper, so it is flattened and reaches from almost the top of the wax paper to between a third and half of the way down. There should be at least an inch of uncovered paper on each side of the caramel.
- Place a piece of marshmallow in the center of the caramel.
- Tightly roll the paper toward you, so the caramel surrounds the marshmallow.
- When the paper is completely rolled up, twist each end tightly right next to the caramel (but not too tightly, or the paper will tear).
- Repeat until you have used up the caramel.
- Enjoy!
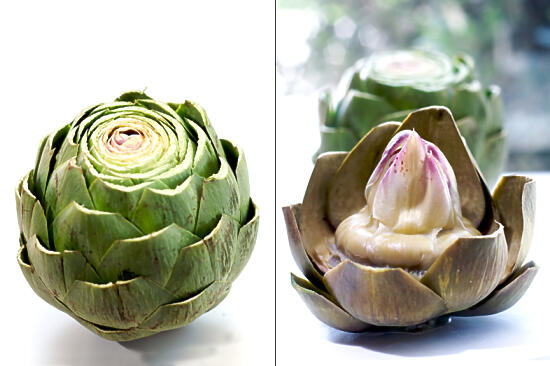
Artichokes
This month’s Daring Cook’s challenge was Rice with Mushrooms, Cuttlefish, and Artichokes, picked by Olga of Olga’s Recipes. It sounded delicious – exactly the kind of dish that Son would love. I intended to make it just as written, except… cuttlefish isn’t exactly sustainable. Thus, a no-no for me. Besides, Whole Foods didn’t have cuttlefish… OR squid. And I was in a bit of a hurry, since I’ve been traveling most of the month. So then I figure, hey, I’ve got shrimp in the freezer! I’ll use that! Except… I didn’t. So instead, I went with sausage that I had at home, being in a hurry and all.
But otherwise, the recipe went exactly as planned. Making the allioli was quite a workout (okay, so I’ve got wimpy arms)… oh man, was I feeling it. And holy cow, is that stuff garlicky! Even Son, king of all things garlic, couldn’t eat more than a small dollop mixed into a serving of the dish.
As for that picture of the artichokes up there… well, I just couldn’t let all those beautiful artichoke leaves go to waste! So I microwaved them just like mom always used to, and ate them with melted butter like we did as kids. And THEN cleaned them for the dish. Yum.
The dish itself? Delicious. Son and I both had seconds (and maybe even thirds!) Then we ended up giving the leftovers to my dad, but ONLY because we were leaving the next day and didn’t want it going to waste, sitting in our fridge for a week. But man, was it good. And the sausage? (Pineapple and bacon sausage, from Costco, if you were wondering.) Oh man. Did it complement the dish wonderfully. A successful accident, if I do say so myself!
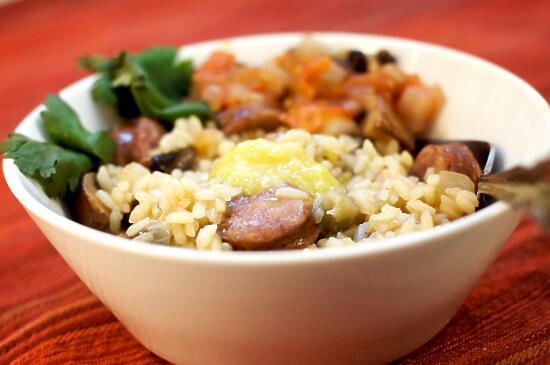
Rice with Mushrooms, Sausage, and Artichokes
Ingredients
- 4 artichokes (you can use jarred or freezed if fresh are not available)
- 12 button or Portobello mushrooms
- 1 or 2 bay leaves (optional)
- 1/3 cup white wine
- 6 sausages
- 2-3 tbsp sofregit (recipe follows)
- 2 cups short grain rice
- 6 cups water or fish stock (I used vegetable stock)
- 1 pinch saffron threads
- allioli (recipe follows)
Cooking Directions
- Cut the sausage into thin slices (about 1 cm thick).
- Add 1 or 2 tablespoon of olive oil in a frying pan and put the sausage in the pan.
- If you use fresh artichokes, clean them as shown in this video. Cut artichokes in eights.
- Clean the mushrooms and cut them in fourths.
- Add a bay leaf to the sausage. Add the artichokes and the mushrooms.
- Sauté the artichokes until you get .
- Add the white wine so all the solids in the bottom of the get mixed, getting a more flavorful dish.
- Add 2-3 tablespoons of sofregit and mix to make sure everything gets impregnated with the sofregit.
- Add all the liquid and bring it to boil.
- Add all the rice. Let boil for about 5 minutes in heavy heat.
- Add some saffron thread to enrich the dish with its flavor and color. Stir a little bit so the rice and the other ingredients get the entire flavor. If you’re using turmeric or yellow coloring instead, use only 1/4 teaspoon.
- Turn to low heat and boil for another 8 minutes (or until rice is a little softer than “al dente”).
- Put the pan away from heat and let the rice stand a couple of minutes.
Sofregit – Ingredients
- 2 tbsp of olive oil
- 5 big red ripe tomatoes, chopped
- 2 small onions, chopped
- 1 green pepper, chopped (optional)
- 4 or 5 garlic cloves, chopped
- 1 cup of button or Portobello mushrooms, chopped (optional)
- 1 bay leaf
- salt
- a touch of ground cumin
- a touch of dried oregano
Sofregit – Cooking Directions
- Put all the ingredients together in a frying pan and sauté slowly until all vegetables are soft.
- Taste and salt if necessary.
Allioli – Ingredients
- 4 garlic cloves, peeled
- a pinch of salt
- a few drops of fresh lemon juice
- extra-virgin olive oil
Allioli – Cooking Directions
- Place the garlic in a mortar along with the salt.
- Using a pestle, smash the garlic cloves to a smooth paste. (The salt stops the garlic from slipping at the bottom of the mortar as you pound it down.)
- Add the lemon juice to the garlic.
- Drop by drop; pour the olive oil into the mortar slowly as you continue to crush the paste with your pestle.
- Keep turning your pestle in a slow, continuous circular motion in the mortar. The drip of olive oil needs to be slow and steady. Make sure the paste soaks up the olive oil as you go.
- Keep adding the oil, drop by drop, until you have the consistency of a very thick mayonnaise. If your allioli gets too dense, add water to thin it out. This takes time—around 20 minutes of slow motion around the mortar—to create a dense, rich sauce.


