Archive for January, 2009
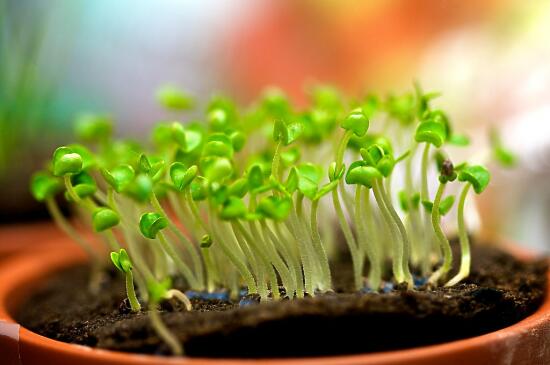
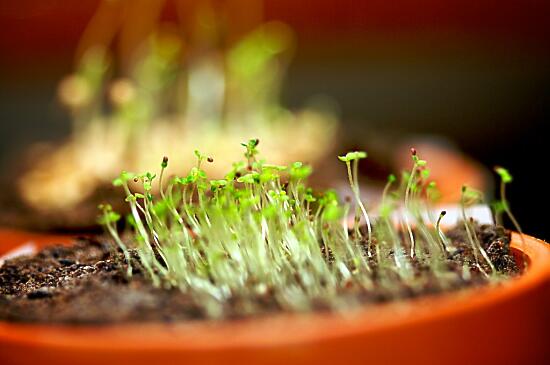
Baby Basil
Recently, I’ve really been wanting to start a garden. This desire to grow my own herbs, fruits, and vegetables began a couple of years ago when I really began to take an interest in cooking, and was only exacerbated when I was introduced to Diane and Todd’s amazing garden. Seriously, that’s my dream garden.
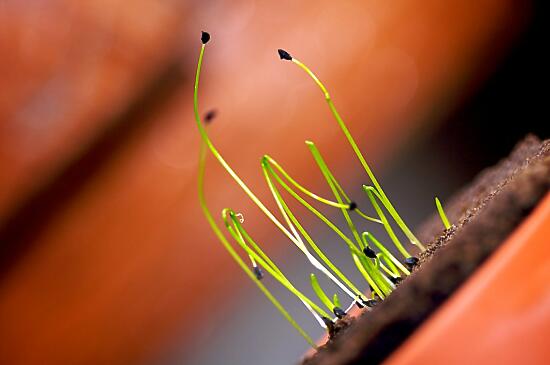
Skinny Chives
Problem is, my apartment isn’t exactly overflowing with free space, and I have, er, less than a green thumb. I’ve tried growing things before, and everything but some very hardy bamboo has died. Kaput. Gone all too soon. Heck, I’ve even managed to kill a Vietnamese herb that is supposedly considered a weed. I unintentionally killed a weed! This gardening aspiration was not getting off to a good start.
Itsy-Bitsy Sweet Marjoram
So when my brother got me a Chia Herb Garden for Christmas, I was understandably excited. Finally an opportunity to grow herbs in an easy, compact way that even I could do correctly. I mean, come on. It’s a Chia garden. I couldn’t possibly kill that… right?
The herbs have been growing for almost a month now, and they aren’t dead yet! In fact, they’re starting to look like the herbs that you buy from the store. These pictures were taken a couple of weeks ago, and since then the cilantro has begun to grow those spiky leaves that you normally associate with Mexican or Asian food, and the basil and chives are getting bigger by the day. And even though it’s still itsy-bitsy, I have high hopes for the sweet marjoram!
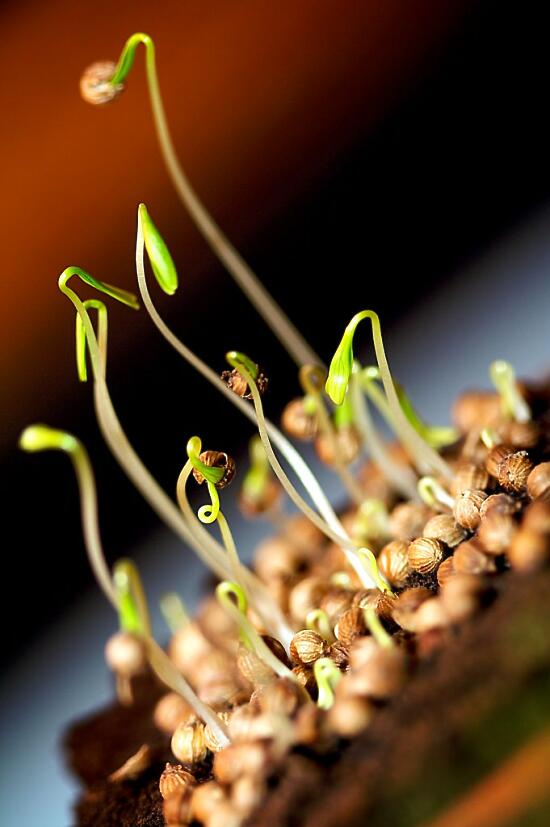
Graceful Cilantro
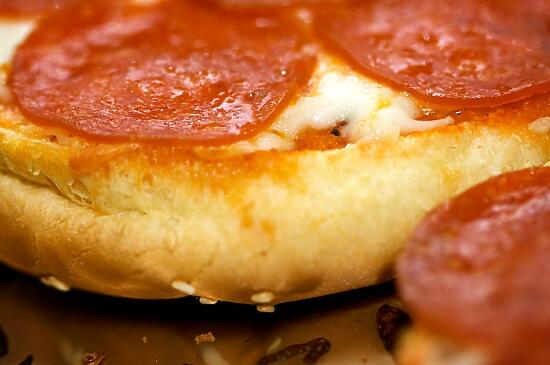
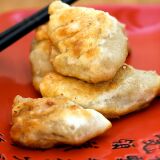
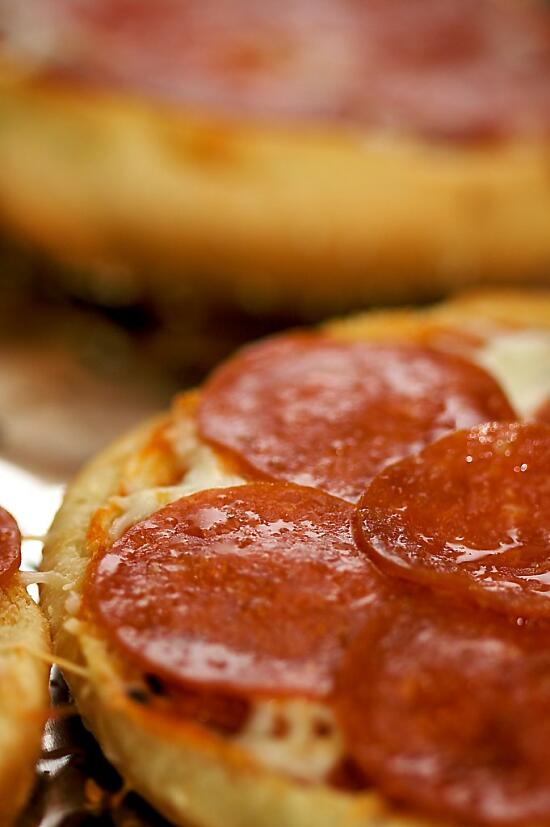
Mini hamburger bun pizzas…
Since Son and I decided to stay home for New Year’s Eve, we had an itsy-bitsy party for just the two of us with spinach dip, stuffed mushrooms, and sparkling cider. Of course, as yummy as the appetizers were, we needed some real food to get us through the night. I suggested ordering a pizza since in our 3.5 years together we’ve never, ever ordered a pizza, but for some reason Son is incredibly opposed to having a pizza delivered. So along the same lines of having pizza (what? I was craving pizza) I suggested homemade pizzas using flour tortillas as the crust, like my family used to eat when I was younger.
But no, Son had a better idea. Apparently when he was younger, his dad used to also make mini homemade pizzas, using hamburger buns as the crust. We decided to go his way, and oh man, that wasn’t a mistake at all.

…great topped with pepperoni, mushrooms, and bacon.
Both ways have their benefits. The tortilla pizza is thin and crunchy, like a super thin-crust pizza. On the other hand, the hamburger bun pizza is thicker, crisp around the edges and softer in the middle. The bread adds a nice sweetness to the pizza, and it holds all the toppings without any sagging.
We’ve made these pizzas several times since New Year’s Eve, and because we had a French bread roll left over from the spinach dip, we made a pizza with that. We found that these pizzas might actually be better with French bread, but of course it’s all up to your own preferences.
Quick, easy, and delicious!
Ingredients
- 4 hamburger buns
- 1 cup pizza sauce
- 4 cups shredded mozzarella cheese
- pizza toppings (pepperoni, mushrooms, bacon, onion, etc.)
Cooking Directions
- Preheat the oven to 400° F.
- Split the hamburger buns apart and place flat side up on a baking sheet.
- Spread each hamburger bun half with 1/8 cup of pizza sauce.
- Sprinkle each hamburger bun half with 1/2 cup of cheese.
- Top with pizza toppings of your choosing.
- Bake 10-15 minutes, or until the cheese is melted and the toppings are beginning to brown.
- Enjoy! Serves 4.
Just look at the crispy bacon and oozing cheese…
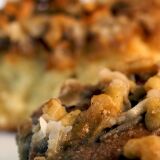
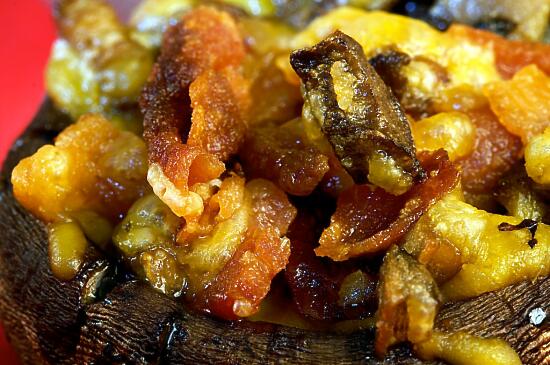
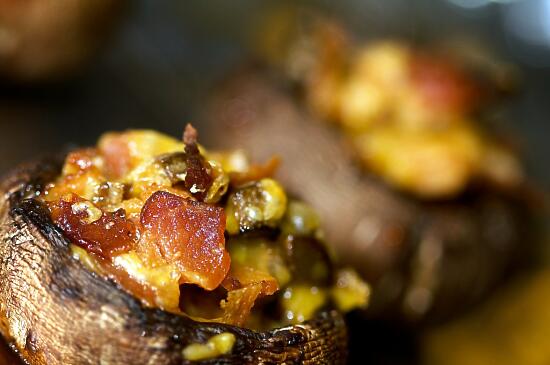
This year, for the first time ever, I didn’t spend New Year’s Eve with my family. Normally, we’ll all be home together – eating deviled eggs, shrimp with cocktail sauce, spinach dip, these bacon and cheddar stuffed mushrooms, and washing it all down with sparkling cider while we watch Dick Clark’s New Year’s Rockin’ Eve. However unlike myself, my two younger siblings are social butterflies, and they both had plans to go out and party for New Year’s Eve. Since it would be considerably toned down at my parents’ and we’d be celebrating New Year’s with my family anyways, Son and I decided to stay home and celebrate by ourselves.
Fresh out of the oven!
Still, even though it would just be the two of us, there are some traditions that I enjoy keeping alive. We stuck some sparkling cider in the fridge for our midnight toast, and of course I had to make my two most beloved appetizers: the spinach dip that my mom has made for birthdays and holidays for as long as I can remember, and these stuffed mushrooms that I found on AllRecipes that I’ve made for my family for the past several years. (And one other dish that I’ll tell you about real soon!) Though quiet, I think Son would agree that this was one of the nicest New Year’s Eves that we’ve ever had together, and also one of the most delicious.

The perfect party appetizer.
Ingredients
- 3 slices bacon
- 8 crimini mushrooms
- 1 tbsp butter
- 1 tbsp chopped onion
- 3/4 c shredded Cheddar cheese
Cooking Directions
- Place bacon in a large, deep skillet.
- Cook the bacon over medium high heat until evenly brown.
- Drain and dice the bacon, and set aside.
- Preheat oven to 400° F.
- Remove mushroom stems. Set aside caps.
- Chop the stems of the mushrooms.
- In a large saucepan over medium heat, melt the butter.
- Slowly cook and stir the chopped stems and onion until the onion is soft. Remove from heat.
- In a medium bowl, stir together the mushroom stem mixture, bacon and 1/2 cup Cheddar.
- Mix well and scoop the mixture into the mushroom caps.
- Bake in the preheated oven 15 minutes, or until the cheese has melted.
- Remove the mushrooms from the oven, and sprinkle with the remaining cheese.
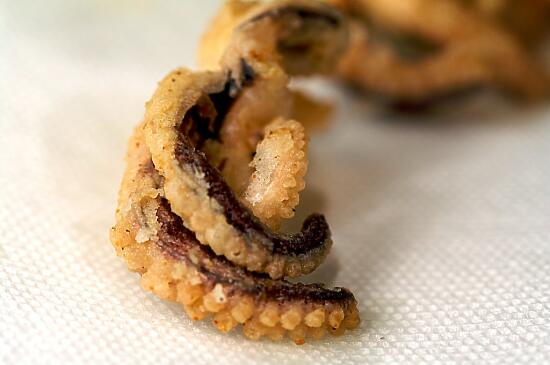
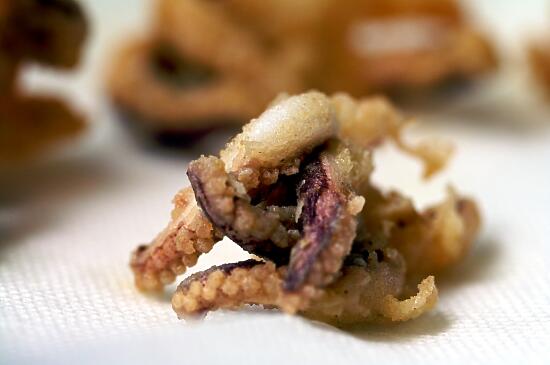
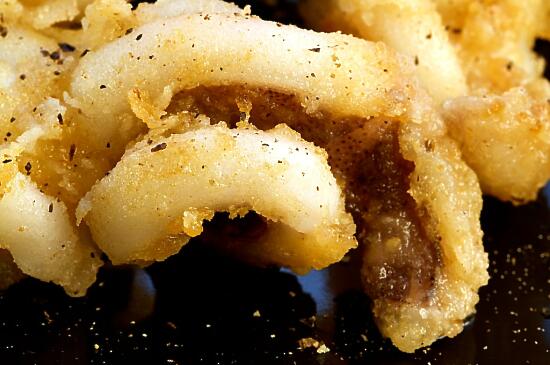
Octopus Calamari
I first tried calamari three years ago, when Son took me to a sushi restaurant for my birthday. I enjoyed it quite a bit, but this was an entire year before I began blogging – I didn’t cook much at home, so it never occurred to me to try making calamari on my own.
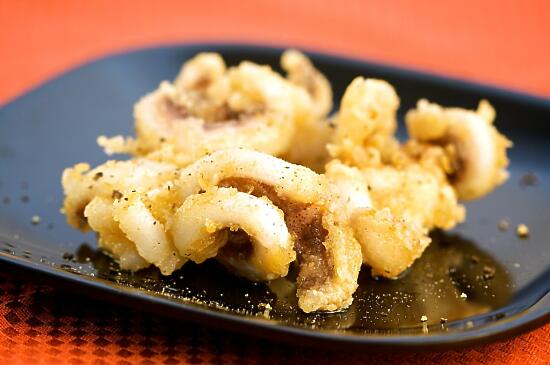
Yummy, chewy calamari.
A year ago, my brother first tried calamari. It was love at first bite, and he’s been begging me to make him calamari ever since. Of course we’ve both been busy, so we’ve never had time to get together and make calamari (meaning I cook, he pigs out)… until now.
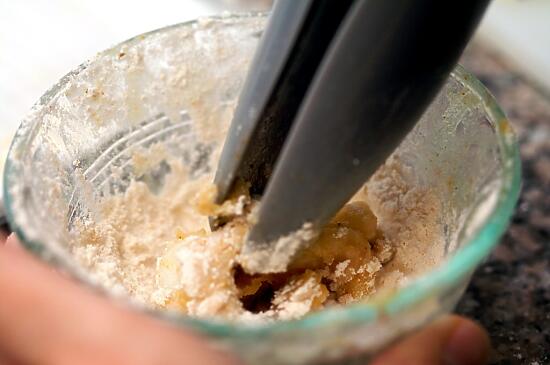
Coat in flour…
On Christmas, after the family had finished opening presents, my brother went to the fridge and presented me with a package of raw octopus. “I’m gonna come over to your apartment this week, and you’re going to make me calamari.” Now that he has his driver’s license (goodness help me) he looks for any excuse to drive to my apartment, especially when I’m cooking. Of course, I’m always happy to have my little brother visit (even if the thought of him driving scares the **** out of me!)

…place in a pot of hot oil…
Wow. I never realized just how easy it would be to make calamari. I imagined some ten-step process of coating in flour, then some fancy batter, then frying it and so on and so forth. In reality, it couldn’t be easier – all you have to do is coat it in flour and fry it. We gave it a double coating (coat, fry, coat, fry again) so it would be extra crunchy and also cook longer (even though the octopus was sashimi-grade, my brother’s not supposed to eat raw seafood due to his leukemia.)
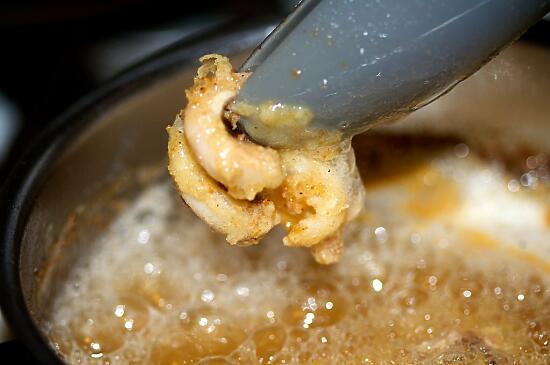
…bubble bubble bubble…
The result? Delicious. Or at least, I assume so. I didn’t actually get any – I was so busy cooking, the two boys ate it all up before I could get any! According to my brother, he’ll be over here very often so I can make him more calamari. Success!
…drain…
Oh, and yes, I know, calamari is supposed to be made with squid, not octopus. We used octopus because that’s what my brother had bought for me to cook. Turned out just as well, but be forewarned that octopus is much chewier than squid… so if you are like me and don’t like super-duper rubbery foods, then go with squid instead.
…and enjoy!
Ingredients
- raw octopus or squid
- flour
- seasonings (I used Old Bay Garlic and Herb)
- vegetable oil
Cooking Directions
- Mix the flour and seasonings.
- Coat the squid well with the flour mixture.
- Deep fry the coated squid in a pot of hot oil until golden brown.
- Repeat steps 2 and 3.
- Let drain on paper towels.
- Enjoy!

Mmmmmm…
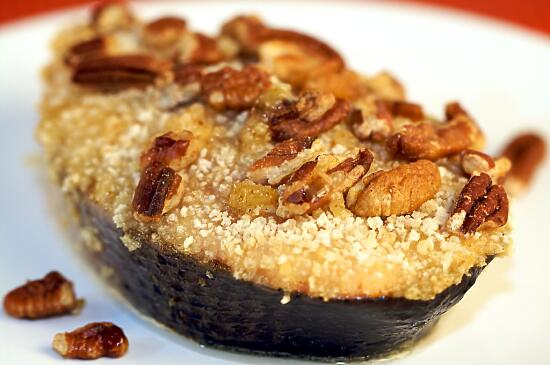
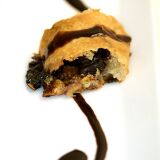
Alaska Salmon Bake with Pecan Crunch Coating
My brother is a silly boy, though he generally has the best of intentions. For example, he got me a can of SPAM for Christmas… because he wanted me to make him some SPAM Musubi. (He also gave me some raw octopus, the result of which you shall see here soon, and a Chia herb garden which is growing wonderfully. Makes me very happy to finally have herbs growing well in my kitchen. There will be pictures soon!) For Son, he bought a salmon steak.
Most people might think, “A salmon steak? What kind of Christmas gift is that?” But no, not Son. Turns out this was the perfect gift for him – Son was genuinely excited. Even more so when I made him this Alaska Salmon Bake with Pecan Crunch Coating that I adapted from a recipe I found on AllRecipes. It’s a delicious way to eat salmon, easy enough for a night in, but still fancy enough for a dinner party.
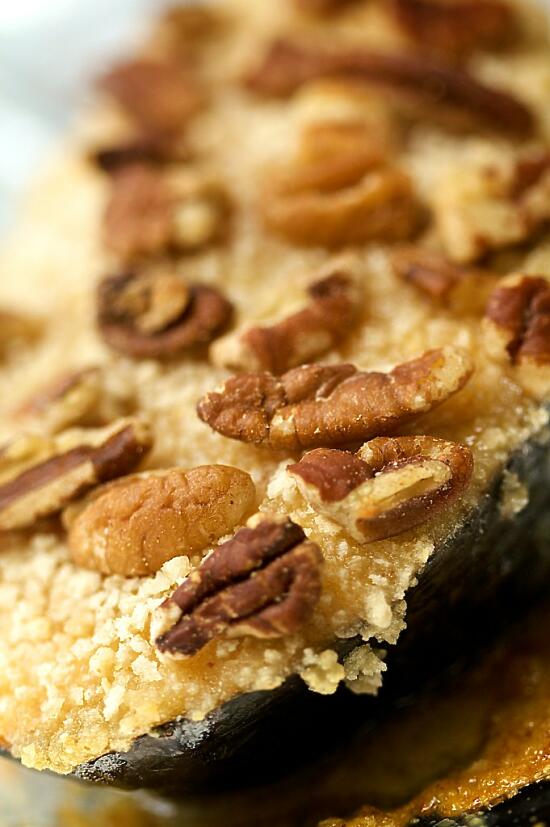
Amazing, amazing salmon.
Ingredients
- 3 tbsp Dijon mustard
- 3 tbsp butter, melted
- 5 tsp honey
- 1/2 c fresh bread crumbs
- 1/2 c finely chopped pecans
- 6 (4 oz) fillets salmon
- salt and pepper to taste
Cooking Directions
- Preheat the oven to 400° F.
- In a small bowl, mix together the mustard, butter, and honey.
- In another bowl, mix together the bread crumbs and pecans.
- Season each salmon fillet with salt and pepper.
- Place on a lightly greased baking sheet.
- Brush with mustard-honey mixture.
- Cover the top of each fillet with bread crumb mixture.
- Bake for 10 minutes per inch of thickness, measured at thickest part, or until salmon just flakes when tested with a fork.
- Enjoy! Serves six.