Archive for the ‘recipes’ Category
Today’s a special day. It’s my little brother’s birthday (happy birthday, Patrick!), it’s the first actual chilly day we’ve had all fall (up until now, temps have been in the 80s, and even above 100F which is crazy for where I live!), and… it’s the release day of Marisa Baggett’s new cookbook, Vegetarian Sushi Secrets!
While I’m always excited about sushi cookbooks (that’s what happens when your original food blog is all about sushi), this one’s especially exciting for me for several reasons. First, we ladies of sushi stick together, and I love Marisa’s cookbooks. Secondly, you may have noticed I’ve been cooking more vegetarian and vegan food – although I still eat meat, I love trying out new recipes for my brother’s girlfriend, who is vegan. And thirdly… I had the huge honor of writing a foreword for Marisa’s new cookbook!
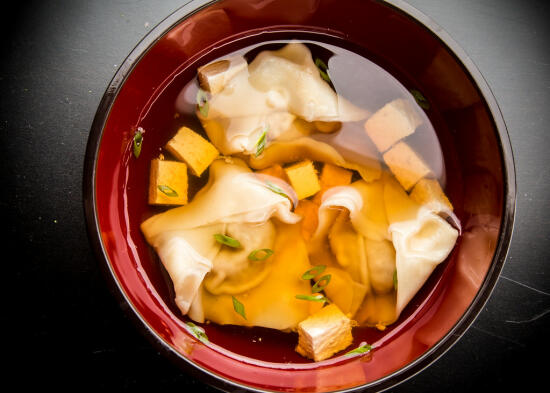
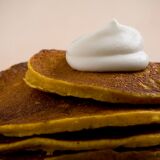
Of course, in addition to writing a foreword for her cookbook, I just had to try out some of her recipes as soon as she sent me a copy. I’m completely obsessed with her spicy tofu rolls. Her Faux Roe “Boats” are a fun vegetarian take on fish roe gunkan maki. And then, because I wanted to try one non-sushi recipe as well, I made this clear soup with pumpkin dumplings.
This soup is perfect for a chilly autumn day like today. Obviously, it’s totally appropriate for the pumpkin-mania that happens as soon as the clock strikes September. And I love the addition of Japanese curry to the dumpling fillings – it’s warming, makes the flavor ever so Japanese, and I pretty much always love anything curry. Delicious!
Recipe from Vegetarian Sushi Secrets by Marisa Baggett, out today!
Ingredients
Dumplings
- 1 cup (220 g) pumpkin puree
- 1 square Japanese curry base
- 3 green onions (scallions), thinly sliced
- 2 teaspoons minced garlic
- 1/2 bunch fresh coriander leaves (cilantro), roughly chopped
- 4 teaspoons soy sauce
- 1/2 cup (30 g) panko breadcrumbs
- 18 square wonton wrappers
- 2 teaspoons potato starch, dissolved in 4 teaspoons water
Clear Soup
Cooking Directions
- Place a large pot of water over high heat. Bring to a boil.
- To prepare the dumplings, combine the pumpkin puree, Japanese curry base, green onions, garlic, coriander leaves, soy sauce, and panko breadcrumbs in a food processor. Pulse a few times, then process until well blended.
- Place two wonton wrappers on your work surface. (Keep the remaining wrappers covered with a damp towel.) Spoon 1 tablespoon of the pumpkin mixture in the center of each wrapper. Dip a fingertip in the potato starch mixture and wet the edges of the wonton wrapper. Pull the edges of the wrapper around the mixture and pinch closed. Fold the dumpling so the ends meet and crimp to close. Repeat with the remaining wrappers and filling.
- Gently drop the dumplings in the boiling water and then turn off the heat. Stir with a spoon to make sure none of the dumplings stick to the bottom of the pot. Let the dumplings cook for 3 minutes. Remove from the pot with a slotted spoon.
- To assemble the soup, lay out 6 medium-sized soup bowls. Place 1/2 teaspoon pumpkin seed oil and 1/2 teaspoon pumpkin seeds in each bowl. Divide the tofu evenly among the bowls. Add 3 warm dumplings to each bowl. Ladle 1 cup (250 ml) of hot dashi into each bowl. Sprinkle with green onions, if desired. Serve immediately.
~~~~~~~~~~
I received a copy of this cookbook for free, as well as provided a foreword for the cookbook. Links in this post may be affiliate links.
2015 marks the fourth year that I’ve participated in the Great Food Blogger Cookie Swap! … and the first year that I couldn’t get the darn post written by the deadline. Oops.
Not to worry – I definitely got the cookies made and shipped with time to spare, and I’m happy to say that Rebecca of Displaced Housewife, Elizabeth of It’s Good to be the Cook, and Sara of Confectionary Tales of a Bakeaholic all received packages of cookies from me right on time.
It’s just that awesome things and crappy things and just plain life happened a bit more than usual, and then Lightroom broke so we couldn’t even process the photos until we figured out how to get that fixed, and the cookie swap posting deadline came and went and I decided that the posts will happen when they happen (because, yes, as usual I definitely made more than one type of cookie to send) and it’s not worth stressing like crazy about.
So.
Cookies!
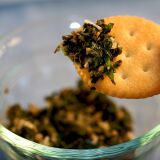
These Black Sesame Shortbread Cookies were the first of four different types of cookies I sent. They’re nutty, and fragrant from the orange zest, and oh so snackable especially when you make them small (mine were quarter-sized). Of the four types of cookies I made, these were my mom’s favorite.
Black Sesame Shortbread with Orange Zest
Recipe from SugarHero!
Ingredients
- 12 oz unsalted butter, at room temperature
- 4 oz (1 cup) powdered sugar
- zest from 1 large orange
- 1/2 tsp ground cardamom
- 1/2 tsp salt
- 15 oz (3 1/2 cups) all-purpose flour
- 1 1/8 oz (1/4 cup) black sesame seeds
Cooking Directions
- Cream together the butter, powdered sugar, and orange zest in a large bowl on medium-low speed just until the sugar is incorporated and the butter is smooth. Add the cardamom, salt, and flour, and mix on low speed until only a few flour streaks remain. Mix in the black sesame seeds with a rubber spatula, scraping the bottom and sides of the bowl and making sure the seeds are well-distributed.
- Scrape the cookie dough out onto a piece of plastic wrap, form it into a disc, and wrap it tightly. Put the dough on a flat tray then refrigerate it until firm, at least 30 minutes.
- Once firm, preheat the oven to 350°F, and cover two baking sheets with parchment paper. Divide the dough in half and keep the half you’re not working with well-wrapped in the refrigerator. Roll out the remaining half between two sheets of lightly floured parchment or waxed paper, until it is about 1/4-inch thick. Cut shapes out of the dough, or cut it into squares with a sharp knife. Arrange the cookies on the baking sheets. The cookies won’t spread very much while baking, so you don’t need to leave too much room between them. When you’ve cut out all the cookies you can, press the dough together, re-roll it, and return it to the refrigerator to chill while the first batch bakes.
- Bake the cookies at 350°F for about 12 minutes, until the edges are very slightly colored. Remove the tray from the oven and let them cool for 5 minutes, then transfer the cookies to a wire rack to cool completely.
- Repeat for the second half of the dough. Let cool completely.
- Enjoy!
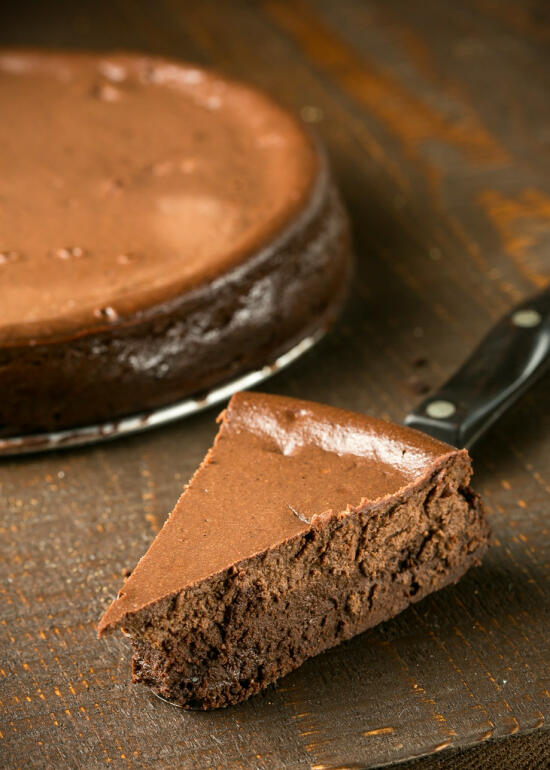
Death by chocolate… very appropriate for Halloween, don’t you think?
I made this a few years ago, when my grandmother had to go gluten-free so we planned an entire gluten-free Thanksgiving for her. This cheesecake is rich, decadent, and oh so chocolatey… and completely flourless! Highly recommended for all the chocolate-lovers in your life.
Recipe originally found on Fridgg, but sadly the original link to the recipe no longer works.
Ingredients
For the brownie bottom:
- 4 eggs
- 1 cup dark chocolate cocoa powder
- 1/2 cup honey
- 1 tbs vanilla extract
- 1/3 cup coconut oil
- 3/4 cup milk chocolate chips
- 3/4 cup semi sweet chocolate chips
For the cheesecake:
- 2/3 cup mascarpone cheese
- 1 cup fat free ricotta cheese
- 1 egg yolk
- 1/3 cup dark chocolate cocoa powder
- 1/3 cup milk chocolate chips
- 1/3 cup semi sweet chocolate chips
- 1 tsp vanilla extract
- 1/4 cup honey
Cooking Directions
- Preheat the oven to 350°F. Grease the bottom of a pie tin with a bit of coconut oil.
- Combine the first 5 brownie ingredients in a large bowl. Mix with a hand mixer until all the ingredients are incorporated.
- Combine 3/4 cup of milk chocolate chips with 3/4 cup of semi sweet chocolate chips in a microwave safe bowl. Melt the chocolate chips by microwaving on low and stirring every 20 seconds until the chocolate is melted. Make sure not to overcook the chocolate chips!
- Pour the melted chocolate into the existing brownie batter stirring the batter as your pour. Once incorporated, pour the brownie batter into the prepared pie dish and bake for 15 minutes at 350°F.
- After 15 minutes, remove the pie plate from the oven and set aside to cool while you make the cheesecake part. The brownies will be very underdone at this point, but that’s ok. Reduce the oven heat to 325°F.
- Combine the 1/3 cup of milk chocolate chips and the 1/3 cup of semisweet chocolate chips and melt them in the oven using the technique described above.
- Once chocolate is melted, combine the mascarpone, ricotta, egg, egg yolk, vanilla, cocoa powder, honey and melted chocolate in a large bowl and beat with a hand held mixer until smooth.
- Pour the cheesecake filling onto the partially baked brownie bottom. Bake in a 325°F oven for 40-50 minutes or until the center of the cheesecake springs back when touched.
- Let cool, and enjoy!
I’ve got a persistent cough, the kind where you always get an itch in your throat at exactly the wrong time (such as, right at the moment when someone asks you a question in the middle of a conference call), and leaves you sounding like a chain smoker.
Son’s getting over an ear infection, which, as he put in an uncharacteristically poetic manner earlier tonight, “I feel like there’s a tiny hummingbird in my ear, making love to my eardrum.”
I’ve spent the last week staying up working until 4am every night, trying to meet crazy deadlines. (The glamorous life of a freelancer!)
The dishes are piling up, and there are boxes and boxes of miscellaneous kitchenware all over my living room floor, because they’re cleaning out grandma’s house and I couldn’t bear to let them just get rid of it all.
This is real life.
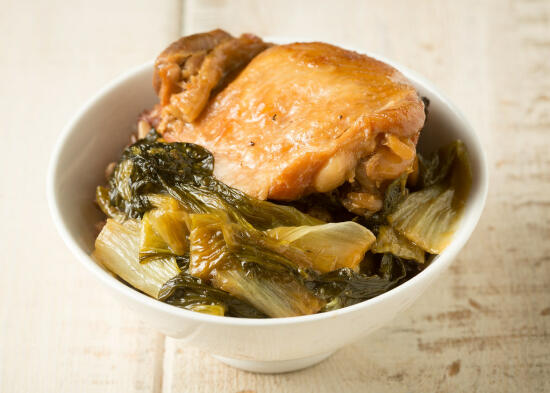
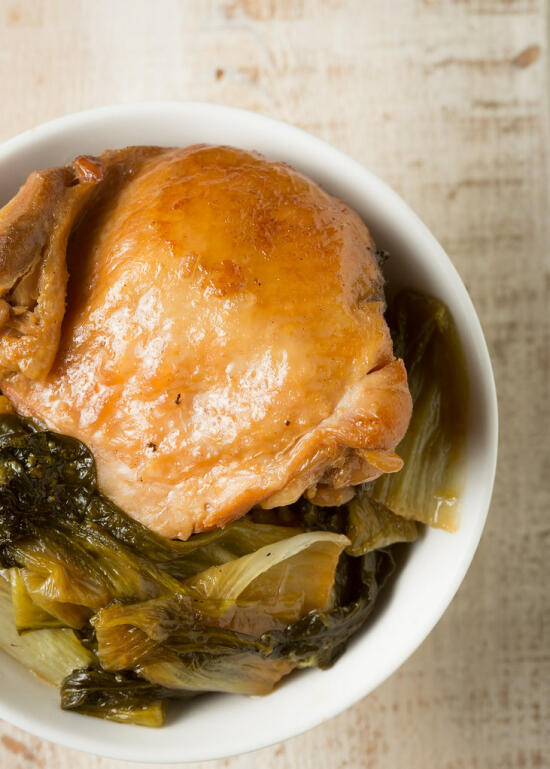
Which means, well, there couldn’t possibly be a better time to break out the slow cooker. What a lifesaver it is. Just toss the ingredients in a pot, turn it on, and don’t think about it again until it’s time to eat. It doesn’t get better than this.
I originally wrote the above back in May (yes, it takes me five months to finish a blog post), and liked it so much I decided to post it anyways. It’s finally cooling off in LA right now, after a summer and fall filled with heat waves, so it feels like slow cooker season again. I’ve already made this again this season just a couple of weeks ago, and I’m already craving it again. It’s that sort of hearty, comfort food-delicious sort of meal that fills you, warms you, and makes you feel good about yourself because it manages to be pretty healthy, too.
Recipe adapted from Yankee Kitchen Ninja. We like to make lots and have leftovers all week, and the bok choy is our favorite part so we make quite a bit extra. However if you have a smaller slow cooker or just want enough for a meal, you can refer to the original recipe.
Ingredients
- 10 bone-in chicken thighs
- 1/4 cup fish sauce
- 1/4 cup shoyu
- 1 tsp white pepper
- 8 cloves garlic, minced (I usually add more because we really love garlic)
- 2 tbsp canola oil
- 1/4 cup brown sugar
- lots of bok choy (I usually go with 5lbs or so; other greens can also be used)
Cooking Directions
- Put everything except the bok choy in the slow cooker. Cover and cook on low for about 6 hours.
- Wash the bok choy, discard the last inch of the base. When the chicken is finished cooking, carefully transfer it to another bowl. Place the bok choy in the slow cooker, stirring to make sure it is coated with the sauce. Replace the lid, and cook on high for another half hour or so, until the bok choy is wilted and soft.
- Serve over white or brown rice. Enjoy!
With the Labor Day weekend coming up, picnics and barbecues are on my mind. This weekend feels like summer’s last big hurrah, before school really starts to get under way and temperatures start to cool down.
(Of course, I have no kids and temperatures in LA are going to stay hot for another month… but that’s beside the point. I’m still ready for all the apple and pumpkin-spice things that fall will bring!)
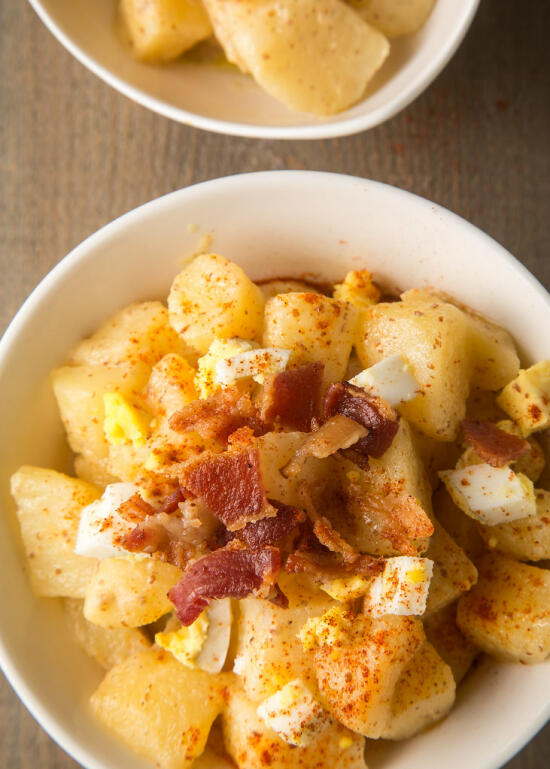
One of the dishes that is always a must-have for barbecues and picnics both, is potato salad. And this version ought to make an appearance at your Labor Day celebration this weekend! While I’m all for mayonnaise-heavy potato salads, this version is great because it’s a little lighter (who wants to go swimming in the ocean after feasting on heavy potato salad?), it won’t go bad like mayonnaise-based potatoes will in the hot sun, and (if you leave off the bacon and eggs) it’s vegan, too!
The tangy-sweet dressing is addictively good, and this goes great with whatever meat (or non-meat) you’re grilling or serving alongside. I made this potato salad for my family’s Fourth of July celebration, and it was loved by vegans and carnivores alike (seriously, there were no leftovers).
Potato Salad with a Vegan Maple Mustard Dressing, from Cooking and Beer.
Ingredients
- 1.5 lbs Yukon Gold potatoes, cut into 1″ cubes
- 3 tbsp whole grain mustard
- 2 tbsp white wine vinegar
- 1 tbsp dijon mustard
- 1 tbsp maple syrup
- 1/2 cup extra virgin olive oil
- salt and pepper
- optional toppings:
- chopped green onions
- chopped parsley
- diced hard boiled eggs
- crumbled bacon
Cooking Directions
- Put the potatoes in a large pot. Fill with just enough water to cover the potatoes, and salt the water generously. Turn the heat to medium-high, and cook the potatoes until just tender, but not mushy. Remove from the stove and drain. Immediately transfer the potatoes to the refrigerator to chill.
- In a small bowl, whisk together the whole grain mustard, vinegar, dijon mustard, and maple syrup until completely smooth. Continue to whisk as you start drizzling in the olive oil, and don’t stop whisking the dressing until it is perfectly smooth.
- Toss the potatoes with the dressing and add salt and pepper to taste. Garnish with the optional toppings, or leave them on the side for everyone to garnish their own potato salad. Eat immediately, or refrigerate until you are ready to serve!
- Enjoy!